I’ve been running a TP-Link Archer C7 flashed with OpenWRT at home since early 2016 (and a TP-Link 1043ND with OpenWRT for years before that), but since I moved into my current place over the summer it has been falling over every couple weeks. It hasn’t been logging anything (I have a flash drive mounted that it persistent logs to) but goes down until hard reset, most likely just because of the load of two heavy stream/video-conference/file-sync users (…and probably not because of my kitten chewing on the antennas. Probably.) Rather than updating/diagnosing I decided that was a good excuse for a new faster router.
TL;DR: The Asus RT-ACRH13 is an excellent current-production OpenWRT host for ~$65 with only minor install challenges, and represents a significant upgrade over the Archer C7.
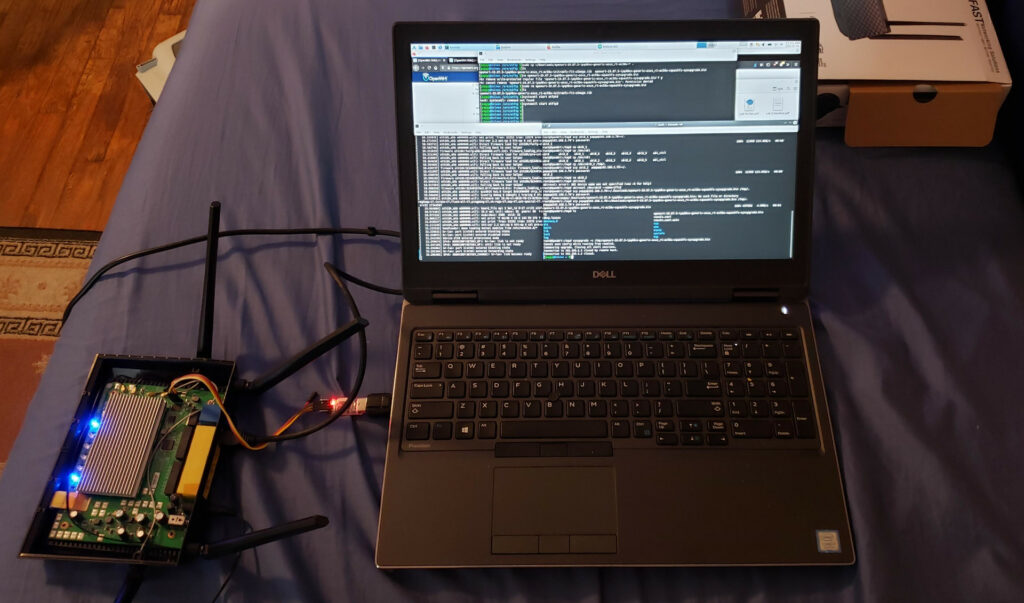
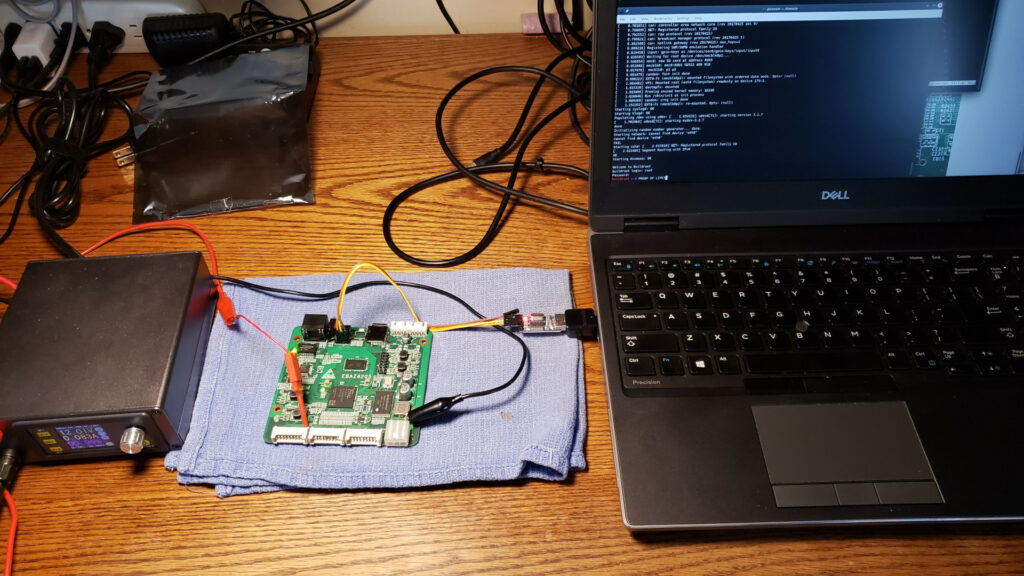
A not long ago there was somenoise in places I follow about Zynq FPGA boards surplussed from their role as controllers in retired cryptocurrency mining rigs, for way less than the price of even the bare FPGA SoC. I impulse bought one EBAZ4205 from “College Shop Store” on Aliexpress for $19.08 shipped to try them out, since it seems to to be the most common and documented flavor, and it showed up yesterday. Short version: they look awesome for the price.
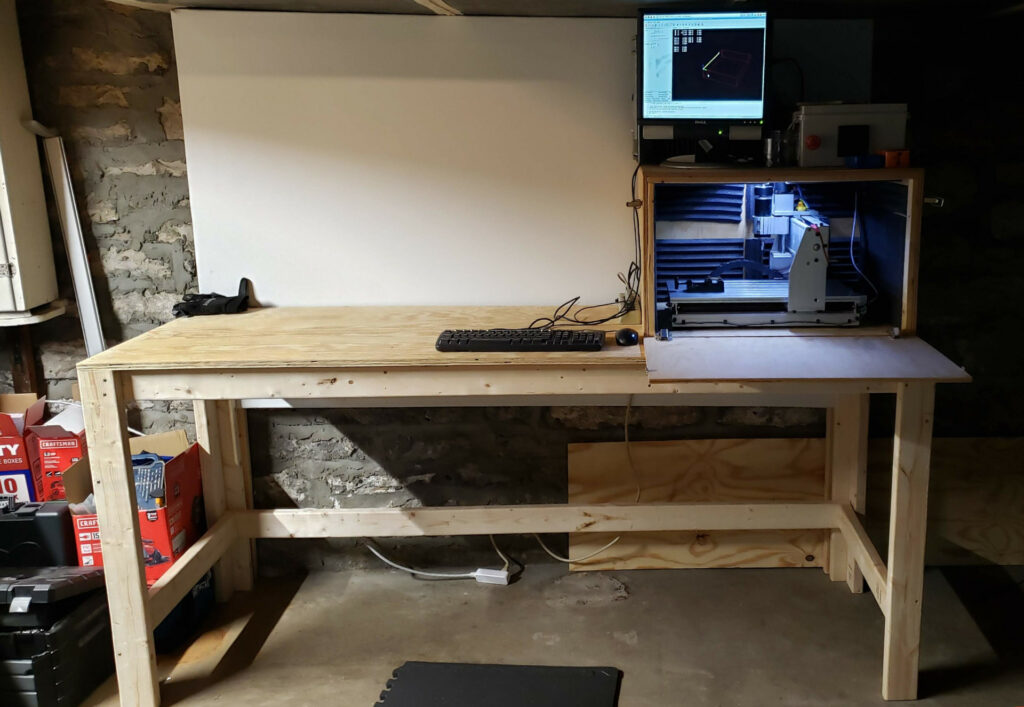
Since I moved in to my current house in May, I’ve been thinking about putting a (n additional) workbench in front of the inscrutable 7ft wide projection screen (?) thing some previous tenant built in the basement. I sketched out what I wanted early summer, and drew a proper design and cut-list in September – but by then the grueling part of the break-less fall semester had started, so it never got to the top of my list. This week I finally got around to picking up the parts and building it. This has been a rate-limiting step for other projects, since it was partly needed as a home for my CNC router.
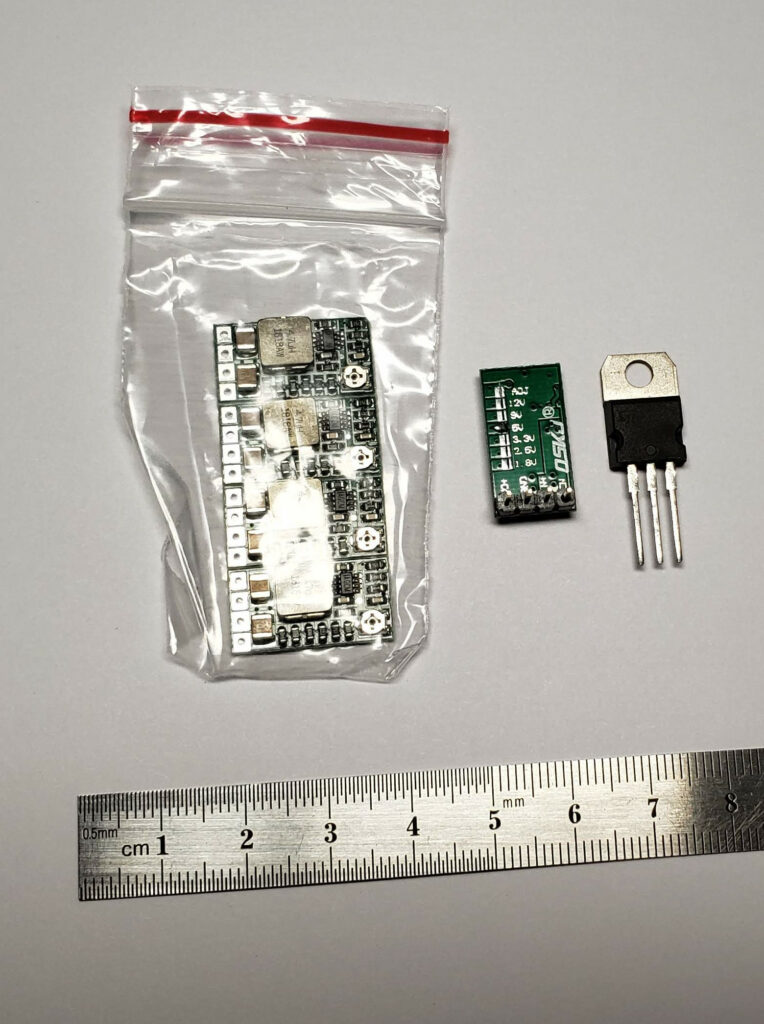
I needed some cheap little vregs recently and had run out of and/or lost all of my useful-value 780x linear parts, so I decided to look at what people in this century use.
I found some little buck boards roughly the size of a TO-220 package that looked exciting. These particular ones are QSKJ Mini DC-DC Buck Step Down Module model “QS-1205CME-3A”, Vendor page here, mine were 5pcs/$9 from Amazon.
Upon analysis they have serious issues with regulating under load, so the hunt for something decent continues, but the form-factor and advertised feature set are really compelling.
Pros:
High-efficiency high-frequency synchronous buck instead of a linear heater^H^H regulator.
Solder-jumpers for 1.8,2.5,3.3,5,9,12V or a default (fiddly, tiny) adjustment pot output so you only have to stock one device – one easy-to-cut trace to disable adjustable mode.
Tolerates 4.5-24V input as long as out < in or so.
Good stability to input voltage variation.
~0.25V drop-out.
Does appear to have a cutoff for over-current.
No perceptible ripple under various load conditions.
Cons:
Voltage regulation manages maybe 600mA at 5V before droop becomes unacceptable (<4.8v).
…and that makes it basically useless for most applications. Test data below the fold.
Maybe it could be resolved with appropriate external capacitors and/or offsetting the adjustable to regulate right at a known load or something, but not being drop-in really reduces their charm.
Anyone know of a similar offering that doesn’t suck at output regulation? (Rel: Anyone know if any of the low-end electronic loads are worthwhile? I’m not looking to spend real-lab-instrument money, but it’s come up often enough lately that I want to be able to dissipate a couple 10s of Watts through a at least stepwise-controllable resistive load).
I had my dear old Macintosh SE out for a health check as I slowly extract my vintage computer collection from the (unconditioned) place I’ve been keeping it at my parents house to the basement of the place I’m renting. It had a couple interesting findings that seem worth putting online, including another floppy drive rebuild and a slightly elaborate fan replacement.
Why did a Banggood package I ordered on March 26 just appear in Bahrain on July 5, the same day it finally showed “Shipment picked up?” Did it just get packed into a container and loaded on whatever outgoing vessel … Continue reading →
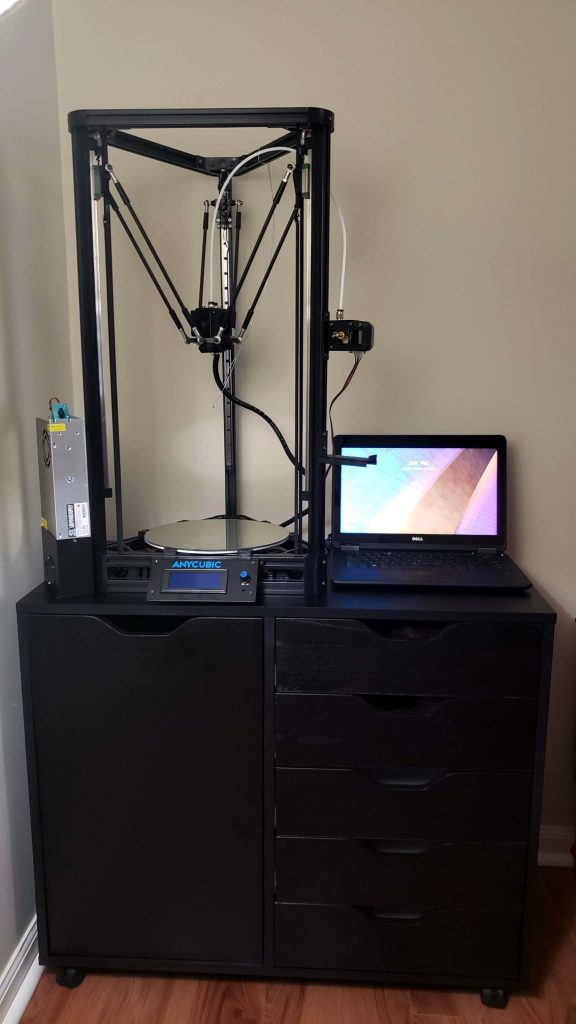
I’ve been working with a number of Anycubic Linear Kossel / Kossel Plus (whatever branding they’re using when you look) 3D printers for the last couple months, including one I bought personally. While I’m overall extremely pleased with them, there are a whole bunch of notes, fixes, and improvements I feel like should be collected somewhere.
Bias-tape bound seams out looks better, even if the sewing job is obviously uneven.
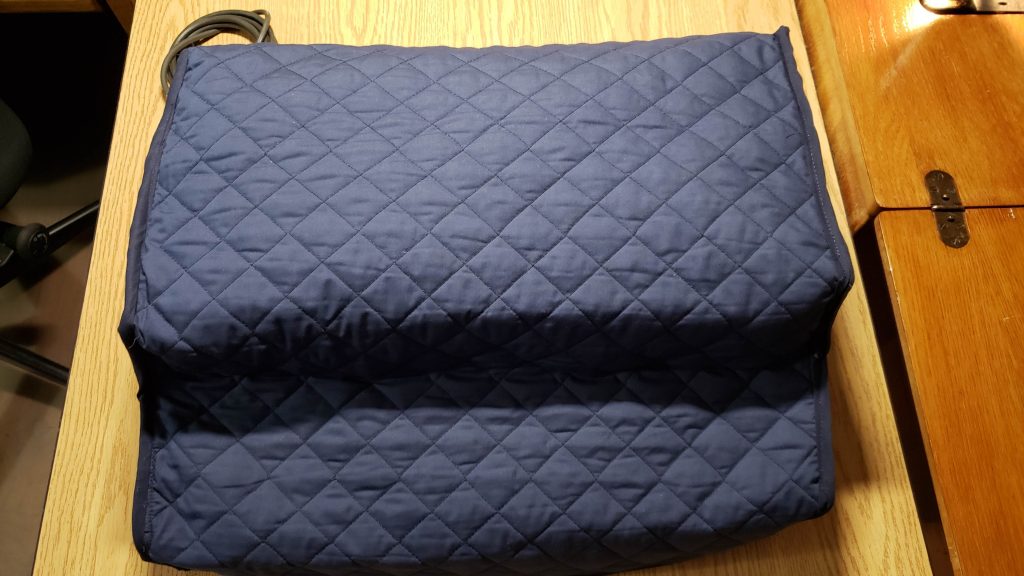
Some months ago I decided I wanted to play with an IBM Selectric typewriter, and after some fuckery, obtained and started working on an example of the dual-pitch, correcting Selectric II I find most appealing. At some point there will be an extended post about that, but 1. I’m not entirely sure I know what I’m talking about yet, and 2. Too much writing at the time I was working on it. This post is not about the machine, just the cover I made for it.
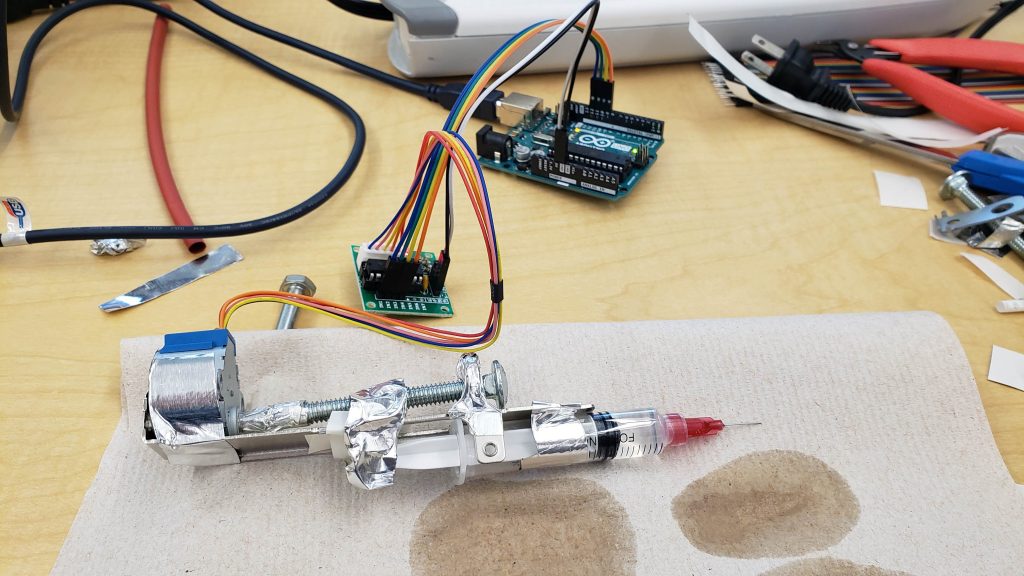
Scrapheap Challenge: The world’s worst syringe pump.
Or, three hours enjoyably lost to a visit from the bad idea fairy.
My PhD advisor and I were chatting in the lab today and had an idea that it would be interesting to try to drip/jet a bit of water onto just-extruded filament, ideally in small enough quantity that it phase changed and flashed off with all the excess energy, in order to allow printing unreasonable unsupported structures.
It unfortunately doesn’t look like it will be practical, but we got a PoC-grade implementation in a few hours and it seemed worth a quick write-up to document our experiment for the interwebz.
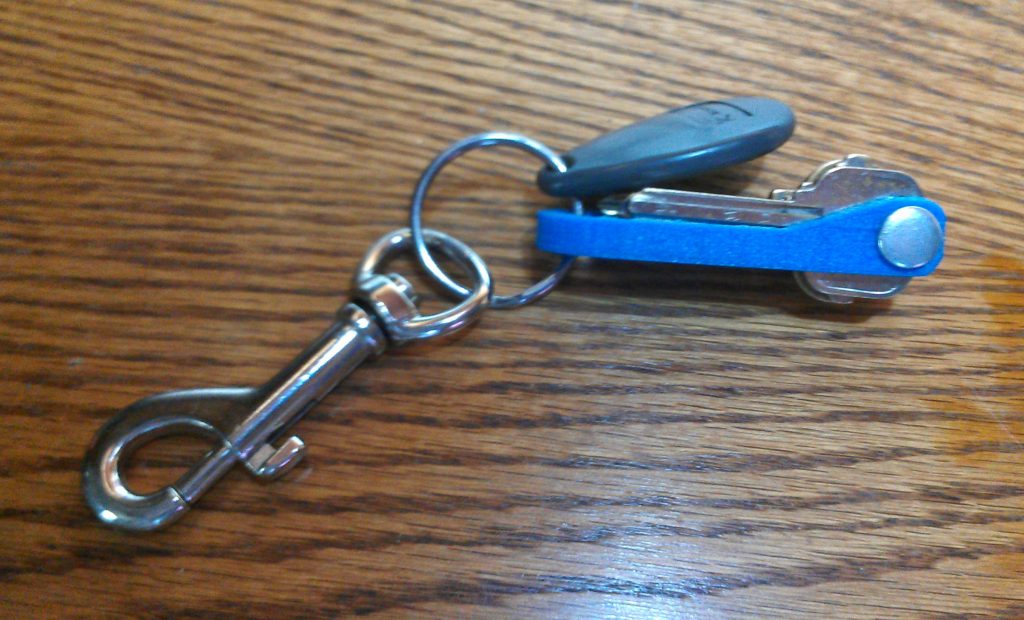
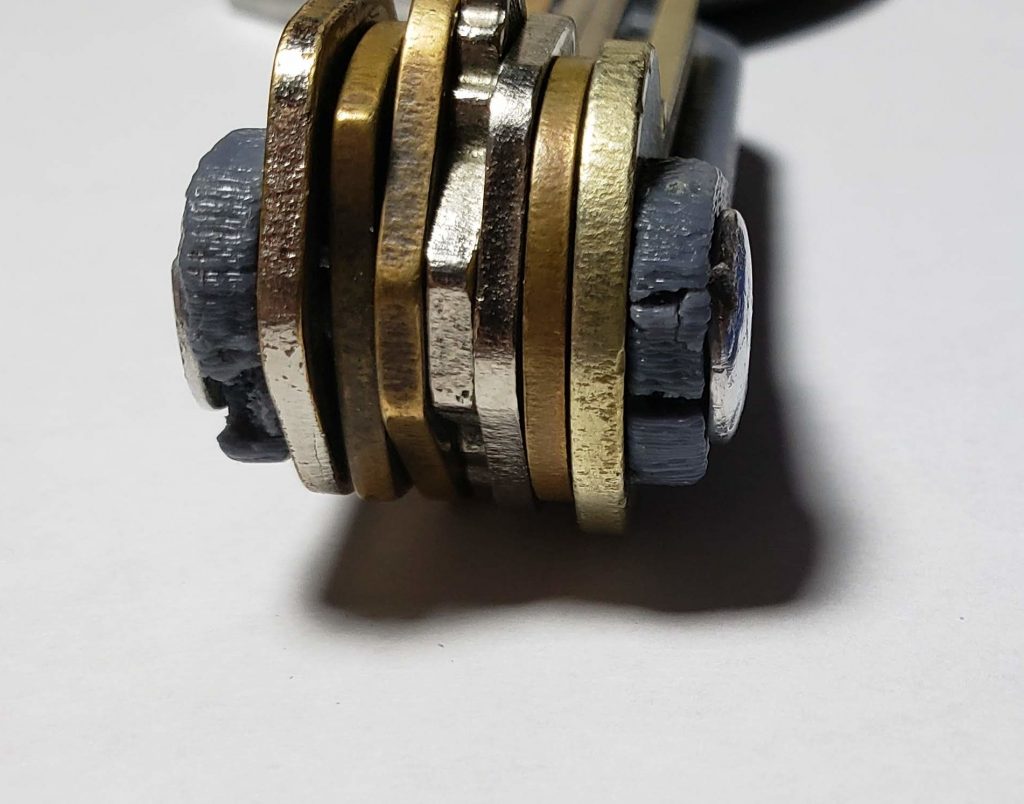
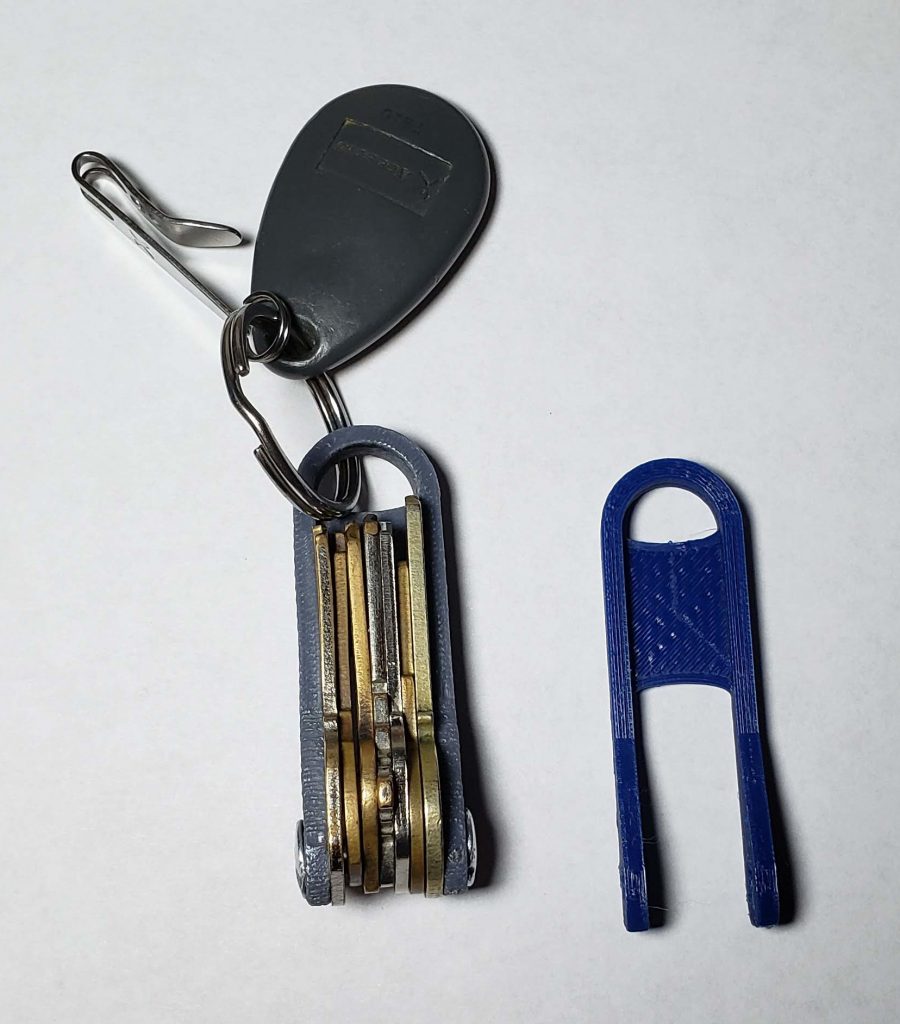
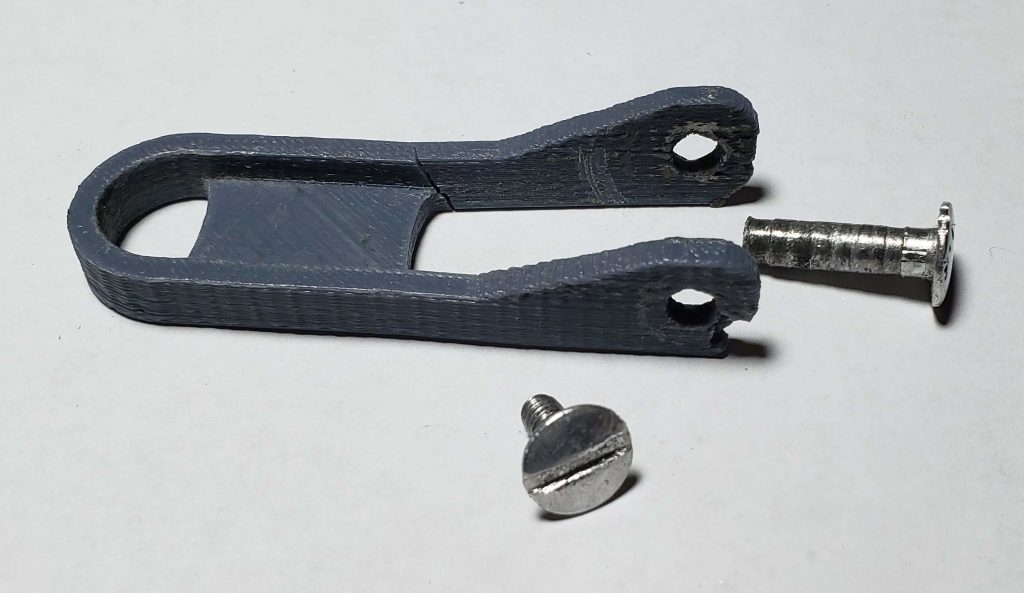
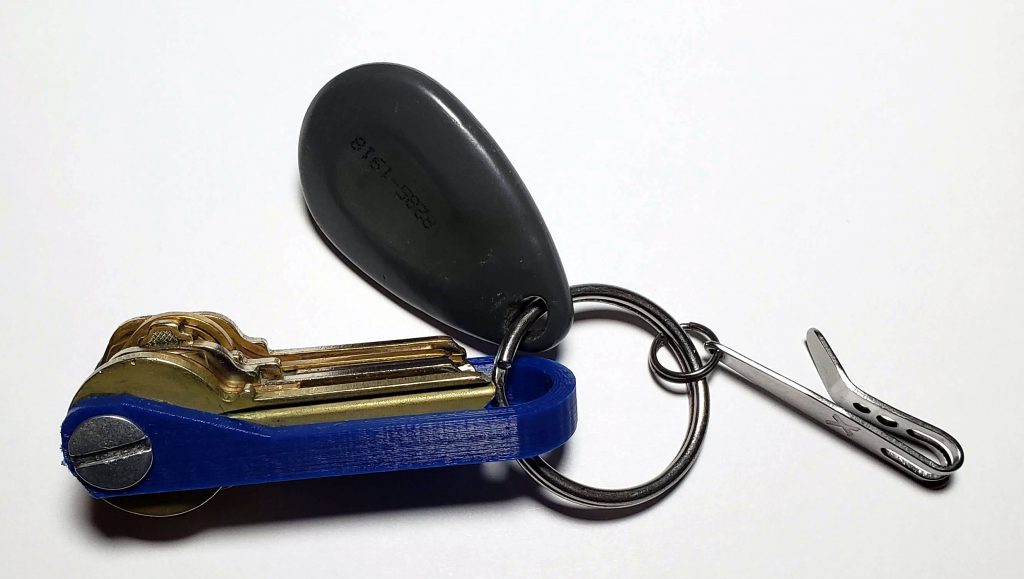
I’ve been carrying a series of slightly-customized 3D printed bolt-type bladekeys since 2014. Despite being printed PLA, I’ve only had to print a new one once every several years – I wasn’t keeping good records but I think this is my third plastic body, second #8-32 “Chicago Binding Post,” and I upgraded the type of pocket clip at some point. I’m yet to have a catastrophic failure. The setup essentially eliminates key jingle, poking, or wear on pocket facings, while still being easy to tap check and use. The only slight downside to this setup is that when I attach a car key and put it in the vehicle, the blade-key dangles at knee height and occasionally grabs a leg hair – if I drove more I’d probably tweak how I attach the car key to fix that.
Pictures from the first one I carried in 2014, and the most recent swap out, induced by it “getting loose” and letting the stack of keys flip forward in my pocket – which turned out to be the result of several cracks in the plastic body. Plus, flexing that the bitting and labels are both obscured when closed, which I suppose is a minor security feature, especially when posting pictures on the Internet.
The first version I carried in 2014. IIRC that filament had greenish glow-in-the-dark additives.
I think this one died from a drop onto concrete, cracks in the end.
Old and new plastics.
Extensive damage to the one I’ve been carrying for the last several years.
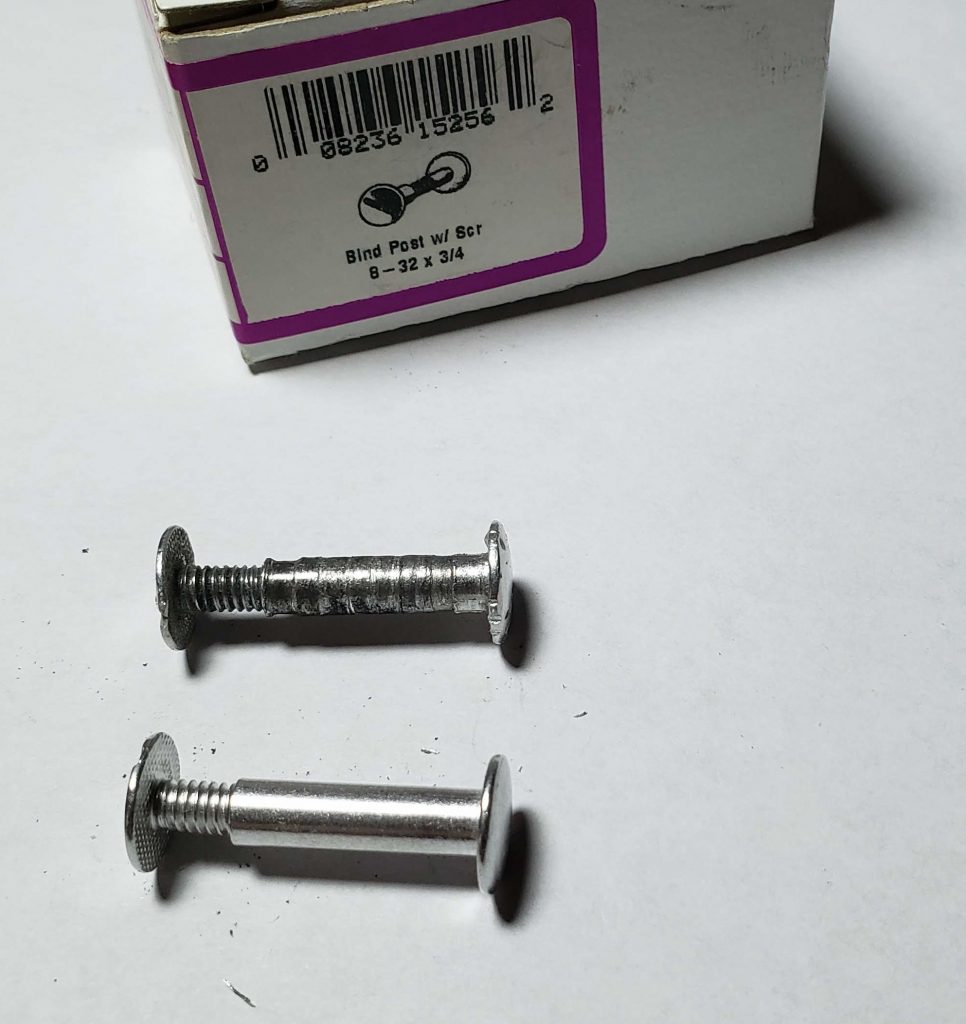
A deeply grooved binding screw, plus a fresh one and the box, which probably represents a lifetime supply.
My current iteration.
At this point I’d buy one of the fancy ones just to support the designer, but my desired size falls in between the models they do commercially (I use 15mm W x 58 L, closest sizes are 12mm W and 19mm W). Maybe sometime I’ll get ambitious and cut one in a different material on the router.
Even if you do something that others might consider wrong, you should at least be willing to talk about it and tell your parents what you’re doing because you believe it’s right.