Talking about the impact of AI on the the maintainers of open-source work the entire tech world is built on and no one wants to pay for (and many other artifacts of human effort being reprocessed and resold as unreliable … Continue reading →
I bought another computer. This one has a tragic origin story, an active pen with (like everything about it) shockingly good Linux support, and – bonus – has finally given me the impetus to switch from VirtualBox to libvirt for my VMs for obstinate software.
Trilith, my Dell Latitude 5340 2-in-1, pictured, as is tradition, with the current KDE default desktop at time of purchase.Continue reading →
TL;DR: If you have one of those sketchy Chinese metal-cage 500W spindle speed controllers that uses a potentiometer for speed control, the potentiometer terminal block is probably referenced to a dangerous voltage, be careful what you connect to it and/or replace it with a less dangerous one.
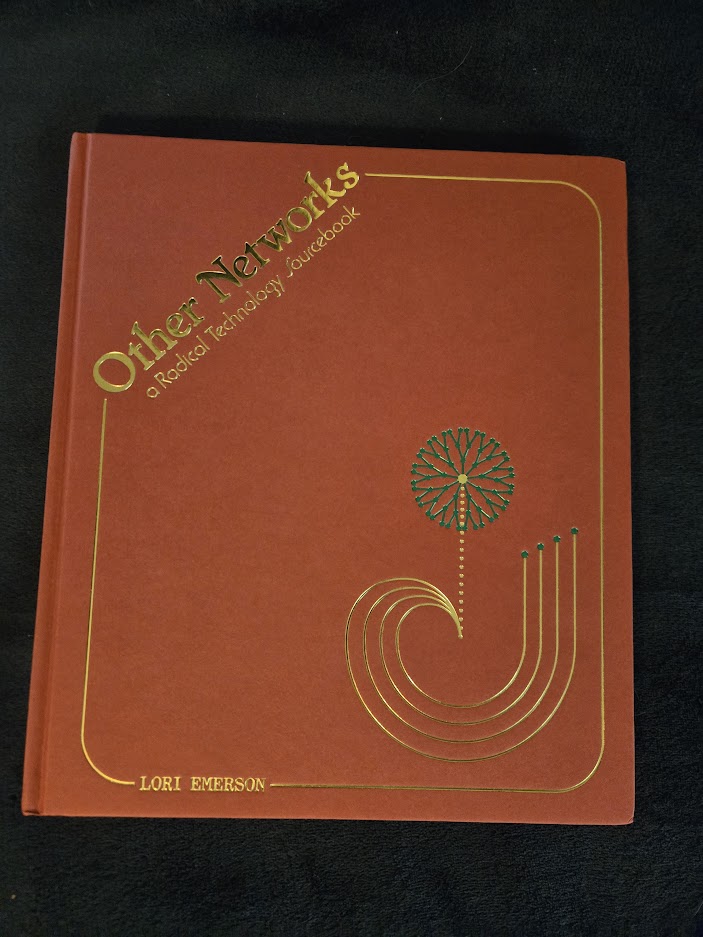
The only books I buy new anymore are beautiful things that appeal to my niche interests, which might become unavailable because they are niche… so my pre-ordered copy of Lori Emerson’s new book Other Networks: A Radical Technology Sourcebook arrived today.
Lori Emerson is one of the few people really prominently writing seriously in a media studies/anthropological sort of way about the history of technology, and I constantly assert that there isn’t enough of that, so I’m excited to see a win.
I found her via the press for her first book, Reading Writing Interfaces, which is fabulous and thought provoking (and I only have a handful of quibbles with it, mostly around promulgating some of Apple’s dubious self-centering history that they seeded to writers and journalists in the 90s, even where she clearly knows better) and have followed her online posts as she prepared this one – We even interacted online once or twice in those; I’m acknowledged in her piece The Net Has Never Been Neutral that didn’t end up in the book because of a conversation we had online about how different parts of the audience would understand the world “Neutral” in subtly and problematically different ways when she posted an earlier version.
At a skim, Other Networks is much less densely academic and analytical than Reading Writing Interfaces; it really is a sourcebook of curated examples of technologies and instances of those technologies, with the necessary breadcrumbs to set up the interesting properties and comparisons with others. I’m a little disappointed that some of the deep musings about other ways the thing that is the Internet could have been largely didn’t make it in to the book, but, from an editorial view, they are different content for a different audience than what it ended up being.
It is also beautiful; the binding and the typesetting and the illustrations, right down to this lovely little foiled glyph on the back cover. My copy is sitting next to Marcin Wichary’s Shift Happens, which is a benchmark for beautiful books, and it looks good.
I picked up a little MinisForum UM870 Slim in a 32GB/1TB configuration for about $463 on sale (from nominal $580 sticker price) a few weeks ago, just to have a decent piece of fixed hardware on my desk at home. I’d recommend these things to a large swath of the desktop market, with a few model-specific caveats. Details below.
Easily in the 1L ultra small form factor class, 130×126.5×50.4mm is about 0.8LContinue reading →
I don’t tend to post non-technical personal things here anymore, but Jenn and I went and got married this weekend. We essentially built a whole wedding around “Serious not-serious, wouldn’t it be fun to…” and it was, indeed, a good time. Remember that the serious part is signing a marriage license in a compliant way, everything else is just to suit you and (insomuch as you choose to care what they think) yours.
Spend years designing and crocheting a dress and flex on the other crafty folks. Fill your invitations with visual puns. Enter to “What I like About You” “For Once In My Life” (and don’t tell the bridesmaids ahead – the day was such a blur I forgot which was the decoy and which was played in the ceremony). Start the ceremony with a bit from The Princess Bride. Have your brother (in law) officiate because he once admitted “Man, I love weddings, I’ve always thought it would be fun to officiate one.” Slip in some gag bonus vows your partner doesn’t know ahead. Exit to “Turn Down for What.” First dance to “Boogie Shoes” to satisfy an in-joke. Put out coloring place mats for everyone and mark bags of crayons as place markers in the reception. Play orchestral arrangements of your favorite video game music in the background and see who notices. Get casual family-style catering from the restaurant you went to on your first date. Pick your cake because it’s delicious. Do you.
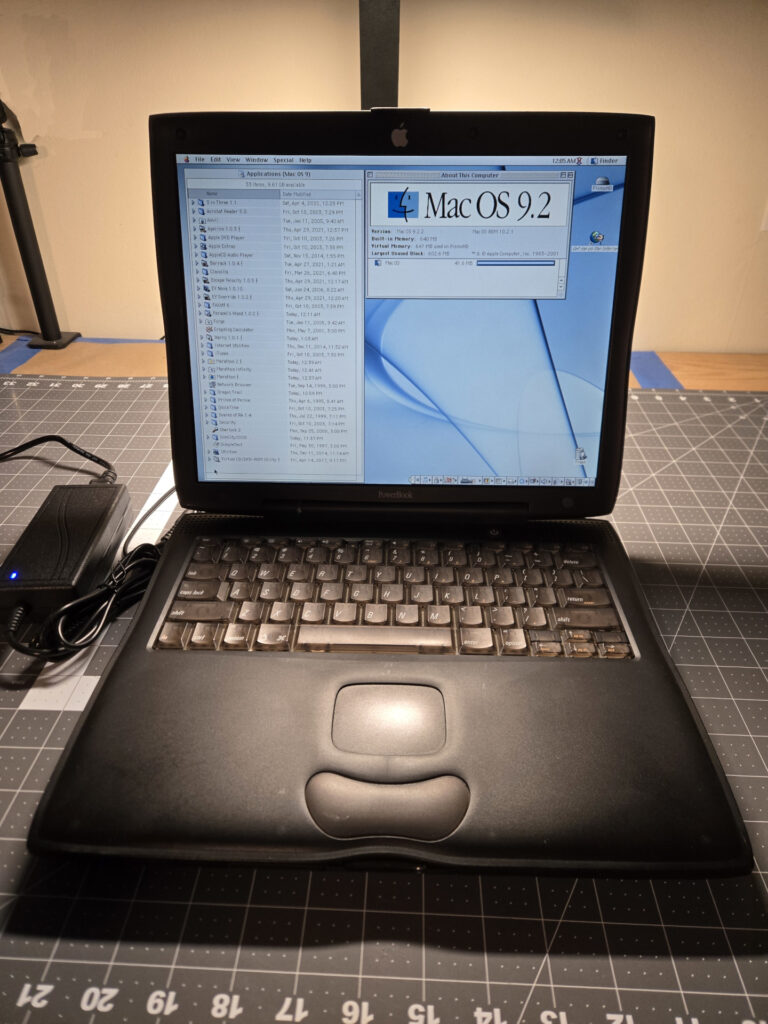
I’ve wanted one of the curvy bronze-keyboard G3 Powerbooks since they were new – I’ve always been kind of taken by the design language (half business, half iBook). I got to play with a university-owned Wallstreet for a while as a kid, so I remember them beyond looking in catalogs, and uh… I really like a bunch of classic Mac games and want a convenient late-classic machine to run them natively, because a few are glitchy in emulation.
So, I occasionally lowball bid promising auctions when one comes up somewhere. A few months ago (in late February) there were a succession of them on ShopGoodwill, and I tossed a $50 max bid on a Pismo in the 500MHz/128MB/12GB/DVD configuration in unknown electrical and OK but not perfect cosmetic condition. And, surprisingly, won. It ended up being about $67 with shipping/handling/tax/etc. Since working condition examples tend to be around $200, this seems like a decent deal. It survived the typically awful shipping, and, in long form below, it turned out to be a good buy.
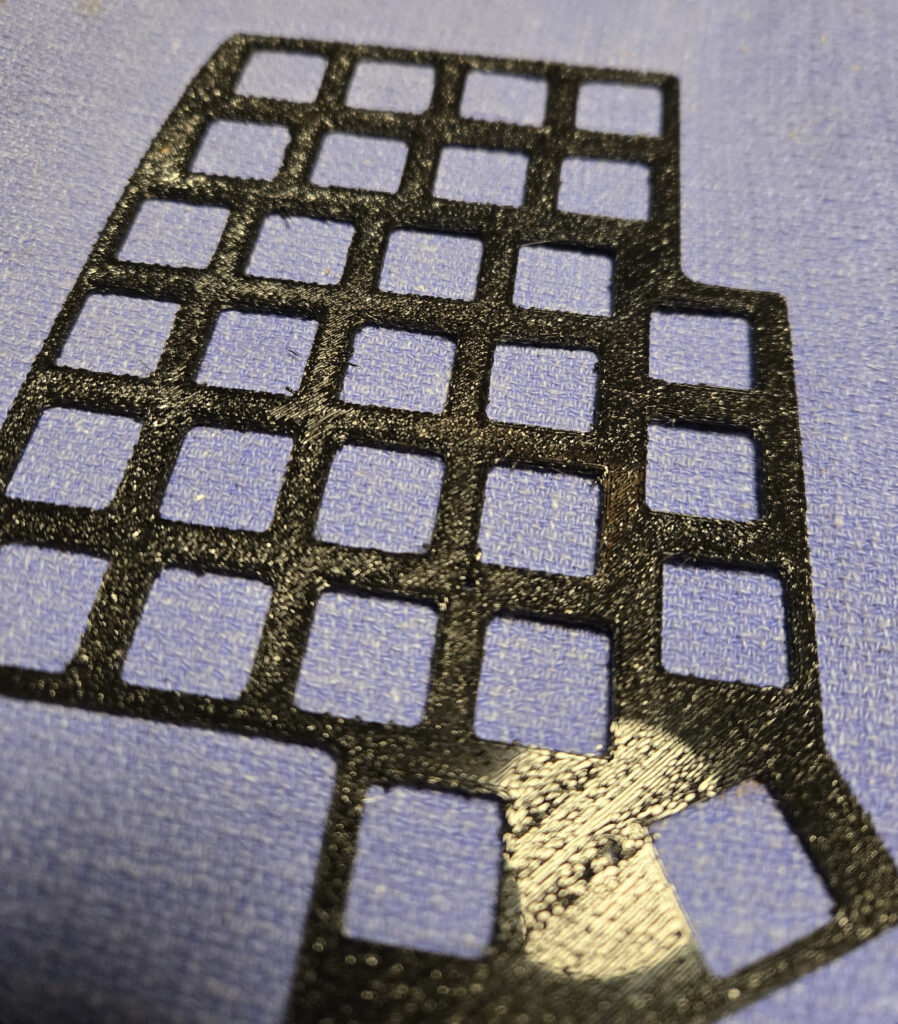
I’ve had a few projects recently that needed 3D printed parts, went to use a roll of black eSun PLA+ that I accidentally left out in my basement for some time, and it produced the telltale dull, rough, stringy, gappy print quality of hydrated filament. Since I have some energy for projects right now, I decided it was finally time to get a filament dehydrator setup.
Pretty sure PLA printed to a glass bed shouldn’t look like this…
I went reading up about filament dehydration. The purpose-made filament dryers mostly seem to have a problem with actually removing moisture, most of them are dry boxes with no exhaust path, and the liberated water vapor has to go somewhere. Many seem to rely on instructions for the user to periodically open the lid during drying (which is …not automated), and a few contain a large amount of desiccant that will be more-hydrophilic than most filaments at drying temperatures, then itself require dehydration. Bambu seems to be doing basically the right thing with the AMS2 Pro and it’s automatic exhaust valve, but I’m not in the Bambu ecosystem and not looking to spend that kind of money.
So, instead, I looked at the DIY options. There are a variety of clever schemes with PID controllers and heating elements… but lot of folks seem to just repurpose inexpensive food dehydrators, and I went with a variation on that plan.
I picked up a $40 Elite Gourmet EFD770WD dehydrator; I paid a few extra bucks for a model with a digital thermostat/timer. It gets me a heater, a blower, and thermostatic control in a package that is at least theoretically safe for consumer use, which is really all that is called for. There are many directions on the internet for cutting the grilles out of several trays on this style of dehydrator to make a spool-sized cavity, and many designs for large, elaborate, and almost inevitably multi-part printable extension tubes, which must be printed in a filament still rigid at the highest drying temperature you expect to need. The former seems wasteful and the latter seems like a tedious hassle.
A little foamcore and tape to make a suitable cavity.
I did something much lazier and made a tube out of foamcore. Just bent it using the little tabs for aligning the trays and taped. Mine is two pieces because none of my scrap pieces were quite large enough to do it in one. The foamcore is slightly insulating which seems like a minor feature, and this method isn’t many hours of printing or destructive, which is a major feature. I also saw several folks modifying a 3.5gal or 5gal paint bucket with a diameter around 12.5″, and I may try that in the future as a more polished solution, but didn’t have a suitable empty on hand.
This particular dehydrator only lets you pick specific temperatures, but 115 and 125F are options right to either end of the suggested range for drying PLA variants. As for effectiveness, the main subject roll of black eSun PLA+ that sat out for a couple months, whose behavior is pictured above, went in for 8 hours at 115F, and initial results were really promising.
The first experiment looked really promising; Same printer, same gcode, top print before drying, bottom print after 8H@115F. Almost all defects were gone from the first layer.
There were still some hydration-looking defects in areas (and the thermocouple I had shoved in through one of the lid slots of the dehydrator as a safety was reading a little low), so I gave it another 8 hours at 125F. And the results didn’t really change, but there was no obvious degradation. It has a dead spool producing parts that are usable if a little textured, which is worthwhile.
Similar parts printed wet, dried for 8 hours at 115F, and dried an additional 8 hours at 125F. It’s unclear if the subsequent/hotter drying offers any significant benefit.
PLA+ is always a bit of a mystery material, I’ve generally supposed that much of it is doped with a couple percent PBT, but the relevant eSun PLA+ MSDS just shows 2-4% calcium carbonate (which apparently just provides nucleation sites to improve the crystallization) and 2-5% “other,” (likely pigment). CaCO3 isn’t very soluble in water, but who knows how it moved around or altered crystallization or whatnot during the wet-dry cycle. I ran some Inland “Egyptian Blue” regular PLA that had sat out in the basement for a while through a similar 8h@125F cycle and it did seem to reduce the surface irregularities (pips, especially on corners) between the previous and next part I printed in it, but not in such a dramatic way.
From a somewhat-amateur reading of the relevant literature, it seems like not all the hydration induced changes should be reversible. The most relevant thing I could find was Beyond Biodegradability of Poly(lactic acid): Physical and Chemical Stability in Humid Environments (2017) which looks at degradation due to liquid and vapor phase water infiltration, and found pretty substantial chemical changes especially from vapor at higher temperature. The literature in general is a little spotty, there are more liquid phase studies (eg. ref), but studies like the earlier one comparing liquid and vapor phase water infiltration indicate they aren’t entirely comparable. The literature on drying is “thin,” and the relevant Internet content is thoroughly astroturfed by vendors trying to sell you gadgets (which is becoming a real problem in the 3D printing market in general; good luck finding un-sponsored information about anything). I’m sure some of the commercial (bio)plastic manufacturers/processors have detailed internal documentation, but they aren’t sharing.
In the same order as they dryer, I picked up some indicating desiccant packs to improve my ability to monitor and dry filament in bags. I’m so distrustful of Amazon junk now, I stuck one in the bathroom to absorb shower steam to see what the indicator hydration process looked like, and it is slowly turning pink after being repeatedly exposed to shower steam. Hopefully storing filament with known-dry desiccant will help keep it from going bad – at least as long as I continue avoiding any of the truly hydrophilic materials like Nylon that require special handling.
All in all: Hydration is absolutely a problem for PLA and adjacent materials, drying is imperfect but effective, slightly modified food dehydrators that exhaust the vapor do a fine job, and keeping material dry is better than trying to dry it.
I played The Legend of Zelda: Echoes of Wisdom (as a distraction to avoid losing my mind reading the last giant batch of lab reports for the semester) since I finally found a copy for a vaguely reasonable price a few weeks ago, and will play anything from the franchise. It’s… OK. Thoughts:
The main echo gimmick is novel and mostly positive;
it’s narratively a neat way to have the player character (who is Zelda) not get their hands dirty
it’s pretty clear when you can learn something, and which things on screen are your echoes
it’s fun to try applying different echoes to situations
…but it involves a ton of menuing, which their attempts to make affordances for don’t quite cover up
and there are quite a few points where it’s aggravating to get an echo to do what you clearly need it to
The game is pretty short. A bit unsatisfyingly so.
The vast majority of puzzles are highly telegraphed and fairly trivial (most are just interesting enough to be satisfying) and a few are “go look up what obnoxious detail makes the obvious solution frustrating to execute”
The minor characters and side quests are not very interesting, which is something Zelda games are usually better at
I went in and played a bunch of side content after I beat the game, just looking for interest.
Several of the mechanics just…aren’t very useful:
If you can find a safe spot, you can always heal with a bed, so smoothies matter once for cold resistance and otherwise only if you need to heal during a boss because you did something dumb.
Once you have clouds, the other platforming-related echoes are largely irrelevant.
I… didn’t even bother with Dampe and the automatons until I went back to mop up stuff I missed after I finished. It feels more like an alternate pitch to the echo system that they didn’t quite let go of.
It’s not a bad game, but don’t pay full price. Given that the 3D Zeldas for the Switch (BoTW and ToTK) were excellent, do those first if you haven’t. And if you specifically want a 2D Zelda-like and you haven’t played Tunic (which is a 2D Zelda influenced game whose magenta otherworldly corruption feels like it might have fed back into the franchise with this one), do that first, it’s more interesting.
I got the upgrade to GIMP 3.0 yesterday, went to do a few basic image editing tasks, and it’s great they’ve fixed many of their long-standing issues and added things like NDE for filters, wider color depth, etc. … but I was so annoyed by the dialog-buttons-in-title-bar situation caused by the move to GTK3 that I stopped what I was doing and looked for a workaround.
Dialog-buttons-on-top is backwards from reading order, backwards from every other piece of software I use, and backwards from almost every other piece of software made in the last 40 years – I’m not interested in arguing if the GTK folks repeatedly doubling down on their weird bullshit is legitimate, I just want to be rid of it.
It turns out there isn’t really a runtime workaround on Wayland, your choices are force it to use the X back-end via `GDK_BACKEND=x11 gimp` so it will respect the gtk-dialogs-use-header=FALSE setting, or patch and rebuild GTK3. Because that setting gets overridden with the Wayland back-end. Unless you delete like 4 lines of code and rebuild the whole library, since the “technical reason” it had to be hard-coded for wayland is apparently just some bad behavior with CSD bars (which are also undesired behavior – I want consistent window controls and labels plumbed by my environment) that come up when running under gnome.
…And since you’re replacing your system gtk3 with a rebuilt library anyway, there’s gtk3-classic. Which isn’t packaged, so you have to build locally. From some random github repo and an AUR package. But it is pre-patched, and gets rid of a bunch of the other misfeatures like the search-instead-of-typeahead and some weird CSDisms at the same time.
I moved from daily driving xfce to kde in like 2017 because GTK3 was awful (and the KDE folks got their resource usage in check), and the stragglers (gimp, inkscape) moving to gtk3 is making me think about it again, because it is now even more awful. At least GTK3 is basically frozen at this point, so I won’t have to build the replacement too often.
Structural engineering is the art of molding materials we don’t wholly understand, into shapes we can’t fully analyze, so as to withstand forces we can’t really assess, in such a way that the community at large has no reason to suspect the extent of our ignorance.