Category Archives: Objects

Makergear M2 Heated Bed Issue

There was a problem with the Lab’s Makergear M2 recently that is worth writing up.

Last weekend, we had it off site for a demo event for a group of highschoolers interested in engineering and medicine, which included assembling samples of these printable articulated hands that Dr. Dietz designed. (Semi-related: I’ve watched him do it, and continue to be mystified how he does things like this in OpenSCAD). We printed some models live, but on the last print of the trip it made a burning plastic smell. Not the usual, pleasing corn-syurp-y PLA-at-work smell, but acrid recently-deceased-electronics smell. We couldn’t locate the problem, and everything was working, so we assumed filament impurity and moved on.

M2RAMBO39530Melted

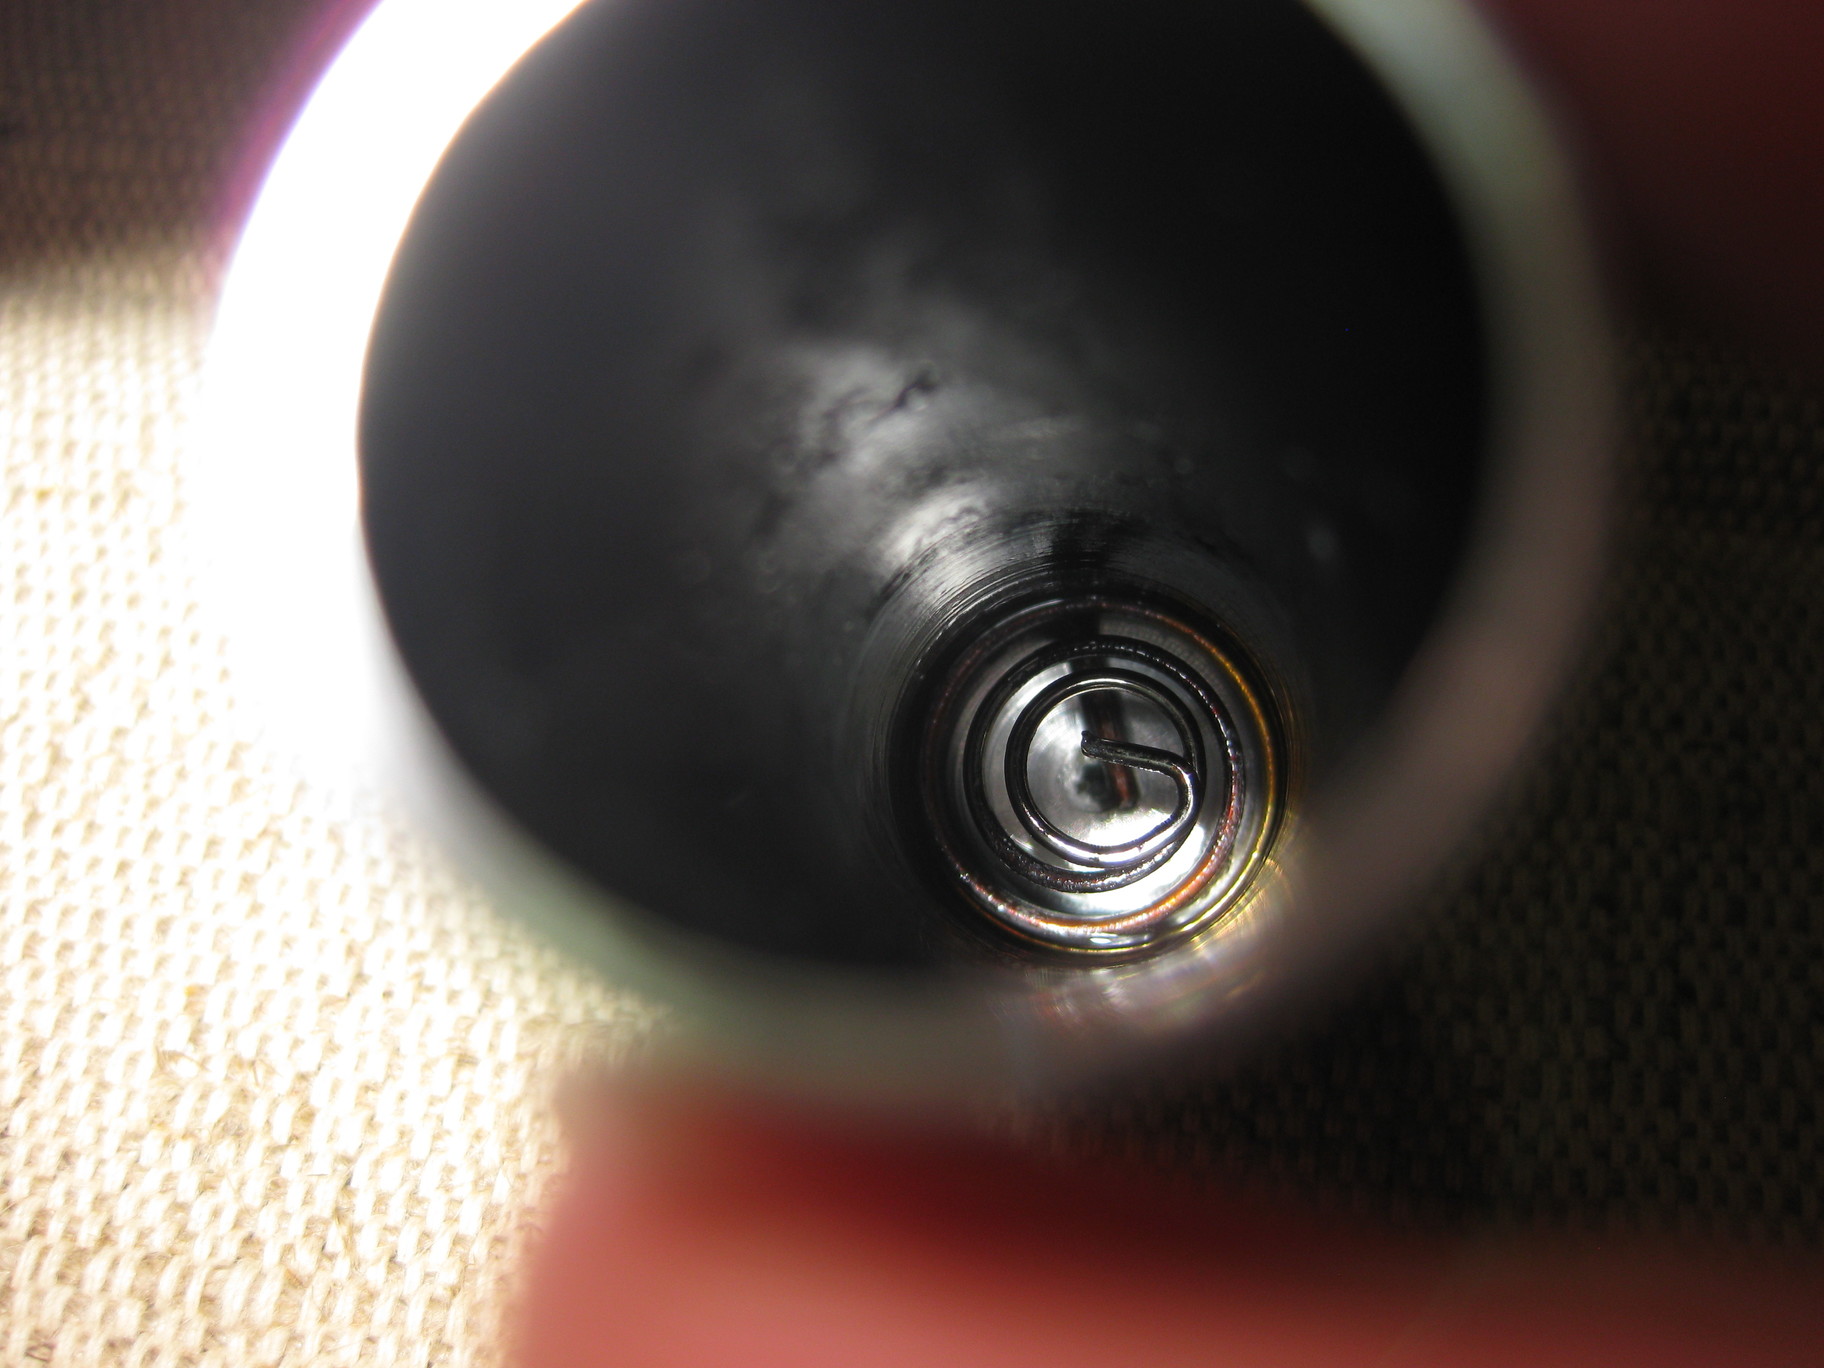
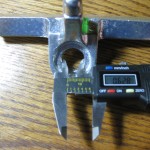
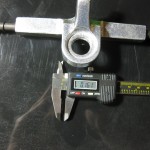
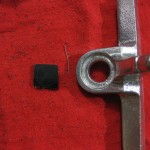
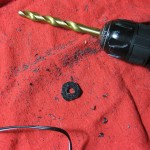
The next day, the bed stopped heating. Probing around with a DMM indicated the board was fine but the wire harness was not (A thank you to the Ultimachine folks for putting proper test points on the outputs). A bit of googling turned up this thread implicating the quick release screw terminal block that connects the bed leads to the board. Sure enough, upon yanking the connector free, the removable wire-side portion was a melted mass.

39530Melt

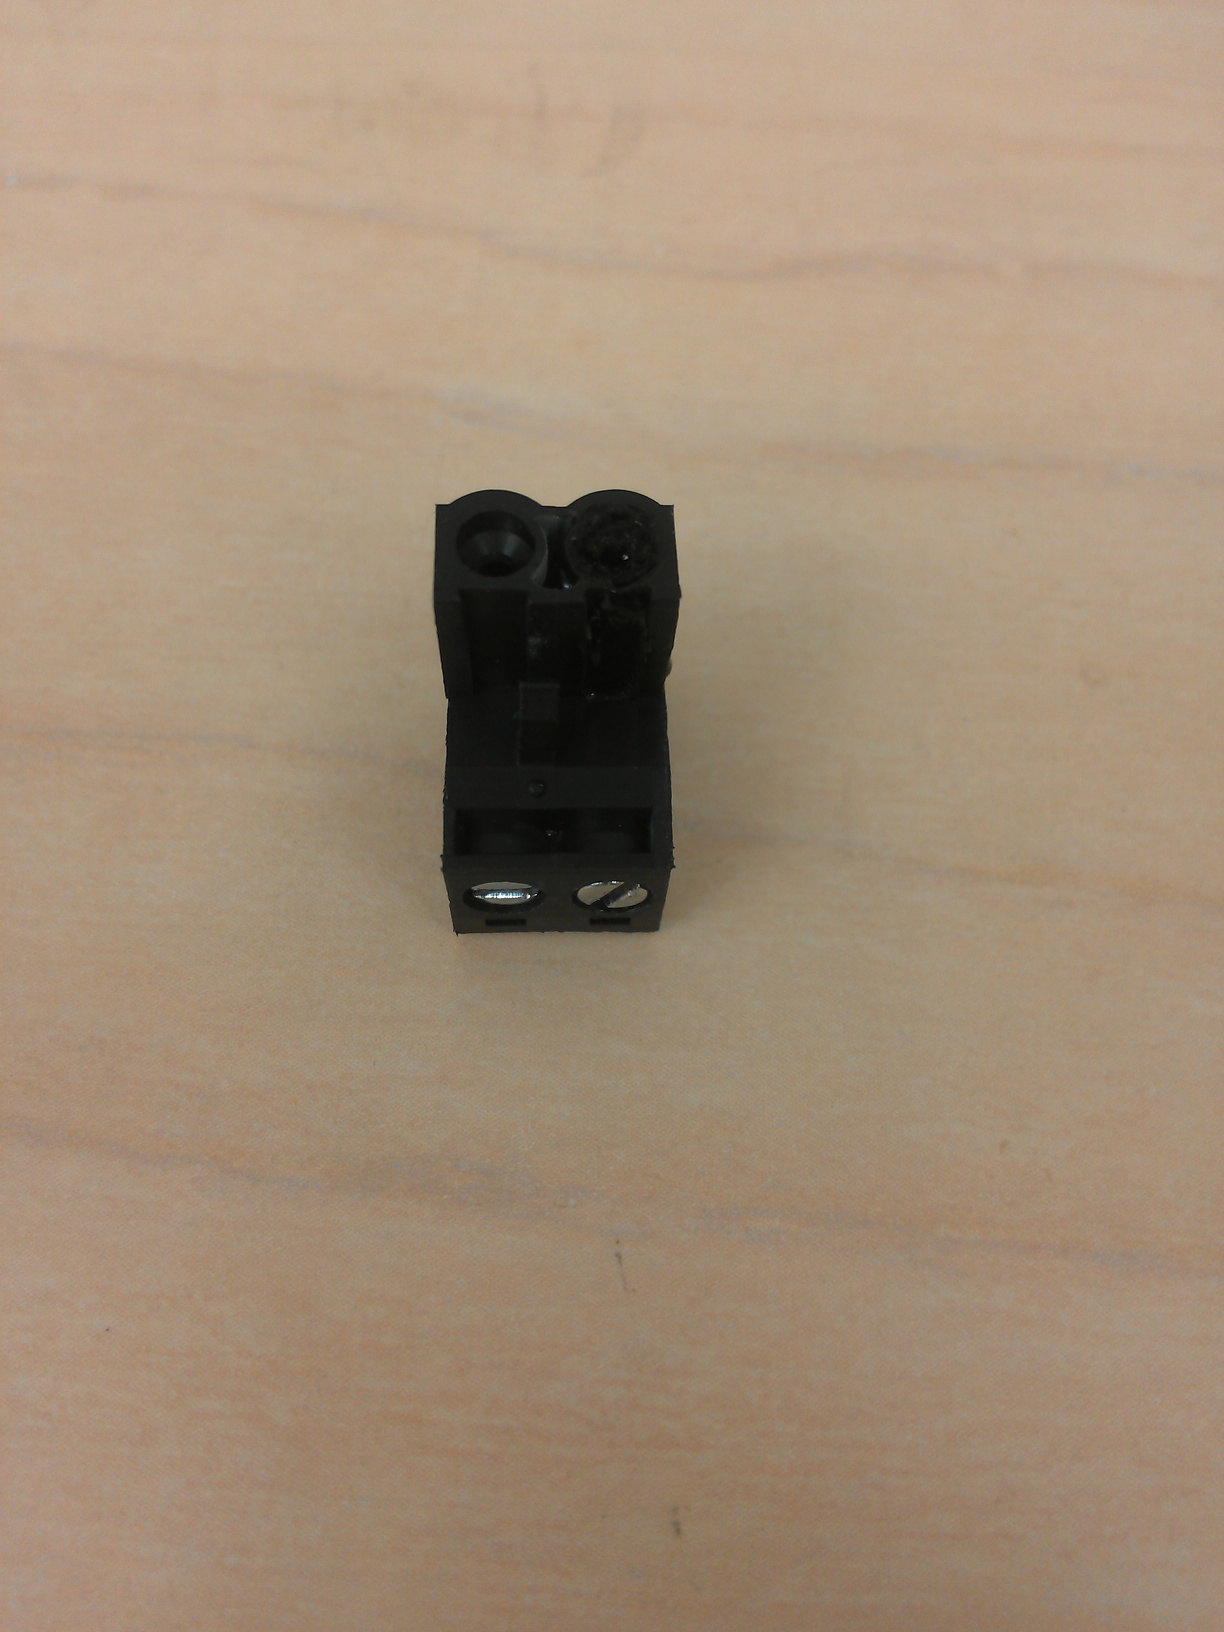
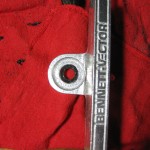
The existing connector is a Molex 39533-2002 rear-entry, two lead “Eurostyle” connector. Interestingly, Makergear and/or Ultimachine (Makergear buys and installs RAMBO Boards) used straight-through 5.08mm (200mil, but usually talked about in metric) quick release connectors – screws on the top, wires enter from the right – for the other MOSFET outputs, but a rear-entry (screws on the left, wires enter from the top) for the bed heat. This seemed odd since the side of the little laser-cut enclosure the RAMBO board lives in obscures the screw heads, but the reasoning will become clear. When I was poking at it to see if I could figure out what went wrong, I noticed the threads on the melted side were all but stripped out, but I don’t know if that was a cause or a symptom.

M2RAMBO39533

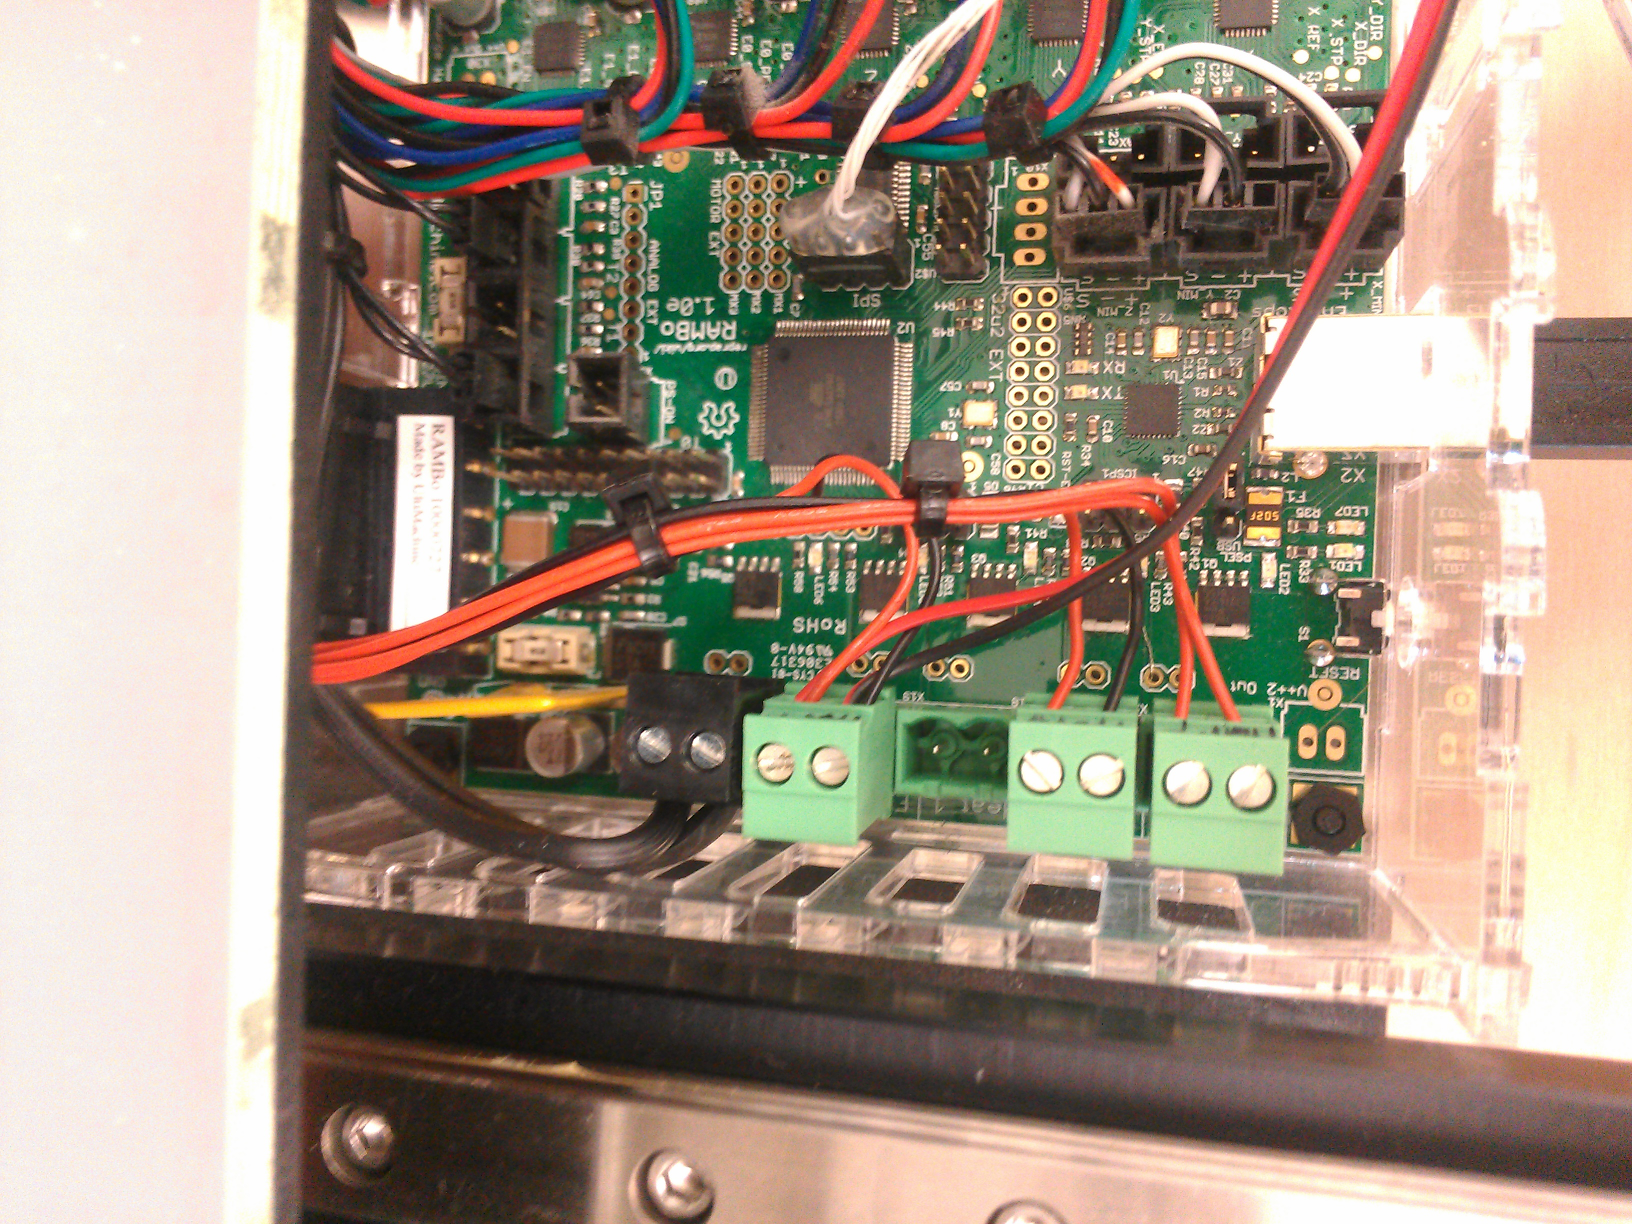
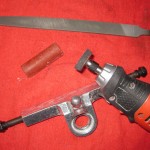
Since it is a standard connector, the (apparently intact) board side will mate with any two-position 3953x part. We found an ebay listing for five 39533-2002 for about $8 shipped, which are compatible and straight-through. Sadly, ebay is usually cheaper and faster than dealing with an electronics vendor if you only need one thing. The replacement seems to work fine, but clearly the original was a rear-entry model to keep the wires from being pressed against the side of the case. The M2’s wire harness is definitely its weak point; two of three serious intervention-requiring stoppages have been related to the bundle headed up to the bed/Y assembly.

The general lesson is to keep an eye on your screw terminals, especially if they are carrying current. I recall replacing the (non-quick-release) bed heater screw terminals on Collexion’s Makerbot ToM after a meltdown not long ago, so there is clearly a general issue with running that much current through screw terminals (several of the common crimped connectors would likely be superior in most ways). Since it came up (and since it is intuition-defying and I’ve heard a lot of people who should know better get it wrong) I’ll close with a reminder that you should not tin your wires before placing them in screw connectors – I know I’ve read this in a standard, research-backed source from ISO or NASA or somesuch, but I can’t find it right now.

ADDENDUM: It cooked two more of the same connector, then we discovered that the SD card connector was a little lose, and apparently causing a ground problem. It hasn’t cooked another connector since, and the bed heats faster than it was, so strong evidence that that was the root cause.

Posted in DIY, Electronics, General, Objects | Tagged , , | 3 Comments

The Best Science Fiction and Fantasy of The Year Vol. 7

While I’m writing up things I’ve done recently, I finished this year’s edition of the Jonathan Strahan edited The Best Science Fiction and Fantasy of the Year collection. As in previous years I’ll mention the high points.
Continue reading

Posted in Entertainment, General, Literature, Objects | Tagged | Leave a comment

Singer 201-2 Restoration

My 1947 Singer 201-2, S/N AH040755

I wrote about this machine once before a few years ago, but only brought it down to Lexington to work on it at the beginning of July. I’ve had a delightful time cleaning restoring it over the last couple weeks, and just wanted to post some pictures and musings. I did have it correctly identified before – it is a 1947 Singer 201-2, in good mechanical and OK cosmetic condition. The machine’s story from the family has settled on it being my great grandmother’s machine down the matrilineal line, but I don’t know if they were the original owner, or what exactly has happened to it over the last couple decades. My grandmother noted that she remembered her mother doing upholstery work on it, and my mother remembers using it as a child, and it was in my grandmother’s basement three years ago. Descriptions follow pictures below.
Continue reading

Posted in DIY, General, Objects | Tagged , , , | 21 Comments

N109 Thinkpad AC Adapters

N109-6

Since I’ve been documenting failure modes in electronics, another tale of electronic woe regarding N109 type knockoff Lenovo 90W AC adapters. I have a couple T series ThinkPads, which conveniently all use the same 20V 90W supplies with the same connector. I noticed that the stress relief on one of my AC adapters was wearing, so, having had a streak of good luck buying various direct-from-China products, I bought a knockoff replacement adapter that way.
I would suggest that you don’t want do that.
Continue reading

Posted in Computers, DIY, Electronics, General, Objects | Tagged , , | Leave a comment

Thrunite T10 Repair

T10Bodymd

The Thrunite T10 light I’ve been carrying failed to come on when I reached for it the other day. It wasn’t a dead battery, and, yesterday, I determined that the 24mo warranty offers free repair contingent on you paying for shipping to and from Shenzhen, China, which comes out similar to the purchase price. I like my little T10, so this evening, I decided to fix it myself.

tl;dr: If you have a T10 die on you, it is likely to be the negative contact spring in the bottom of the body corroding/moving. Try cleaning and/or re-seating it.
Continue reading

Posted in DIY, Electronics, General, Objects | Tagged , | 3 Comments

Shapeoko: Part 6

SH7-8

I’ve been working on my Shapeoko in little fits and spurts that individually haven’t been terribly documentation worthy, but in aggregate are pretty interesting. Continuing from where I left off in Shapeoko: Part 5, I’ve iterated a bit on belt tensioners, switched to a commercial breakout board, put the spindle under computer control, attached the spindle to the machine, made some tentative test cuts, and added hall-effect endstop/homing switches to the X and Y axes.
Continue reading

Posted in DIY, Electronics, Entertainment, General, Objects | Leave a comment

Babylon The Master Builder’s Puzzle Cube

BabylonSet

We have been printing out little puzzles to test dimensional accuracy on the 3D printer in the lab, and it reminded me of a cube puzzle I had as a kid, which is now rather difficult to find information on. I’m putting this on the ‘net largely because coming up with search terms to unify all the relevant information was nearly impossible – I had to go root around at my parent’s house to find my set to connect all the dots. It was the source of many ragequits as a child, and it would be a shame to deprive future generations of the same …stimulation.
Continue reading

Posted in DIY, Entertainment, General, Objects | Tagged , , | 9 Comments

Learning to LDP

I’ve wanted to learn to LDP (Long Distance Pump) since before I started skating. Every summer, I spend some time trying to learn to pump, and make minor adjustments to my setups to make it more practical, and for my efforts I could impart energy, but my setups have always been sufficiently sub-optimal that I only managed sustain speed with a pump a handful of times, and never accelerated.

LDParts_md

This summer I decided do it right. I bought the classic inexpensive LDP truck set (A Bennett Vector and a Tracker RTS, I picked the 5.0 and 129mm variants respectively), modded them for LDP, and installed them on my suitably sized deck with suitable bushings and wheels.

Distance skating attracts the best sort of crazies – It’s something of an equipment sport, so they tend to obsessively purchase and modify gear. It’s remarkably physically demanding, so there is a lot of the classic solo endurance sport mentality. It also has carryover from the “raah hardcore” skate world. Fortunately, the internet has brought together the appropriate crazies at sites like Pavedwave and skatefurther, where the discipline has been developed from its roots in the 70s.

Designed-for-LDP decks (Subsonic Pulse, LBL Walkabout, RoeRacing Mermaid, etc.) are boutique items and tend to cost in excess of $150 for the bare deck, so I wanted to ease in financially in smaller steps since I’m not sure how capable I’ll be. Most sources say 26″ to 31″ is suitable for an LDP wheelbase, and my Pakala III is around 25.6, so it is manageable if a little tight-pumping.

The mods for the trucks are pretty interesting, I implemented a number of the suggestions from this excellent thread on the pavedwave forums.

On the Bennett, I made myself a nice Polyoxymethylene(aka Delrin/Acetal) insert for the pivot. I think the technical name for this thing would be a bushing, but since that term is already in use for trucks, people have taken to calling these “hobo sphericals” or “fixed spehericals,” as the more elaborate alternative is to install a spherical bushing. I saw that Griffin sells fixed spehricals for Bennett trucks that look to be machined out of some flavor of Polyoxymethylene, looked at the sheet of 1/8″ Aceteal I had for another project, and decided to DIY. For those looking closely at the numbers, the insert is a little thinner than ideal (0.125″ sheet, gap depth measures around 0.16″) but it seems sufficient.

I hacked a small chunk off the sheet, held it under the truck pivot, and scribed the diameter into the sheet with a pin. I then did the typical chords-and-90°-angles center of a circle stunt, sanity checked it against a washer, and drilled the center to 25/64″ in a couple steps (starter drill, some intermediate size grabbed at random, 3/8″ because I wasn’t sure how sloppy I was being, then 25/64″) — Kingpins are 3/8, and it should slide freely, so a V letter drill would probably be technically correct, but I’ve never contrived an excuse to own a letter drill set, and was free-handing it with pliers and a handheld drill anyway, so 25/64. I then followed my scribe line with a coarse sanding drum chucked into a rotary tool, and fitted/finished it with a finer sanding drum. I’ve checked on it a couple times as I fiddle with the configuration, and it seems to be holding up and doing its job.

If I ever get my Shapeoko into shape for this sort of thing I should be able to punch out some nice precision parts for this on it.

On the RTS, I clipped the wings a bit with a file, as apparently the wings will chew up the pivot cup if you don’t. I then polished out the file marks and the whole pivot pin on both trucks with some tripoli compound and a felt wheel chucked up in a rotary tool.

Inital_LDP_Setup_md

At the moment I have the Bennett wedged to +10°, with Green and Yellow tall Reflex barrels, and the RTS at -7° with some blue Khiro barrels I had around, both stacked on top of 3/4″ of risers to keep it from biting – gives a ~5″ ride height, which is not ideal.

I built up speed by pumping the first time I stepped on this thing (and then wheelbit, got some road rash on my elbow, installed some more risers, and accelerated again without the painful sudden deceleration). I’m still clumsy and slow pumping, and I’m sure the setup can be improved, but it feels wild, and the dedicated trucks make a world of difference.

Posted in DIY, Entertainment, General, Objects | Leave a comment

EDC 2013

I made an EDC post back in 2009 that is now woefully out of date. I’ve had the little pen case thing I carry come up a couple times recently, as people are more in to this sort of thing now, and thought I should update.

EDC2013

A – Belt, 1:00- Generic suitably sized phone holster, with clearance for the headphone jack cut out.
B – In the holster – T-Mobile MyTouch 4G Slide (AKA HTC Doubleshot), currently running a recent unofficial CM9 build. Detailed impressions here.
C – Wrist – My over-decade-old Fossil Blue AM-3314. It’s a dual face (analog/digital), and makes a good grounding strap.
D – Clipped in to right front pocket – Keys, on a snap-hook. RFID fob for the office.
E – Left Front Pocket – Wallet. Leather, with card slots, and an integrated coin pouch.
F – Right Front Pocket – Self-made pocket organizer, holds Black, Blue and Red 0.5mm Uniball Vision Elites, 0.7MM mechanical pencil, Flash drive, and Chap stick. Discussed below.
G – Belt, 5:00 – Leatherman Wingman. Much lighter/thinner than a Wave, particularly since it clips on directly instead of needing a sheath. Not as well made, and the screwdrivers are way worse, but the smaller/lighter/cheaper (I’ve lost/destroyed two Wingmen in the last couple years) makes up for it.
H – Right Cargo Pocket – A pair of non-isolating earbuds (safe for wearing while walking). The current pair are Sennheiser MX300s.
I – Left Cargo Pocket – ThruNite T10 Flashlight. 1xAA, three mode (Hi/Md/Lo) with NO stupid blinking modes. Detailed impression here.
J – Right Cargo Pocket – A couple of spare snagless hairbands.

The major changes are that I’ve downsized my multitool and consolidated my ubiquitous computing device. I’ve also stopped regularly ruining cheap belts and started wearing a 5.11 1.5-Inch TDU Belt, which is thus far impervious to damage or problematic wear.

The interesting bit is, as always, the custom part. The current version of my pen case is this thing:
Pencase2013

It’s getting a little bit worn, and shows some minor design issues, but has been riding around in my pocket doing its job for several years now. The primary issue with this one is that every layer of material has a seam along the bottom, which allows the pencil point to escape through the stitching. When eventually I get around to replacing it, I think I’ll make the lower piece out of a different material (thin split leather?) and wrap it so there is a fold at the bottom and stitches up the sides, the current mid-weight upholstery fabric is otherwise adequate (light, inexpensive, and non-abrasive). I never made a proper pattern, just mocked it in paper then cut fabric to match, so there will be some work in replicating.

This would feel totally ridiculous if it weren’t so entertaining to read these from other people.

Posted in DIY, General, Navel Gazing, Objects | Tagged | Leave a comment

Adventures in 3D Printing

The MakerGear M2 3D printer the KAOS lab ordered arrived last week. I am thoroughly impressed with the machine and how little fussing has been required to get decent prints out of it.

I’ve been pushing annotated pictures of our adventures with the M2 to a G+ album, because the auto-upload from my phone is too good to give up, even if the G+ album manager sucks. Take a look to get a taste of our massive new distraction.

Posted in Computers, DIY, Electronics, Entertainment, General, Objects, School | Tagged , , | Leave a comment