
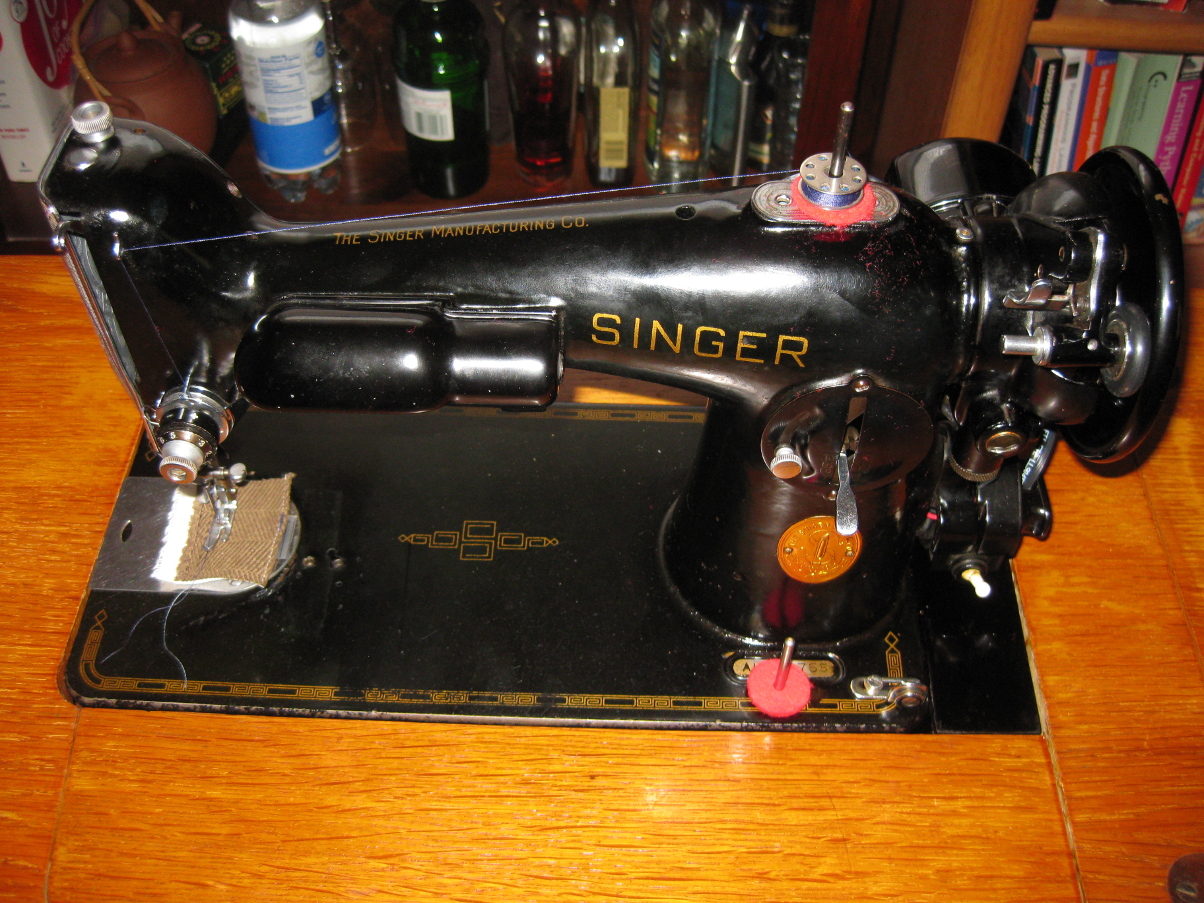
I wrote about this machine once before a few years ago, but only brought it down to Lexington to work on it at the beginning of July. I’ve had a delightful time cleaning restoring it over the last couple weeks, and just wanted to post some pictures and musings. I did have it correctly identified before – it is a 1947 Singer 201-2, in good mechanical and OK cosmetic condition. The machine’s story from the family has settled on it being my great grandmother’s machine down the matrilineal line, but I don’t know if they were the original owner, or what exactly has happened to it over the last couple decades. My grandmother noted that she remembered her mother doing upholstery work on it, and my mother remembers using it as a child, and it was in my grandmother’s basement three years ago. Descriptions follow pictures below.
Cleaning
-
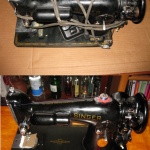
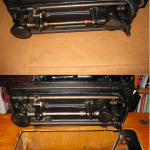
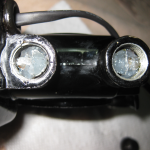
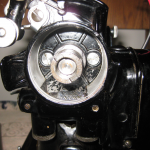
- The Classic user’s-eye before/after picture. Note the 201-2 distinct front light.
-
- This 201 has the older style scrollwork on the plates. They shined up nicely.
-

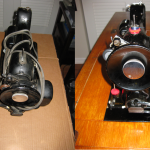
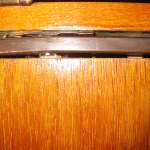
- Before/After view from the rear of the machine.
-
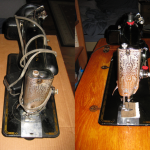
- Before/After from behind the handwheel. Note the new wiring.
-
- Underside of the machine. The feed rods didn’t shine up, but pretty much everything else did.
The first task was cleaning. There was various grime, old dead lubricants, textile fluff, and other expected sewing machine crud built up, and it had to go. The cleaning process also provided a good chance to inspect the machine thoroughly inside and out, to find out if there were any problems or replacement parts I needed to address.
I tested a couple solvents (Limonene, Lighter Fluid, Isopropanol, etc.) on the finish and oil residue, and Isopropanol seemed to do the best job of removing the defunct oil without threatening the finish. I’ve heard some of the lacquers used on old sewing machines come right off in alcohols, so fair warning to others. The officially recommended solvent is Kerosene, which I didn’t have in my apartment, and didn’t particularly want to, so it’s nice that things worked out.
I did one slightly odd thing that seems to be frowned upon by a lot of sewing machine folk – I used an antioxidant gun/tool oil on the non-working parts of the machine (shafts and non-contact faces of parts and whatnot), figuring the non-gumming demands are about the same, and putting a nice preservative layer on the metal surfaces should help it last another half century. I don’t see any sign that it is discoloring or affecting running properties, so I’m tentatively calling it a good move. The working parts are all oiled with Teflon-bearing Tri-Flow “Superior Lubricant” oil.
Wiring and Motor
-
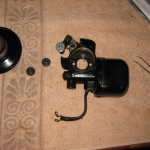
- The pulled motor assembly, ready for work.
-
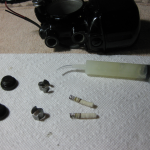
- Usually when lubricants look like that, they need to be replaced. This is no exception.
-
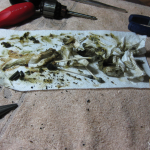
- This came out of the motor assembly.
-
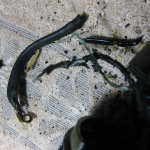
- This is why the motor wiring had to be replaced. Crispy.
-
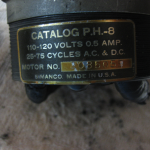
- The EE/Manufacturing nerd in me is excited that Singer made their own motors. 0.5A@120V isn’t that much considering how powerful the machine feels.
-
- Mediocre solder joints to the motor tails.
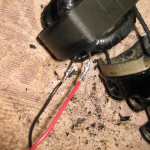
-
- Fresh wires, sloppy underwriter’s knot, and heat-shrink.
-
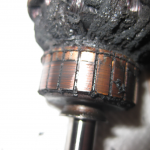
- The commutator is filthy. You can see some of the sticky carbon buildup on the windings.
-

- Pick, Wipe, and Rub the gunk off the commutator.
-
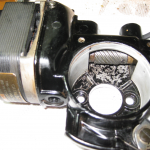
- Clean motor assembly. Most pictures I’ve seen don’t have any finish inside the casing, mine does.
-
- Preparing to grease the motor.
-
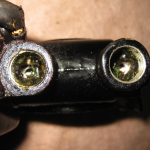
- Grease wick sockets packed with fresh clean petroleum jelly.
-
- The reattached motor assembly. Just a dab of clean, new grease on the worm.
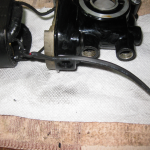
-
- Picture is while I was fitting, I failed to take any later. It shows all the critical parts, including the underwriter’s knot and the neat grooved nuts.
-
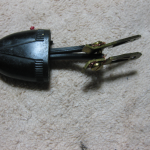
- Standard un-grounded wall plug, a little plastic plug goes in between the prongs and locks everything into place.
-
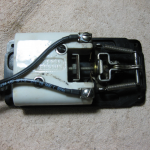
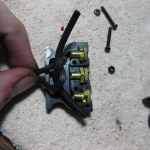
- The inside of the spring-loaded carbon pile foot controller. Fresh wires, gunk blown out, good for a couple more decades.
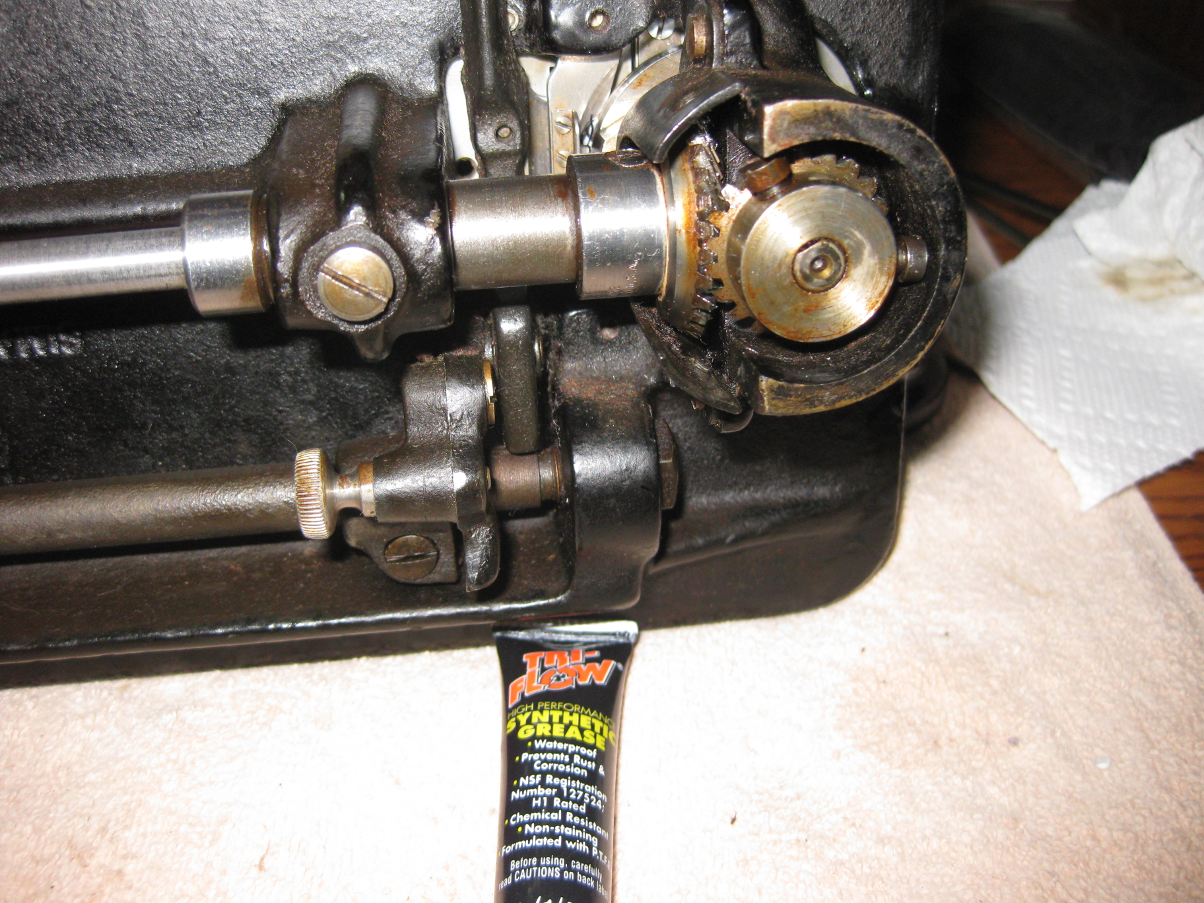
Lower Gear assembly, tri-flow grease.
I applied a small amount of the widely recommended Tri-Flow grease into the lower gears (Which I didn’t disassemble for more than surface cleaning, I didn’t want to re-time the whole machine), and it is running quiet and smooth that way, so it seems to be suitable. It is interesting to note that the gear train is all metal except for the worm gear (not the worm, the gear that mates with the worm) in the handwheel that interfaces between the motor and machine, which is an early composite called Textolite that General Electric started manufacturing in the 1930s. It was apparently primarily used in counter-tops, but makes a strong, quiet composite gear. I’ve waded through a lot of pictures and discussion on old sewing machines and can’t say I’ve ever seen or heard of a broken one, just people fretting that it might break.
Cabinet
-
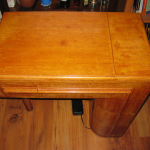
- The Singer #42 “Deco” cabinet is really pretty handsome when closed.
-
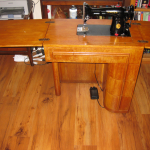
- Also when open. It folds out into a fairly expansive work-space.
-
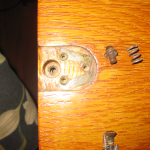
- This appears to be an incomplete push-button release mechanism for the swingarm.
-
- The closed rear view of the leaf support swingarm. I’m pretty sure that plastic shim isn’t an OEM part.
I just rubbed the cabinet down with some wood furniture cleaner and did some general cleaning and adjustment. However:
- I found all sorts of pins and thread bits under the drawers. I also found the missing last pin for the (probably not OEM) bobbin rack in the top drawer under one of them, which is nice.
- Someone messed with the finish relatively recently. It looks like there is a slightly sloppy layer of modern urethane-type finish on top of whatever the veneer was originally finished with, without a sanding job. It isn’t particularly pretty, and there is a peeling spot in the middle of the rear panel. I’m trying to avoid dealing with that.
- My swing arm support for the leaf has to be flipped up and out by hand. The springload gets it into position once lifted, but the little release button looking thing in the back hinge not only doesn’t deploy the arm, but the pieces that are there could never work. There does seem to be a shim washer in the back assembly, and another distinctly aftermarket looking washer in the little felted foot/latch, so I’m assuming a piece of the mechanism is lost to the ages. Unfortunately, I can’t find a picture of an intact one to clone/replace it from.
- The lift plate (the little black spring-loaded plate behind the machine column in the cabinet) wasn’t deploying flush without encouragement. It turns out you can just take out the top drawer, loosen the nut, build some tension with the big honking iron handwheel, then re-tighten the nut to adjust that. The nut for adjusting the lift plate tension is almost exactly 15mm, which I suspect means it is really 19/32″, one of those delightful “What the fuck were they thinking?” fractional sizes that has thankfully fallen out of widespread use. It sadly doesn’t seem to want to stay tight, I may need to adjust the spring with some pliers.
- I’m not precisely sure how the wires are supposed to be routed in this thing. Since the power cord sticks up, I have it clear of the machine. I routed the motor controller wire through the little hole in the flip-up plate.
Mistakes
The biggest thing I did wrong was not using hollow-ground screwdrivers. Everyone tells you you should, I managed to nick up the slots on a couple screws even being careful with my usual taper-points, and it isn’t the first time I’ve had trouble with that on a project. I sucked it up and ordered a decent set of hollow-ground bits from Chapman for around $40, but it hasn’t arrived yet.
I found out looking at someone else’s 201 restore log that there is supposed to be an oiling felt in the presser regulating thumb screw. There was no sign of one when I took it apart, and I couldn’t find it in either the lists of parts or in any modern vendor’s parts offerings. It is mentioned in the adjuster’s manual, and seems like a good idea, so I think I will just cut out a suitably sized chunk of craft store felt product, douse it in oil, and shove it in there.
I didn’t think terribly carefully about how this thing fits into my tiny apartment when I brought it down. Because the cabinet is quite directional with the leaves, and sucks to move with the (~30lb) head installed, I need to scoot some furniture around to get it usable and not in the middle of the floor.
Conclusions
Old sewing machines are the best sort of hobby: mechanically satisfying, good community, reasonably inexpensive, historically interesting, and less likely to result in personal injury than any similar hobby. If I ever get a chance I’d love to take on a really trashed old Singer (maybe a 221) for a ground-up rebuild – I’ve looked at other people’s project machines and it seems like fun. Most of the hobbies I enjoy fall under the “Making things that make things” umbrella, and these are right in line.
Furthermore, 201-2s are particularly awesome machines. They use a horizontal rotary hook, which makes beautiful stitches and is incredibly smooth – there is basically no mass moving out of the axis or suddenly accelerating to make the machine buck (A.B. Wilson doesn’t get enough credit – he designed and patented both the rotary hook and the 4-motion feed that most good machines use… in 1851 and 1852 respectively). They’re driven through a metal gear-train (no belts whatsoever), which will last forever and provide enough power to sew through pretty much anything that fits under the presser foot. It isn’t the most practical object I’ve ever owned, but I’ve already done some small projects and mending on it, and it is very satisfying, both historically and mechanically. I’m still [re]learning some technique, both because I haven’t done much sewing lately, and more specific things like how to use the various attachments for this era of machine.
Resources
- Instructions for using Singer Electric Sewing Machine (P.H. Built-on motor) 201-2 (local mirror, PDF) – This is the standard user’s manual for the 201-2 and it’s various attachments. Enough detail unless something needs serious work. Singer/SVP has an Archive of original documentation, from the era when the included documentation was useful.
- Adjuster’s Manual for Singer Machines 201-1, 201-2, 201-3, 201-4 and 1200-1 (local mirror, PDF) – This is the official service manual for 201 class machines, it took some google-foo and patience to obtain a copy, despite being referenced all over the place.
- Sew-Classic – This is where I got most of my parts supplies, they are very reasonably priced and stock things I can’t find anywhere else. The product pages and attached blog are full of good advice.
- Vintage Singer Sewing Machine Blog (VSSMB) – Nicholas Rain Noe’s excellent Vintage Singer Blog. Especially for the detailed motor-rewiring documentation above, and accurate documentation for modern replacement parts (wire gauges, connector sizes, etc.).
- Old Singer Sewing Machine Blog – Sid and Elise’s (now discontinued, but being maintained by Fargosmom) Vintage Singer Blog. Lots of useful information, particularly in terms of modern updates coupled with original Singer documentation.
- My Sewing Machine Obsession – Elizabeth sharing her stories of sewing machine collection and repair.
- My Sewing Machine Addiction – Elle Dubya’s project log about restoring a trashed 201-2. Excellent pictures of the innards and such.
- April 1930s – This is primarily a shop specializing in good condition, beautifully restored, and thus expensive vintage parts and notions to do with 221/222 machines, but their part number information and use examples are helpful for all low-shank machines.

THANK YOU! for posting the link to the adjuster’s manual. This is the only place I’ve found it, and I am loving tinkering with the 201-2 I’ve acquired. I found the other links you’ve listed above and rebuilt my motor too with the great tutorials on the Vintage Singer Sewing Machine Blog. Another good one to look at is http://theprojectlady.blogspot.com . She helped me get the top tension disc apart, fixed, and back together. I am green with envy over your cabinet!
Hi Paul,
Thanks for posting your 201 restoration. I’ve been researching gear grease for replacement and there are so many questions unanswered about petroleum jelly. You have used it so I want to know if you are satisfied with it? Any downsides to using it that you know of?
You are the first person I’ve seen that has combined OEM with vintage sewing machine parts! Made me chuckle a little bit from my days in the computer industry. Thanks so much. Your work looks great!
Cathy
I haven’t had any problem using petroleum jelly in the drive assembly, last time I checked it seemed to be staying on the gears, not discoloring or denaturing / picking up worn off material / dissolving anything, and I’m not getting any suspicious noises.
I’m a computer engineer, sometimes (read: all the time) the lingo leaks into my everyday speech.
Hi , Paul
Thanks , for your insight. I recently finished cleaning up my great grandmothers ,
Singer 127.
I ‘m awaiting shipment of a Singer 201k potted motor with the knee control on the cabinet. A friend of mine told me that I should have chosen a belt drive because of
the “dreaded” fiber gear. I wasn’t aware that there was this weak link hiding in this Black Iron Lady. Your article , reassured to some extent , that it isn’t that bad.
However , in the event that this fiber gear fails , what would you suggest.
. From what I understand , replacement gears are not manufactured anymore.
. Do we search for another 70 year old replacement?
. Do we attempt conversion to a belt – drive , or hand-crank ?
. In attempting the above conversion , we have to keep in mind that only the early 201-2 models have 4 holes on the body to accept the conversion parts .
What are your thoughts ?
Regards , Harry
Orthopedic Surgeon
For all the hand-wringing I’ve seen on the ‘net about the Textolite gear in 201-2s, I’ve never actually seen a documented failure, it’s some kind of layered fiber mats (not sure if the stuff Singer used was glass or otherwise) impregnated with a PF resin, which is incredibly tough stuff in the same vein as modern axial fiberglass composite construction.
Composite gears are awesome in terms of vibration isolation, so the machines are probably considerably quieter for having them over an all-metal gear-train, and belts do require regular maintenance and are prone to slipping when the machine loads up, so there is a service and power benefit to the gear drive.
If it did fail I’d be inclined to just watch ebay for a replacement.
Thank you for posting the Adjustor’s Manual link! I’ve tried to find a version I can print out and lay beside the machine while I work, with no success…now maybe I can figure out why the handwheel doesn’t move. It’s not locked up tight, but I can only move it back and forth a bit. The needle and feed dogs do move a bit as I move the handwheel.
I just picked up the 1951 version of the 201-2, and the #42 cabinet, for $15. The machine is in very good shape, but the veneer on the cabinet is shot. I’m in the process of taking that off, to be sanded down and refinished, somehow. I’m having trouble getting the inside drawers out. There must be some kind of catch to hold the drawer on the rail, but I’ll be hanged, if I can see what it is. The top left drawer was a piece of cake, but will you PLEASE tell me how to remove the inside drawers? Thanks SO much!!!
Those drawers are tricky, they’ve got a spring catch accessed through a hole in the bottom of the drawer. Pull them forward until they stop, then push a screwdriver or something down through the hole near the back center of the drawer bottom to depress a steel leaf spring and pull it the rest of the way out. Someone else posted good pictures here
I have a 1953 202-2 singer I have had this since 2001 and never used it. I started sewing on it and was doing fine then it locked up on me. Can’t get it unlocked. The motor was working fine. I had oiled it before I started using it. Could you p,ease tell me what might be wrong with it. The bobbin holder won’t turn because the up and down mechinisium doesn’t work.
I have this 201-2 inside of the Cabinet 42. I just acquired in and brought it home from the shop after a $100 tune up, overhaul. When I plugged it in the machine started running at full speed and I can not get it off. Thank you for posting the manual which has led me to looking at the sewing motor controller which must be the source of the problem. I can send a photo of it and the foot pedal which is simply a rod extending out of the cabinet. ( I haven’t seen this in any photos of other Cabinet 42’s…
Naturally I am still waiting for a return call from the shop. Any advice? Thank you.
Controller is a Rod? Is it a knee controller? That setup usually came with a foot pedal.
I have some detail about the cabinet here and here
Great blog. Wonderful discussion of your 201 oddessy. As with some of your other readers I too have looked unsuccessfully for the 201 adjuster manual. But I have a 201K23 and wonder if there is a manual for it. Perhaps not as the 201 internals are supposed to be the same. If there is another adjuster manual, would you know where I might find it? Thanks!
I’ve never seen a 201K23 adjusters manual, though my understanding is that much of the internal apparatus is the same as a 201.
The trick to opening stubborn ancient screws without scratching or munging them is to get a tool called an impact screwdriver. With these tools, the screw head is placed in the slot ( or Phillips head), then the tool is hit with a hammer. I use a rubber hammer. The hammer impact simultaneously holds the screw driver tip to the slot, and the the converts much of the down force to unscrewing force. I have been using a cheap one from harbor freight, with my own adapter using a older Stanley 4-in-one screwdriver that adapts its rather large tip size to the smaller tips typically used. I did find a nice small one one amazon from Japan, which I plan to buy but have not done so yet. Look for : Anex 1903-N Impact Screwdriver. Before I used this method, I had a lot of trouble with very tight screws. Now, I can open them without damaging them.
By the way, Last week I bought my first 201-2. I just started working on it today. I don’t think it was run in a very very long time. The grease in the bottom gears has hardened, and there appears to be no grease at all int the top bevel gear at top of its vertical drive shaft. At first it would hardly turn over. I scraped out the old grease and put in some high quality bicycle bottom bracket grease I had. I hope that works ok. I found that acetone works beautifully to remove the brown oil varnish such as that that covered main drive shaft at the bottom of the machine. I agree, this is a very inexpensive and satisfying hobby for those who enjoy fixing old machinery.
So glad I found you. I have 1947 201-2. Had it for 30 yrs plus. Never had any trouble with it, till now. Motor will run but needle won’t engage. I have looked several times to see how to change belt but there is no way for it’s all concealed.do you have video how to fix it ?
It is in cabinet and very heavy. Pleas advise. Thanks Sandy
There is no conceiled belt in the 201-2. It is gear driven.
Is this discussion still active? I’m the newly lucky owner of a craigslist Singer 201-2 exactly like the one I learned to sew on many years ago. I might have some questions soon.
(This is an interesting blog, btw)
Thanks.
Fran
I hope this is still active. I just got a 201-3 in a #40 cabinet. However, the machine seems to be a 201-2 (potted motor and front light). It is setup with knee control. I’m trying to take the machine out of the case and can’t figure out how to get the foot pedal out of the mounted device holding it. Any ideas?
If it is like the 15-91 & the featherweightD, it will slide out the side.
Great blog! I just came across my 1st 201-2 and I am looking into the proper lube for it. My I fill you in on Textolite? Textolite is a phenolic laminate much the same or similar to Micarta, Spauldite, and over at McMaster Carr what they call Garolite. It is layers and layers of cotton(canvas) and linens infused with phenolic resins and bonded in hot high pressure presses. It is not Bakelite which use amorphous fillers. Very machinable and good electrical resistance. It’s uses range from tool handles, electrical insulators, electrical boards to timing gears as in data processing equipment to engines. It’s very tough and as you found out makes for very quiet gear driven appliances. They are tough and wear resistant but abuse will chip them.