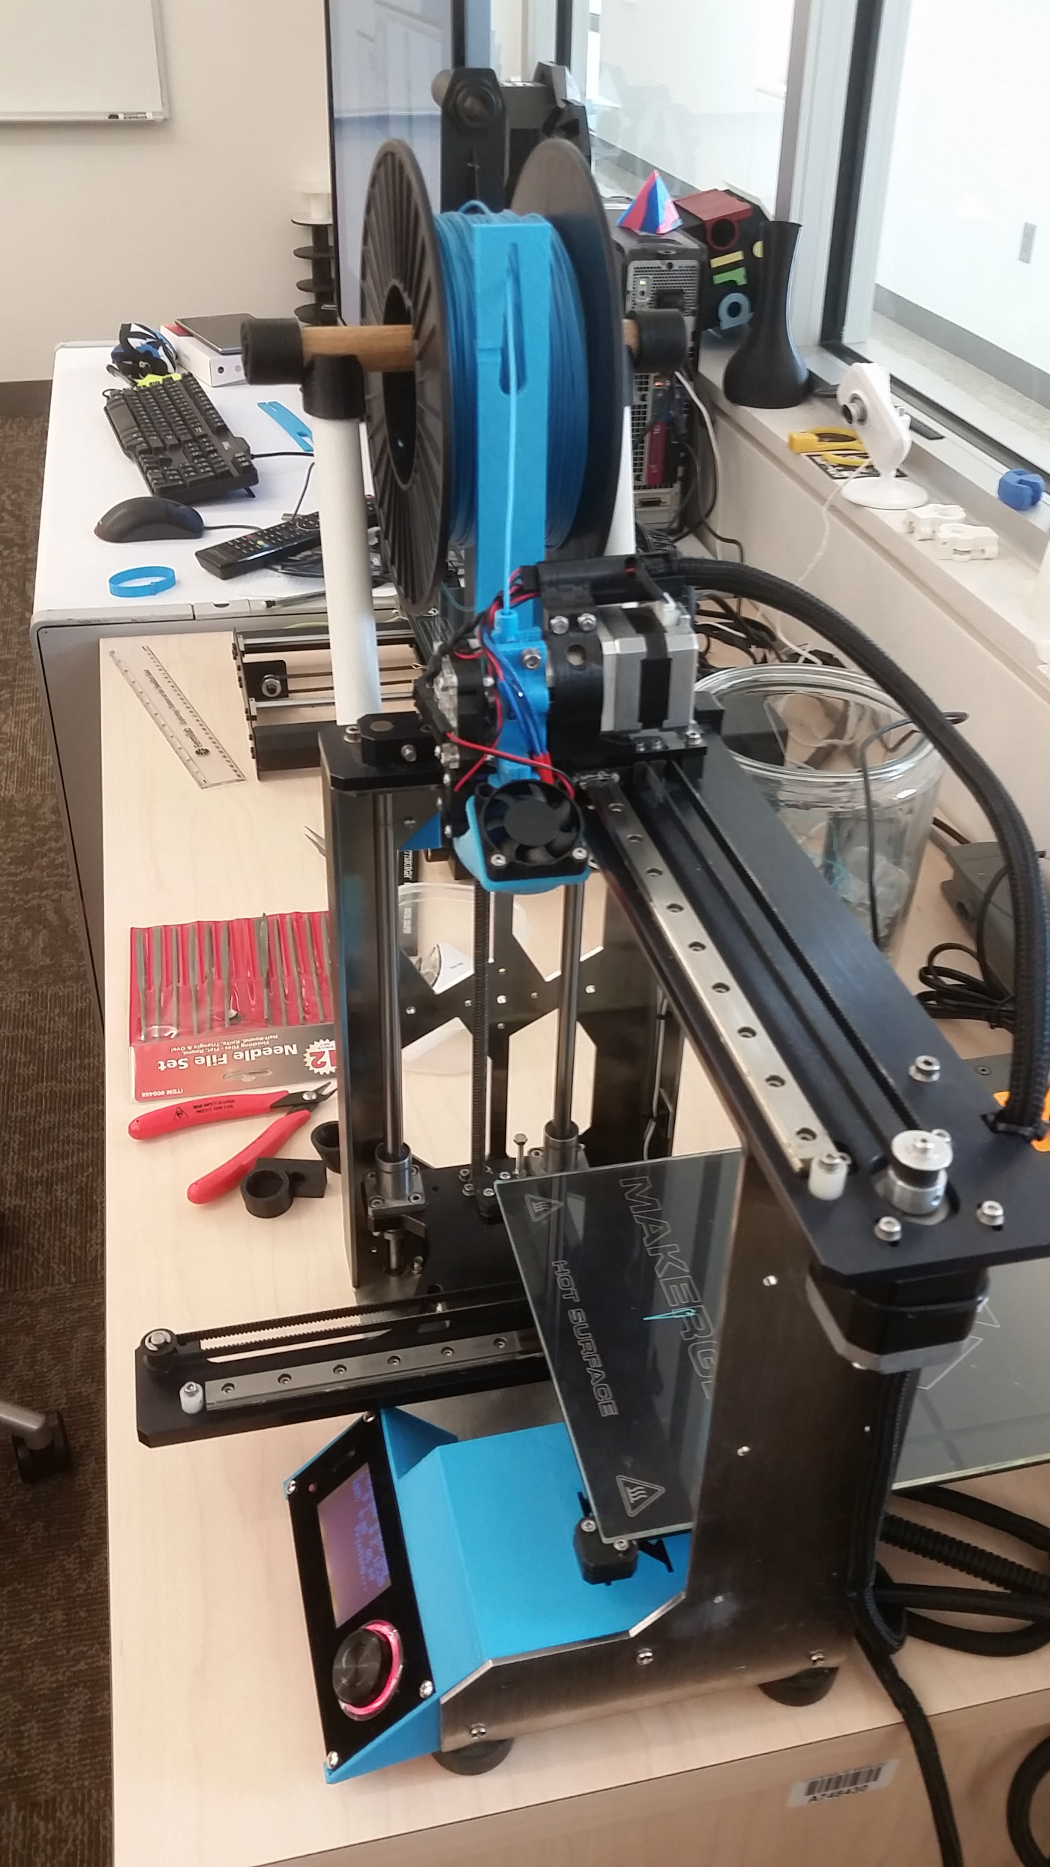
The lab Makergear M2’s heated bed power supply died a few weeks ago, so we decided it was time for a serious upgrade, and set out to equip it with basically the best parts currently on the market, as we’re convinced the M2’s mechanical construction is still about as good as it gets.
Our M2 was a very early M2 from early 2013, with a split-voltage 19v/12v power supply setup, was on its second RAMBo after the first one melted around some connectors (high-current 12V is not a good idea), and RAMBo #2 was already abused with an external transistor on a heatsink wired in to the bed heater. It was also on its second hotend after the first one failed catastrophically during a sensor-separation incident some years ago, and was running a mutant Makergear V3b w/ 12V cartridge custom ordered to suit our machine.
So, shopping list:
Plus a whole boatload of connectors. For reasons known only to themselves, Panucatt doesn’t (or at least didn’t at the time) actually document which kind(s) of connectors are on the board, or offer a wiring kit. Some measurement and educated dead-reckoning got us there, so for anyone else looking, it uses Molex KK connectors in 2.54mm with both keys and locking ramp, in 2,3,and 4 positions. Specifically:
- Motor (4x): 4 position, Molex p/n:0022013047 (Digikey)
- Endstops/Probes (4x): 3 position, Molex p/n:0022013037 (Digikey)
- Thermistors (2x): 2 position, Molex p/n:0008500114 (Digikey)
- Crimp pins for the above (>32x): Molex p/n:0008500114 (Digikey)
- Fan (2x): Standard 100mil pinheader, 3 positions. We used generic 3pos Dupont connectors from a Chinese kit.
I’d suggest buying at least one extra housing in each size, and a substantial number of extra crimp pins (They’re like a dime each in quantity, we bought 50 and had plenty to spare). I got a bit of a chuckle that they use 2.54mm molex KKs with locks and keys for everything except the fans, while standard PC fans use 3p molex KKs with locks and keys, but we’re running a 24V system so PC fans would be inappropriate anyway. I personally bought myself an Engineer PA-09 crimp tool because this crossed the line on crimp terminal projects where I’m willing to do it by futzing around with pliers.
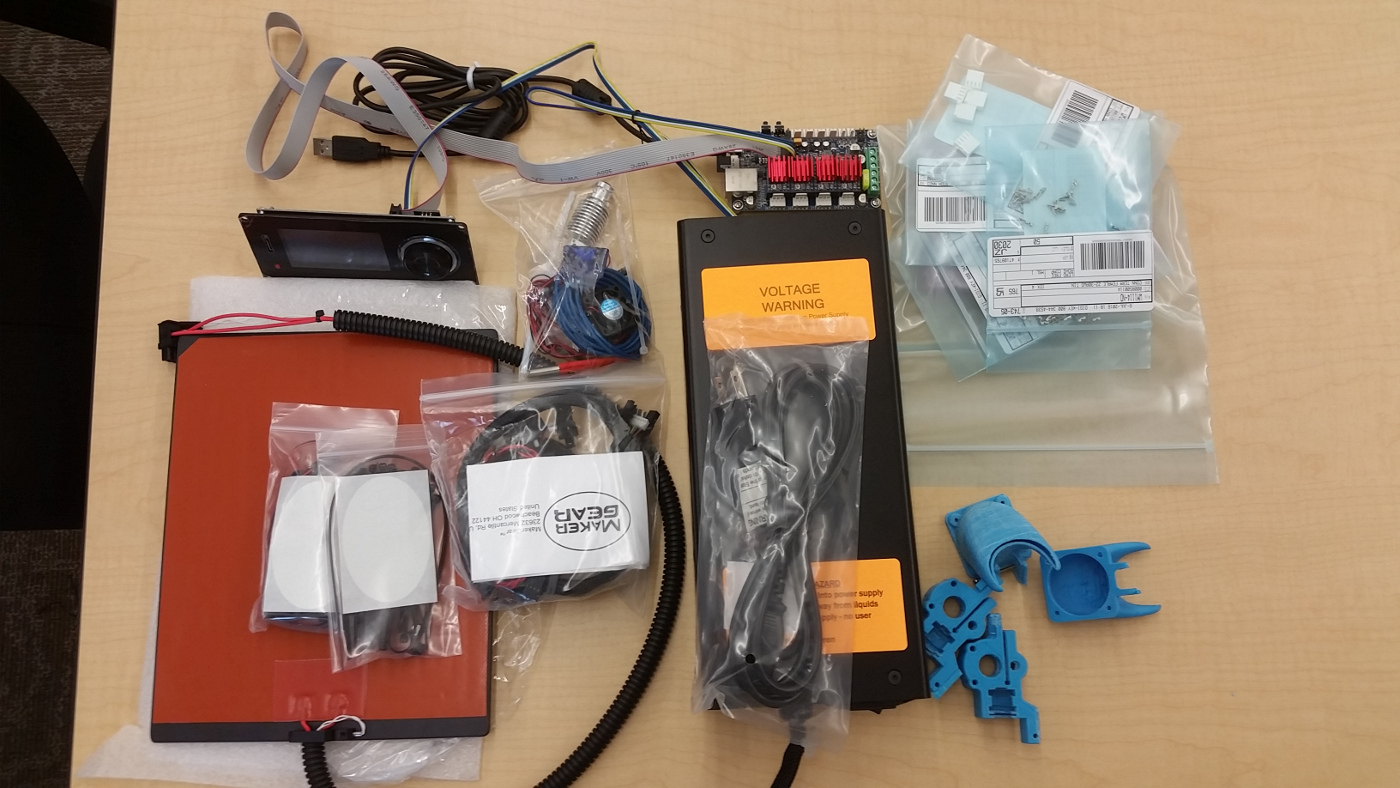
The parts for this little project could have bought us a second low end printer, but that wouldn’t have given us any interesting new capabilities (particularly since we already have a Wanhao i3), and the machine we ended up with is approximately as capable as any FDM printer on the market.
The Makergear specialty parts are lovely, and improved in various ways as compared to even the newer M2 the lab PI owns personally; the power supply is in a ridiculously nice metal case and has ferrule-tipped color coded wires, the new bed heater covers the aluminum spreader more fully, is constructed with a very nicely machined wire and thermistor bracket, and includes a semi-rigid split-loom to keep it clear. I built a couple slightly weird cables and did some aggressive polish and longevity tweaks, including putting ferrules on everything going into a screw terminal (I did it partially because I decided I wanted an excuse to own a ferrule crimper and assortment). Probably the weirdest bit is that all the fans have male 2pos Dupont connectors on them, and the always-on cooling fans around the head are connected via a Y cable that terminates in a 4-position female dupont wired +24,Gnd,+24,Gnd (Picture has the wires routed wrong).
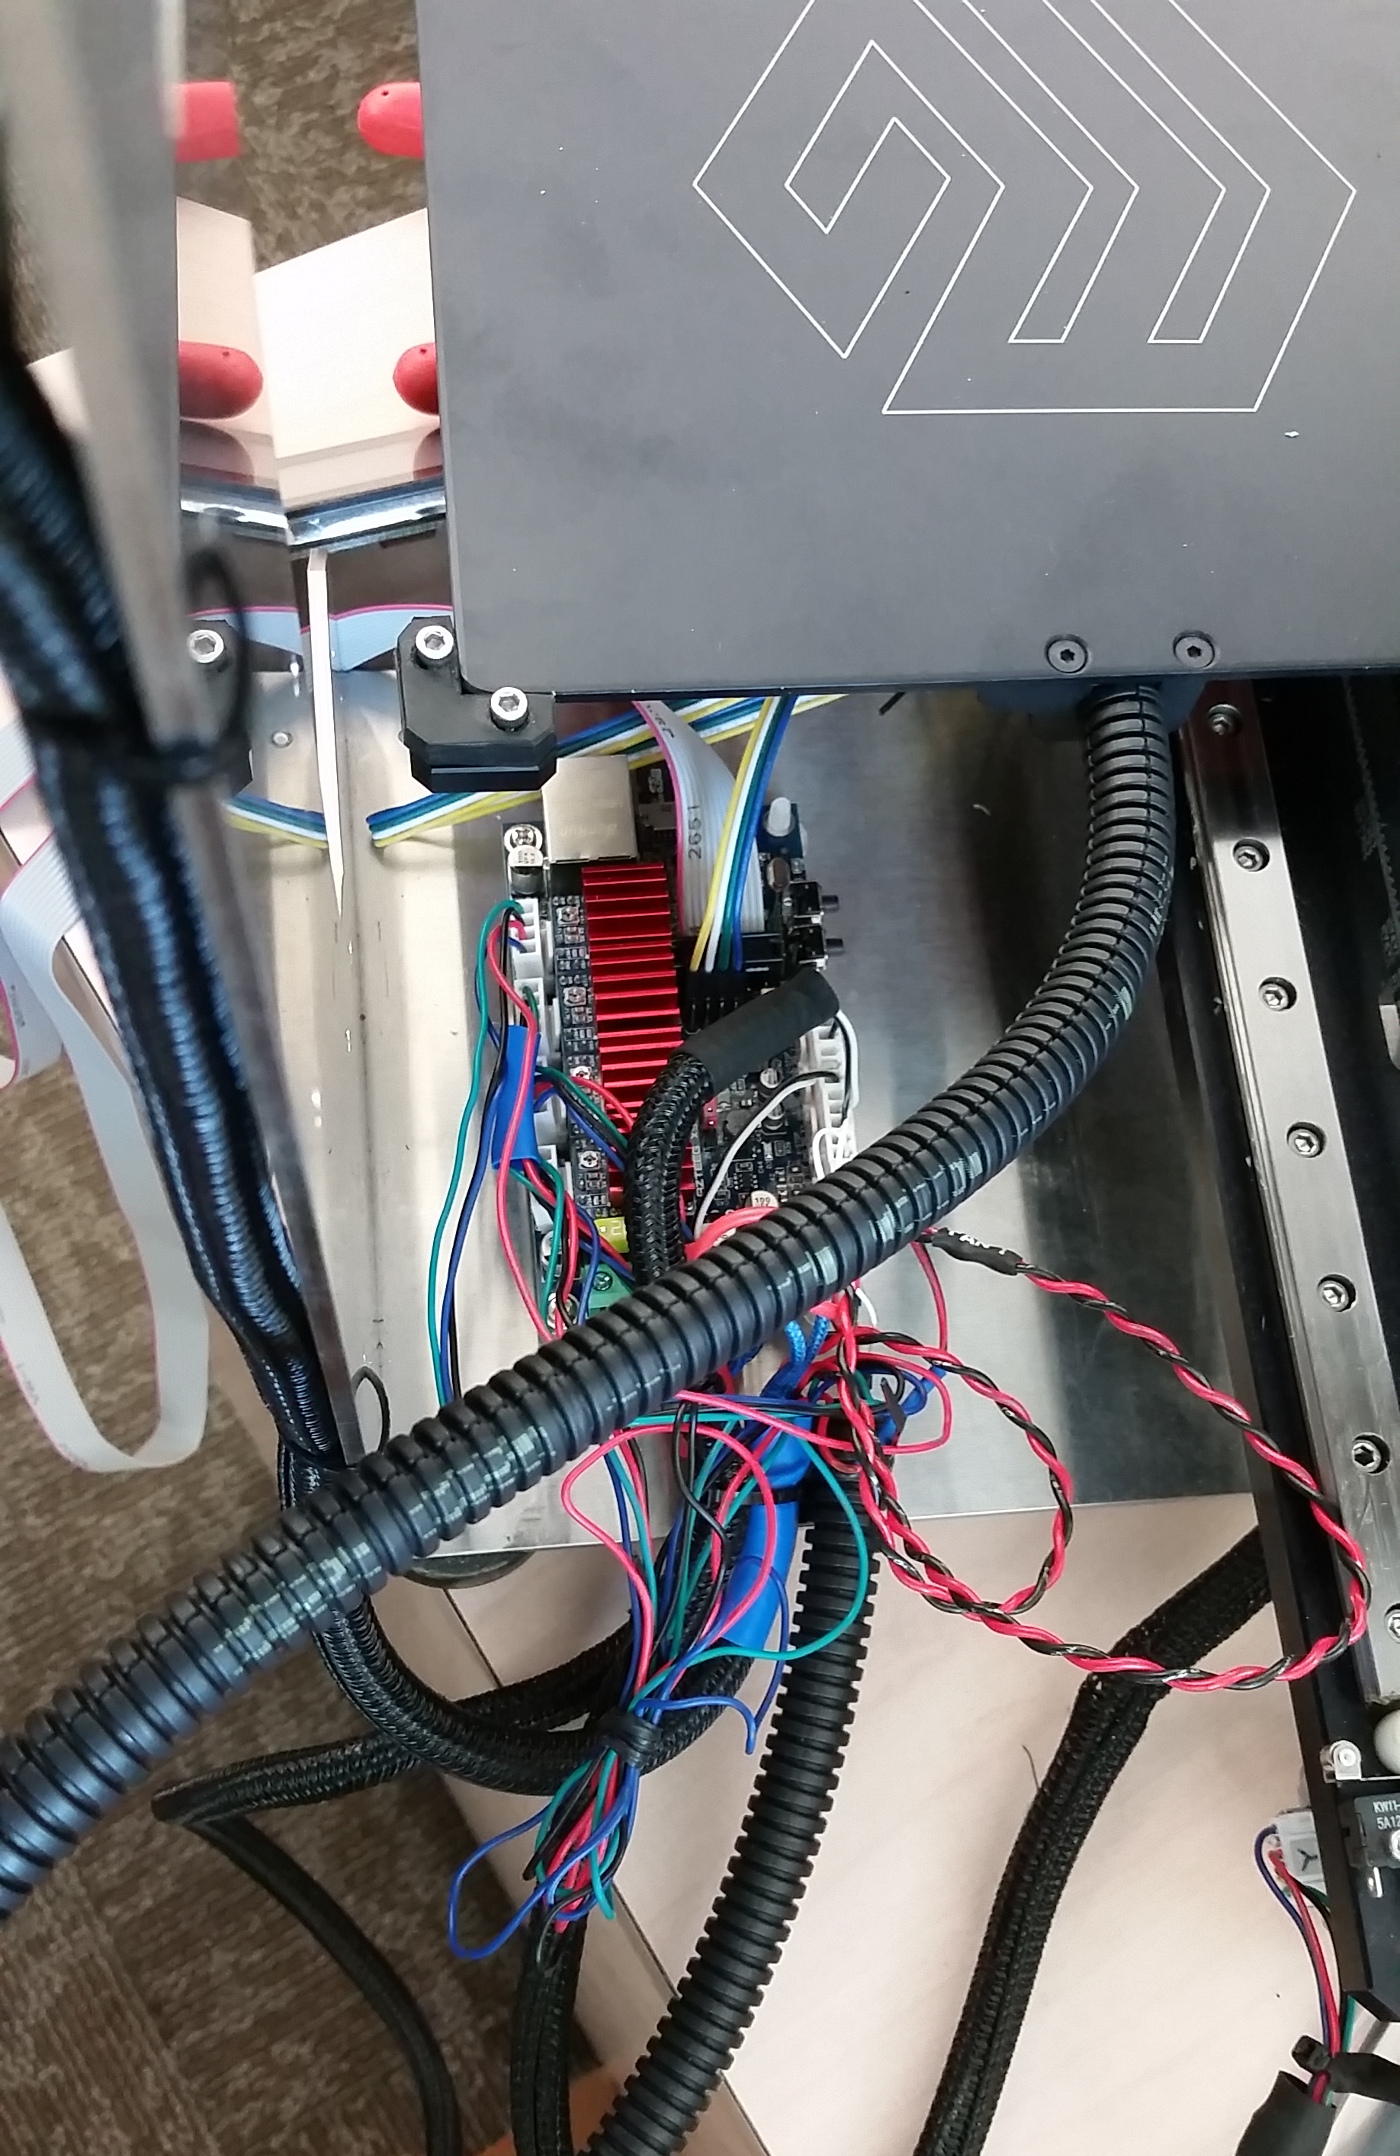
All the cabling then retreated into the awesome mesh split-loom wire guides Makergear uses, and went on in more or less in the same configuration as the original cabling, including the weird little ball of wire at the back of the frame.
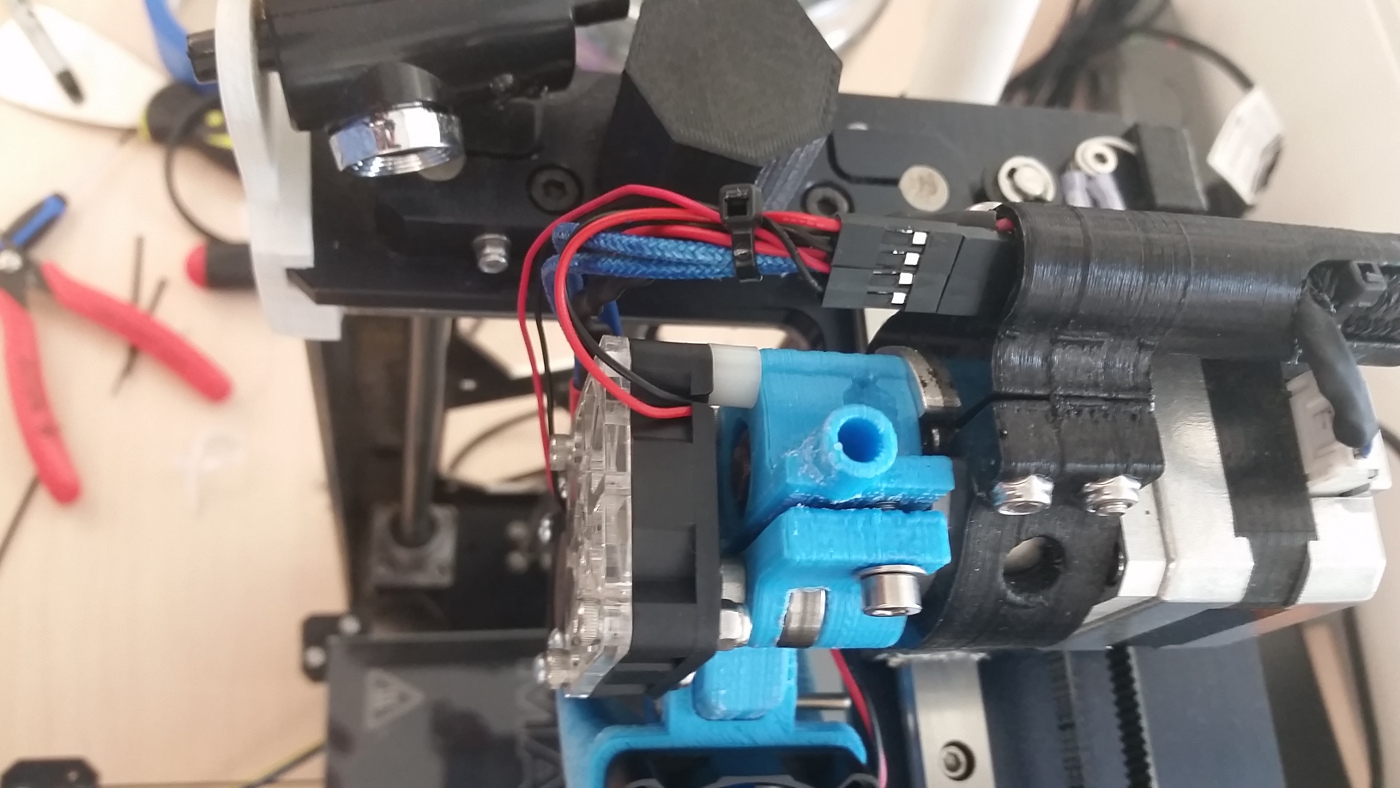
We also printed a number of parts for the upgrade, including a set of thingiverse user Neo Usagi’s E3D v6 40 mm Fan Duct and Extruder for MakerGear M2, which is an excellent design, though ours came out seriously over-tight and had to do a bit of grinding then perform the install with a vise – the dominant theory is that it was our fault for using 3 walls. Once fitted, it’s proven to be an excellent assembly with very good well-focused airflow and no tendency to bump into parts or the machine. The area around the head in this setup is extremely congested, and you must run the hot-end wires to the X+ side (the same side as the fan shroud mount) or they will hit the frame before the X endstop triggers, but once everything is situated it makes a nice package with no dangly bits. Even though it isn’t showing much noticeable difference in performance relative to late-model Makergear heads, I’m thoroughly impressed with the E3D hotend; the machining, the quality of the accessories in the kit, the efficacy of the heatbreak, the ease of assembly, everything is excellent, and in the mount we used, it only eats about 3mm of Z travel. They richly deserve their reputation.
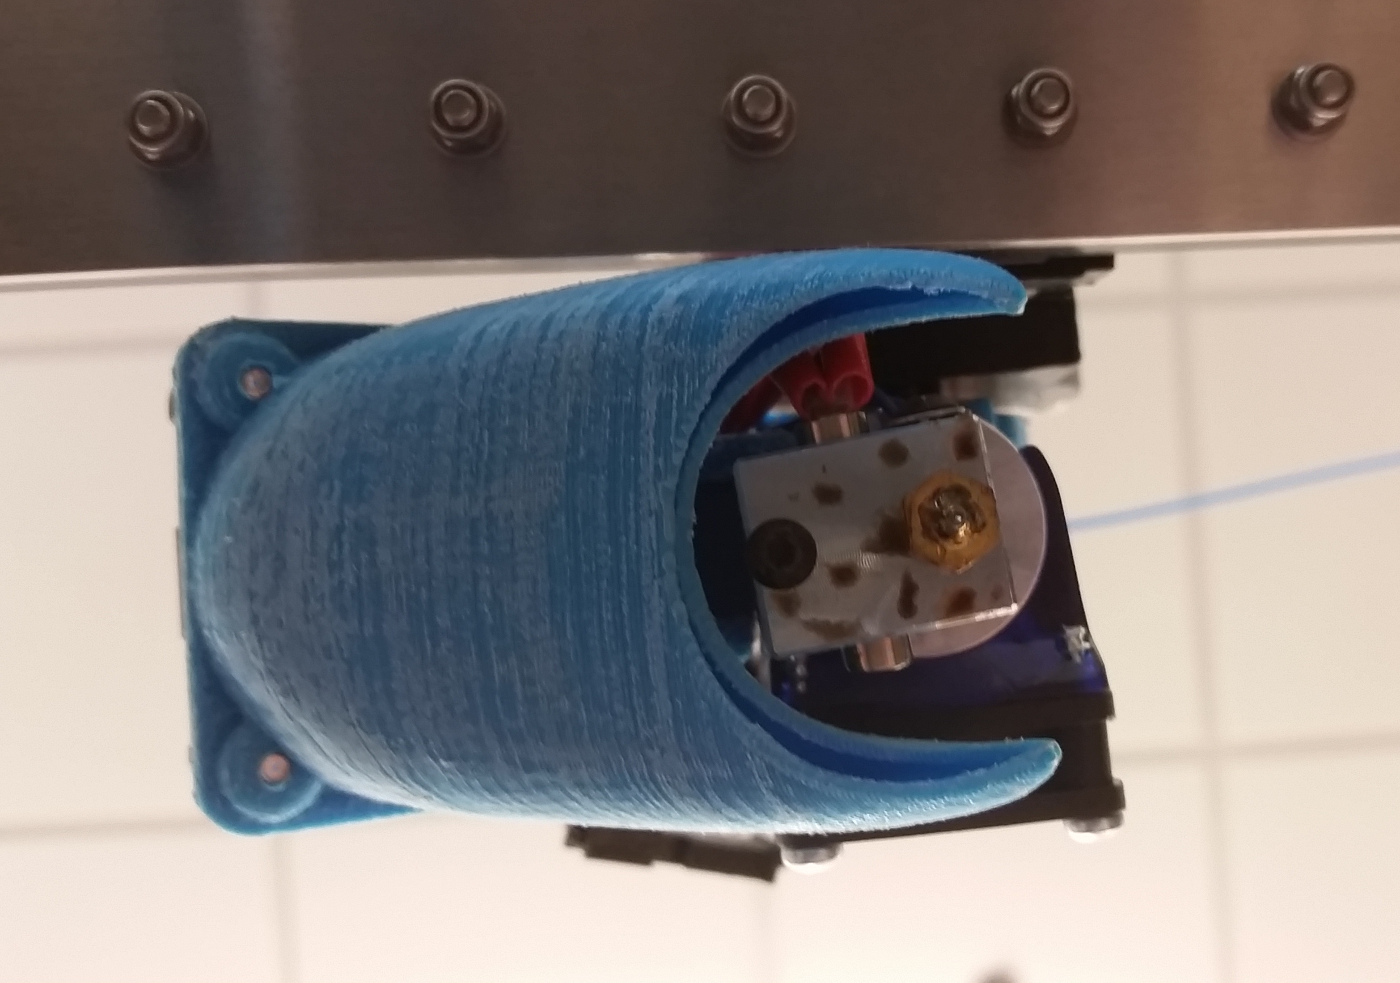
As for the X5 Mini, two of the Makergear original mounting holes are close enough (though not perfectly aligned) to mount the board in a reasonable way with a pair of standard brass threaded standoffs, and a pair of those little barbed plastic motherboard standoffs trimmed to size to prevent tilting, all taken from the lab’s vast collection of PC assembly hardware. Leaving it exposed didn’t seem like a good plan, and we were seeing a slightly uncomfortable amount of warming on the motor drivers, so it needed a case and fan shroud. To that end we designed our own cover/enclosure/fan duct/bracket for the X5 Mini V3 and Viki2 (visible in the header picture – it has a 24V 40mm fan facing the Z motor blowing into the case, powered directly from an extra pair of PSU taps), a more detailed post about which will probably appear on profhankd’s thingiverse page shortly. We did all the printed components for the upgrade in our new favorite material, MakerGeeks’ “Raptor” PLA, incidentally in blue.
Software-wise, I’m satisfied but not enthused by Smoothieware. We’re now running this config.txt, which assumes 32x microstepping on all axes and produces very smooth, quiet motion with a minimum of idle heating. The major tuning efforts are just in the heater PIDs and on the Z movement, as the M2 design tends to make terrible noises if the Z movement is outside of a very narrow velocity window.
I wanted to like Smoothieware a lot more, and it is working well enough for the most part, but it is frankly kind of a garbage fire once you start looking at the code. It’s “modular,” but in an entirely ad-hoc way, so the parts don’t interact in entirely reasonable ways (Ex: AFIK it is currently incapable of setting up a “prevent cold extrusion” behavior, and would take pretty substantial changes to make it able to), with random parser fragments spread throughout the code. It also fails silently on unknown configuration keys, so I wasted the better part of a day on the extruder not responding after I wrote extruder.head.module_enable instead of extruder.head.enable because I misunderstood their half-updated documentation from when they hacked it to support multiple extruders. It looks and smells like a Reprappy hacker/hobbyst “move fast and break things” software, which is fine, but is so much so that I really don’t have high hopes for it maturing into something survivable without a complete redesign. This does make me feel better about sticking with LinuxCNC for my latest personal CNC project (Which I will eventually get to writing up and posting…).
Is ridiculously quieter than even the 24V stock M2, prints nicely at 150mm/s in PLA, heats up almost as fast as you can get a file loaded up and sliced, and can do so more or less independent and minimally attended. From a working current-gen 24v M2, none of the changes we made are particularly substantial upgrades, but from it’s state before the improvement is spectacular.


