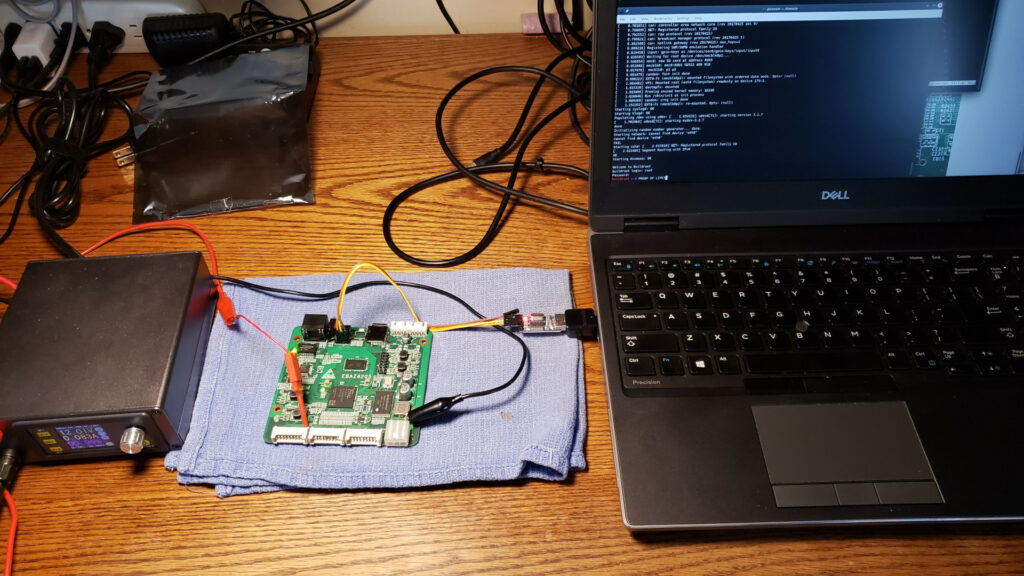
A not long ago there was somenoise in places I follow about Zynq FPGA boards surplussed from their role as controllers in retired cryptocurrency mining rigs, for way less than the price of even the bare FPGA SoC. I impulse bought one EBAZ4205 from “College Shop Store” on Aliexpress for $19.08 shipped to try them out, since it seems to to be the most common and documented flavor, and it showed up yesterday. Short version: they look awesome for the price.
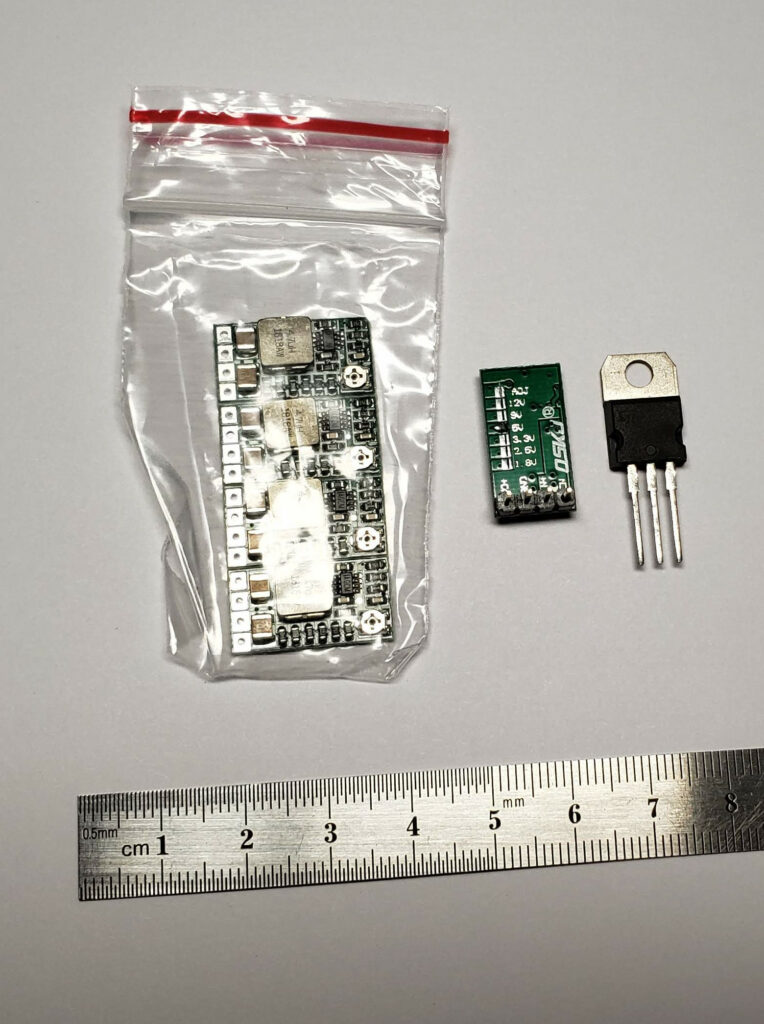
I needed some cheap little vregs recently and had run out of and/or lost all of my useful-value 780x linear parts, so I decided to look at what people in this century use.
I found some little buck boards roughly the size of a TO-220 package that looked exciting. These particular ones are QSKJ Mini DC-DC Buck Step Down Module model “QS-1205CME-3A”, Vendor page here, mine were 5pcs/$9 from Amazon.
Upon analysis they have serious issues with regulating under load, so the hunt for something decent continues, but the form-factor and advertised feature set are really compelling.
Pros:
High-efficiency high-frequency synchronous buck instead of a linear heater^H^H regulator.
Solder-jumpers for 1.8,2.5,3.3,5,9,12V or a default (fiddly, tiny) adjustment pot output so you only have to stock one device – one easy-to-cut trace to disable adjustable mode.
Tolerates 4.5-24V input as long as out < in or so.
Good stability to input voltage variation.
~0.25V drop-out.
Does appear to have a cutoff for over-current.
No perceptible ripple under various load conditions.
Cons:
Voltage regulation manages maybe 600mA at 5V before droop becomes unacceptable (<4.8v).
…and that makes it basically useless for most applications. Test data below the fold.
Maybe it could be resolved with appropriate external capacitors and/or offsetting the adjustable to regulate right at a known load or something, but not being drop-in really reduces their charm.
Anyone know of a similar offering that doesn’t suck at output regulation? (Rel: Anyone know if any of the low-end electronic loads are worthwhile? I’m not looking to spend real-lab-instrument money, but it’s come up often enough lately that I want to be able to dissipate a couple 10s of Watts through a at least stepwise-controllable resistive load).
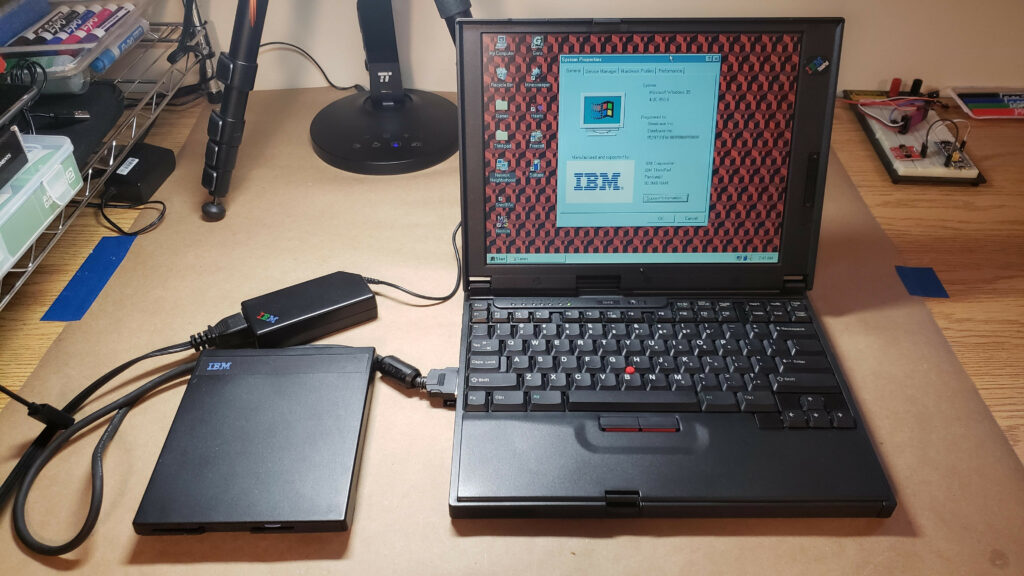
I’ve been idly looking for one of the mid-90s ThinkPads known to have perfect OpenStep/Rhapsody support for years as a fun collector piece, but been unwilling to pay eBay prices. The other week I scored a pristine IBM ThinkPad 560E for $20 in a Shopgoodwill auction, below is notes on getting it up and running, plus some relevant history and plans.
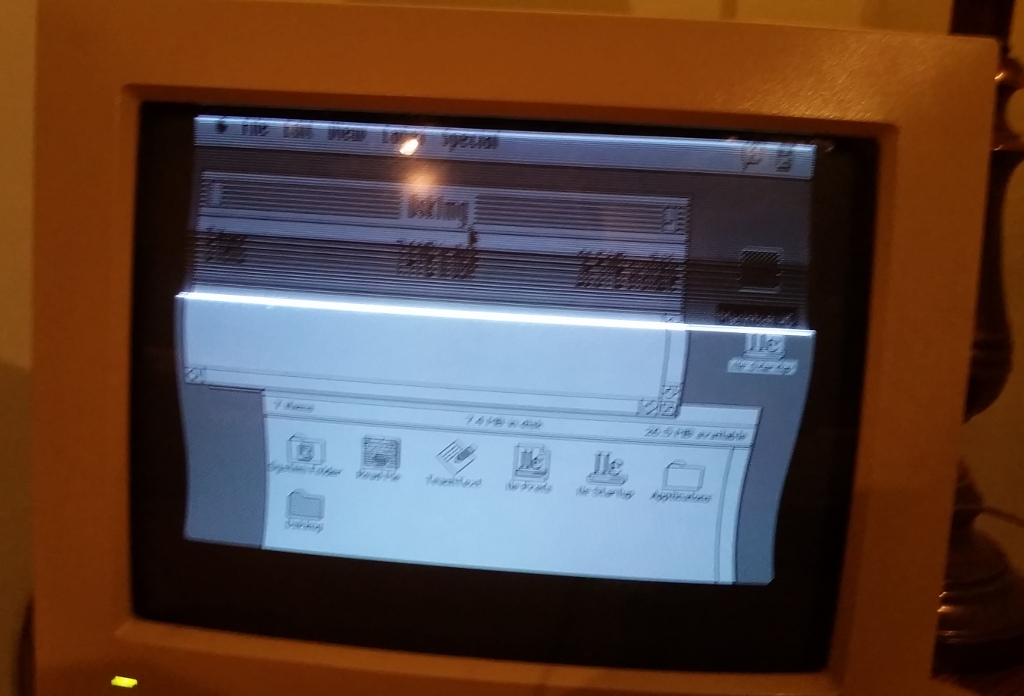
This post is a retro post on a retro topic – a repair I did in 2017 on a monitor made in 1991. I got a question about (probably) the same problem in another venue and realized I never put it online. I managed to dig up my pictures and notes, so there is useful information to be shared.
My 12″ RGB Display is getting sad.
The end of my (2016) post about Recapping my Macintosh LC I discovered that my matching Apple 12″ Macintosh RGB Monitor ( M1296 ) was going pear-shaped, and speculated that I’d need to recap it.
I had my dear old Macintosh SE out for a health check as I slowly extract my vintage computer collection from the (unconditioned) place I’ve been keeping it at my parents house to the basement of the place I’m renting. It had a couple interesting findings that seem worth putting online, including another floppy drive rebuild and a slightly elaborate fan replacement.
Why did a Banggood package I ordered on March 26 just appear in Bahrain on July 5, the same day it finally showed “Shipment picked up?” Did it just get packed into a container and loaded on whatever outgoing vessel … Continue reading →
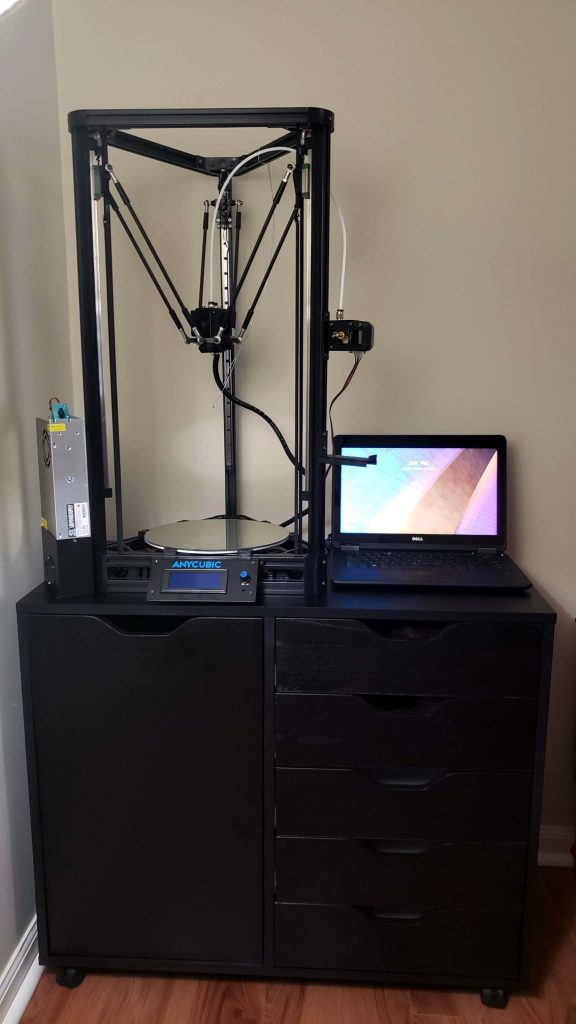
I’ve been working with a number of Anycubic Linear Kossel / Kossel Plus (whatever branding they’re using when you look) 3D printers for the last couple months, including one I bought personally. While I’m overall extremely pleased with them, there are a whole bunch of notes, fixes, and improvements I feel like should be collected somewhere.
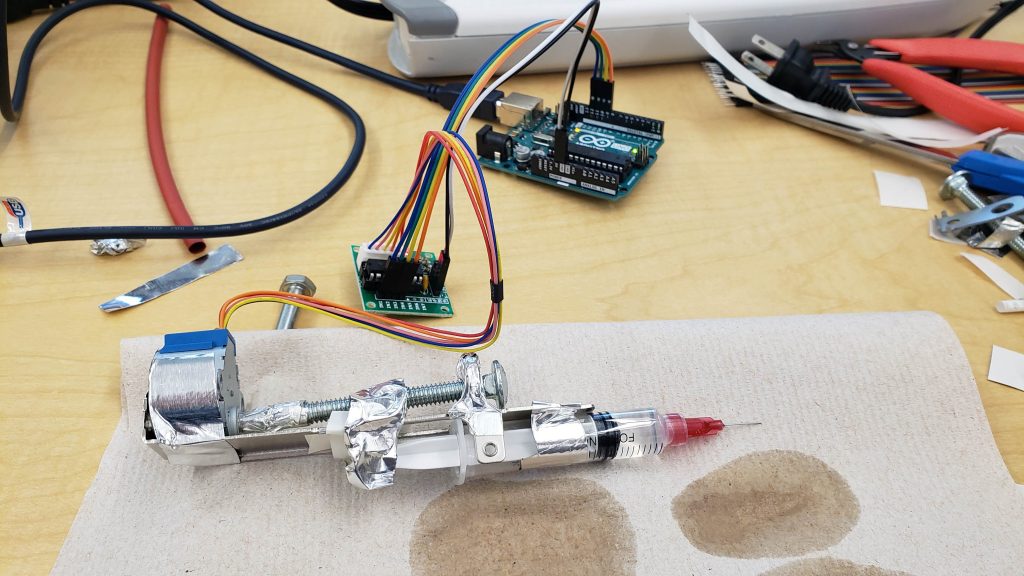
Scrapheap Challenge: The world’s worst syringe pump.
Or, three hours enjoyably lost to a visit from the bad idea fairy.
My PhD advisor and I were chatting in the lab today and had an idea that it would be interesting to try to drip/jet a bit of water onto just-extruded filament, ideally in small enough quantity that it phase changed and flashed off with all the excess energy, in order to allow printing unreasonable unsupported structures.
It unfortunately doesn’t look like it will be practical, but we got a PoC-grade implementation in a few hours and it seemed worth a quick write-up to document our experiment for the interwebz.
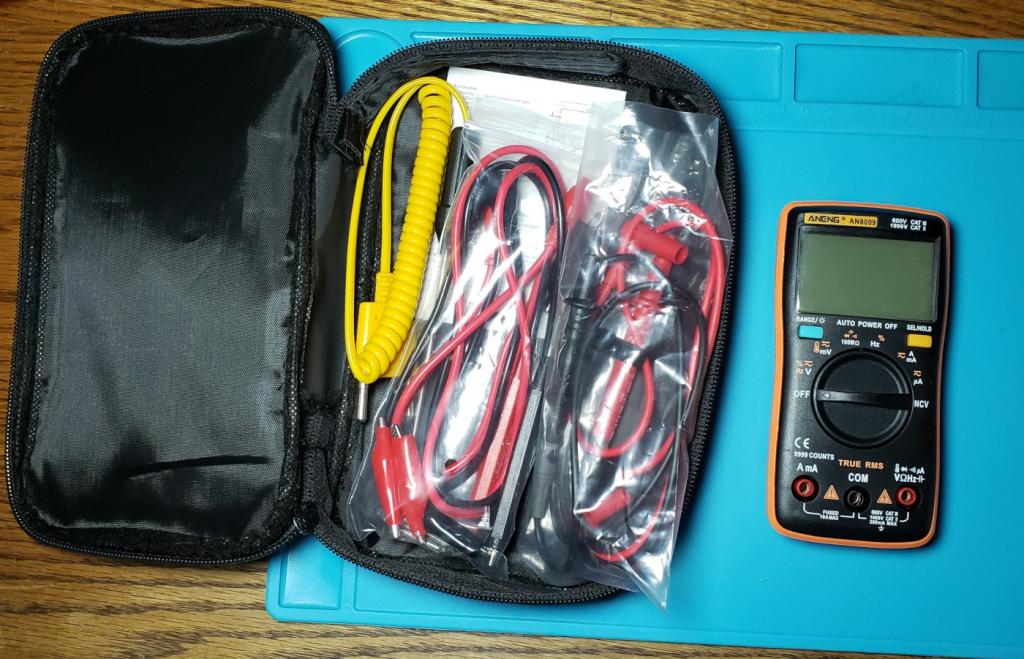
I just picked up an Aneng AN8009 DMM as an upgrade to the cheap, cheap (but surprisingly OK) Circuit Specialists branded MY-68 I’ve had as my home on-desk approxometer for ages. It’s a nice meter for $30ish, and can be readily hacked to improve its performance. I tend to point people to mid-range Uni-T DMMs when they asked for decent hobby meters, but now I might switch to one of these plus one of those little $10 Atmega328 based component testers cloned everywhere for ~$10 as basic electronics lab instruments.
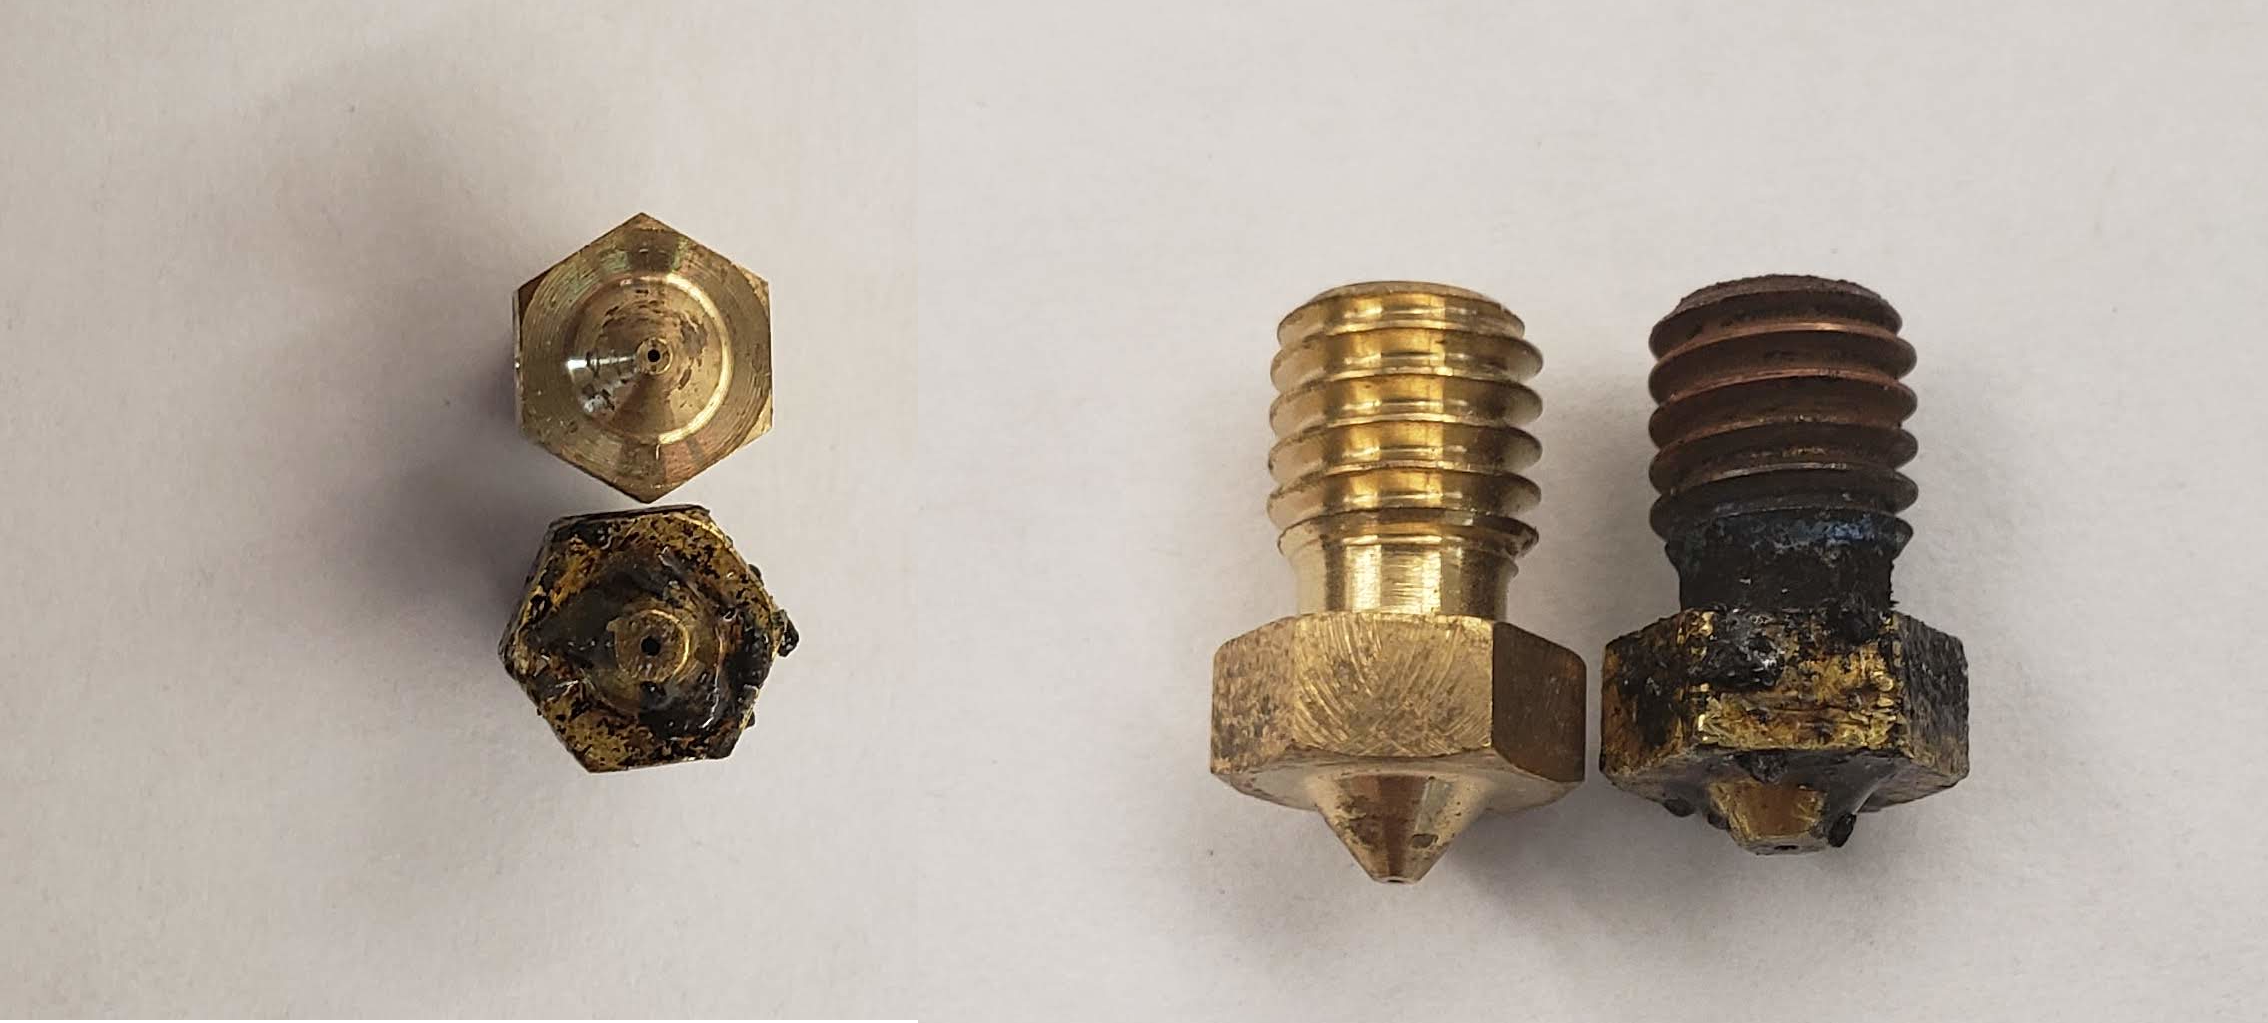
We were doing a bit of beginning-of-summer lab maintenance and one of the projects was to figure out why the MakerGear M2 (Which has been heavily modified over the years, Azteeg x5 mini motherboard, E3D hotend, etc.) was behaving so strangely. Well… there’s your problem. Fresh 0.35mm nozzle next to the bored out, abraded down corpse of a nozzle that we’ve, in retrospect, been running for something like 3 years. Turns out printers work much better when the nozzle aperture is roughly the size it’s supposed to be. Still seeing some odd temperature fluctuation, but … look at that thing.