
…An otherwise useless exercise in rapid prototyping.
I recently made a couple little 3D printed models that I wanted to paint, and needed some model paint to (badly) color some details over the sprayed base coat. The acrylics I’ve been using for putting details on things didn’t stick very well, so I dug out my 20+ year old Testors model enamel set. It was, remarkably, sealed well enough that all but one bottle is still liquid, but they are all extremely separated.
While I was stirring and shaking, I started musing about ways to automate the process.
I have a 3D printer and have been on the lookout for simple projects to practice with FreeCAD and improve my terrible CAD skills.
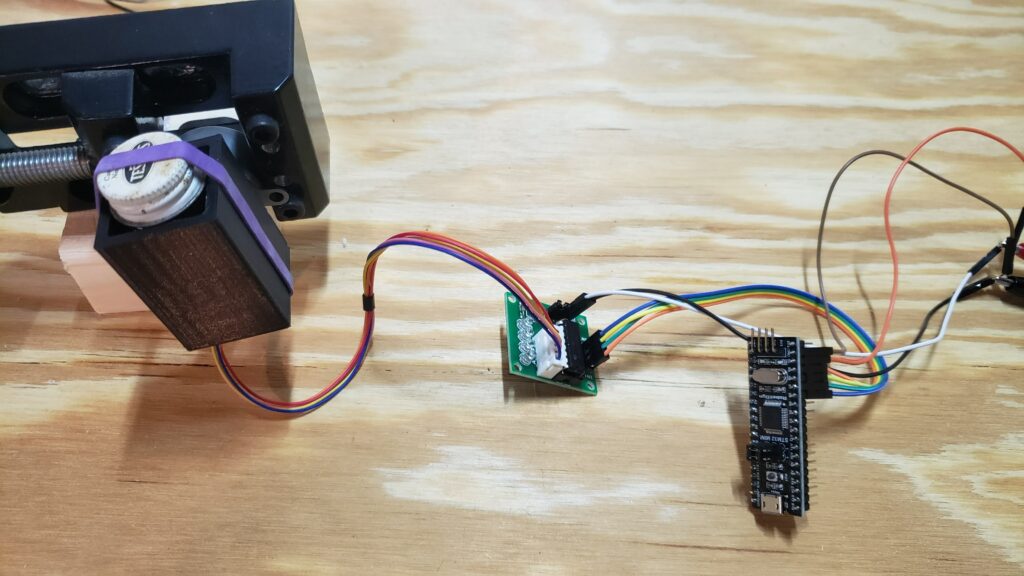
I have very well-stocked electronics part cabinet that includes a bunch of ubiquitous 28BYJ-48 gearhead steppers, ULN2003 darlington drivers, and a probable lifetime supply of cheap knockoff STM32F103 dev boards, so the electronics part is easy.
…So, I overkilled the problem, and designed and built a special-purpose Testors enamel shaker.
Putting the electronics together was just a few DuPont jumpers (ULN2003 inputs 1,2,3,4 = STM32 PB9,7,8,6) and a quick Arduino sketch that moves from the starting position to +180°, then reverses to -180° does it again forever, using the AccelStepper library that I usually reach for for this kind of thing. Its all running off a USB-to-aligator-clip cable to get 5V from a USB brick. The only complication is the usual game of “how are these particular 28BYJ-48 out of spec” – it turns out the batch I have have their middle pins reversed (They’re wired ACBD) which was solved by some lazy swapping pairs until it moved instead of vibrating. I put a label card in the drawer so next time won’t require an experiment.
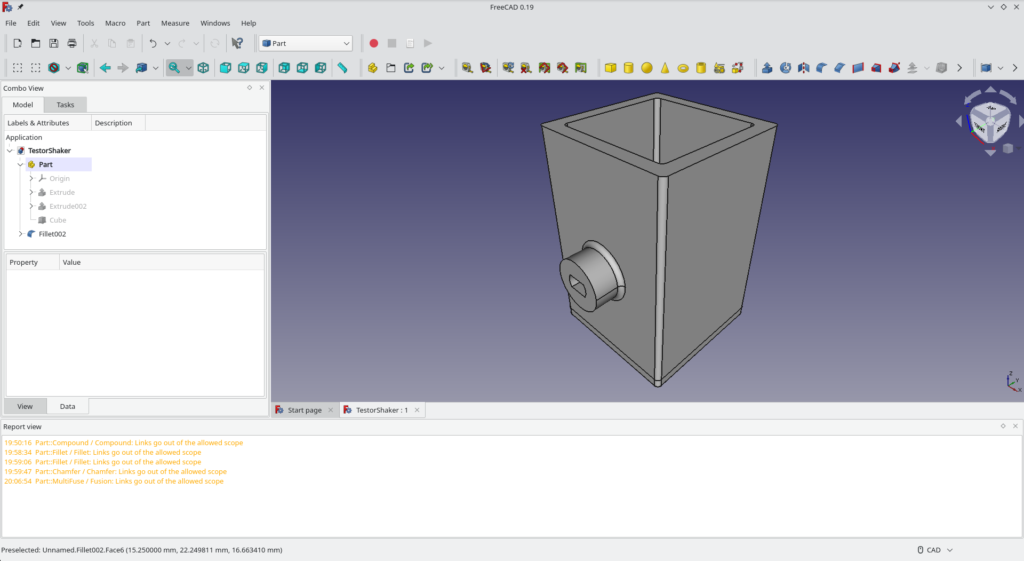
The CAD part is the part I’m “less good” at. I grabbed some calipers, took some dimensions, sketched out a rough design on a sheet of paper, and then Started loading my dimensions into FreeCAD.
I sketched the profile of the double-flat shaft (5mmD, 3mm thick across the flats) collar on the XZ plane and the housing on the XY plane, then pulled up the parts workbench and extruded the sketches to the appropriate lengths (6mm for the shaft, +25mm and -20mm for the housing). I then added a rectangular block for the bottom in the Parts workbench, unioned the whole thing and applied some fillets to the edges. I’m like 90% sure the mixture of approaches I took is a not-recommended workflow, but from my computational background, capturing the critical dimensions then doing some CSG to assemble seems very natural… and for once it looks like what I had in my head.

Shockingly, I got the dimensions close enough and it printed usably on the first try. It needed a little support under the “neck” of the shaft collar, but the bridging on the inside worked perfectly, and the bottle pocket will fit most of my bottles.
Is it a good solution? – No! A standard bench vortex mixer would be way better for this, but a decent one of those is at least $50. This cost me nothing (about $6 of stocked parts, temporarily hooked together in a non-destructive way). It does a decent job gently homogenizing already roughly mixed paint though, and a similar rig might be useful for that kind of task.
Are the dimensions right? – Almost! The double-flat shaft coupler is nice and tight, but the bottle slot is at the wrong end of the tolerance range for Testors bottles; 24.5mm covers from pleasingly snug to too small. If I re-printed I’d go out a hair to 25 or 25.5mm.
Could it be improved? – In lots of ways. Dropping a BB in each bottle would make this kind of shaking a lot more effective. So would a motor with a higher maximum movement speed.
Was it a fun way to exercise some prototyping skills for a couple hours? – Absolutely!
If anyone, for some insane reason, wants the sources, here’s the amf, the fcscd of the printed part, and the ino of the code. Be warned that it’s cute but not very effective.
