Category Archives: Electronics

Posts about electronics. Usually meaning electrical gadgets smaller than a proper computer.

Musical Barrel #1

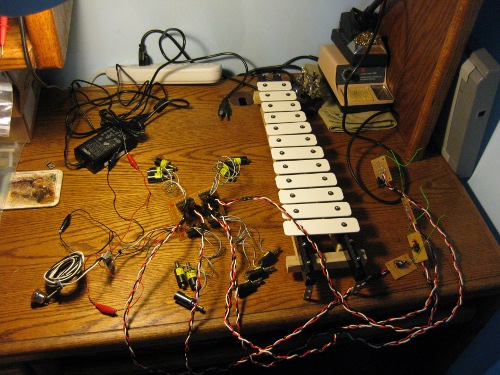
One of my hobby projects just came to fruition earlier tonight. A team from Collexion has been working on building a pair of musical Bourbon barrels to support local charity auctions. The first one (6 notes from an internal glockenspiel, triggered by capacitive touch sensors on the rings, with an excellent paint job by Sam Wilson) sold earlier tonight at Spirits of Giving, bringing in $1500 to be split between Collexion and the Nash Brigthon Project. It’s great to be doing technological art, and it’s great that it can be used to support good causes. I forgot to bring my camera, but as soon as I get sent pictures from the people who did have them I’ll throw at least one up.

Edit: I don’t have pictures, but here is a video of the demonstration.

Posted in Announcements, DIY, Electronics, General, OldBlog | Tagged | Leave a comment

HDL Testbenches

After three classes (EE281, EE480, EE585) where I should have been taught how to write real, procedural testbenches for my digital circuit simulation instead of clicking in inputs on ISE’s (ISE is the subject of much swearing and hatred) waveform editor, there was a nominal effort to demonstrate it in EE685, and between that example and the Verilog book I bought for my own edification some time ago (It’s an OK book: I’m yet to find a HDL text I really like), I finally managed to get it down. This is important for three reasons: First: NO MORE CLICKING! I can write little procedural blocks to generate counting-order covering inputs, or other arbitrary stimulus. Second: Automatic Testing! For simple modules, I can simply write two logically equivalent but stylistically different versions, and, barring any design-level fuckups, determine that they both work by telling the simulator to compare the two version’s behavior and alert me if they differ. Third (and most signifigantly) it allows me to do my check/test/verify my modules without dealing with ISE. There are a number of free Verilog tools, most significantly Icarus Verilog, a Free (GPL) synthesis/simulation suite which seems to be well liked (and builds and installs easily on my machine), which allow me to have a whole toolchain without the hassle of maintaining my own ISE installation, or putting up with the glacially slow (despite being very, very powerful; bad configuration) lab machines for longer than is required to generate a test run to turn in for class.
Icarus looks to be an interesting challenge; it definitely doesn’t go out of it’s way to be user friendly, it requires an external tool like GTKWave to display waveforms, and it’s got some features and switches that I’m not even sure what are for, but it is documented and seems to be quite reasonable.
One feature Icarus doesn’t (AFIK) have is the ability to synthesize to the various programmable chips (which are all very, very proprietary). I do have my own FPGA board, which I got in a burst of excitement after first being exposed to FPGAs, and have never had a chance to play with as much as I’d like. Somewhere deep, deep down on the list of projects is to get a decent programming cable for it (my current one is an old parallel model), and spend some quality time playing around with it, I clearly wouldn’t be alone.

Posted in Computers, DIY, Electronics, General, OldBlog | Leave a comment

Stepper Drivers

3492483015_e33027182a.jpg?v=0
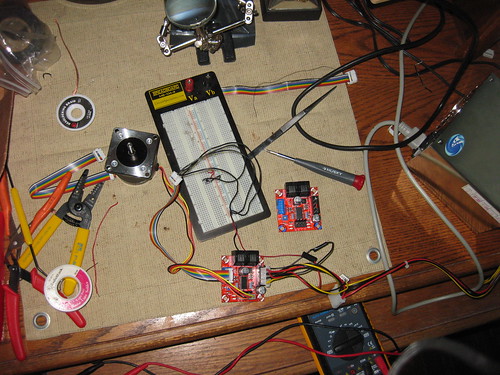
I got a set of RepRap Stepper Driver v.2.3 kits to use for my CNC project, and was having no end of trouble with them, but finally had a breakthrough that has two of the three working…and one definitely, definitely dead; the magic smoke escaped from #3. The trick: the SOIC packages were ever so slightly bent in shipping, and I was a little too conservative in the application of solder paste, so some of the contacts around the IC were intermittent. After I finally found it, which was a little difficult because the pressure of a test probe temporarily fixed the problem, all that was needed was punching down a couple pins with a hot soldering iron. With two boards working I’m now in business to finish off the XY table.

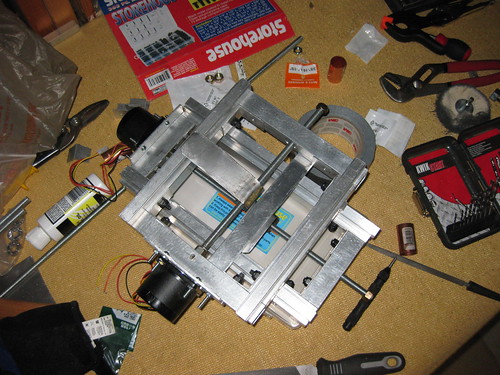
Because I’m getting proud of it, a picture of the framing and drive for the XY table in the state it was in the other night.
3493302894_b1f2a8277b.jpg?v=0
All it (just for the table) really needs mechanically now are the bolts attaching the lower lead nut assembly to the middle crossbar, and the table itself to be attached to the rails and lead nut assembly on top (need to pick up some short flathead screws to countersink in for that). To be safe it should probably also have the bearing assembly/leadscrew protector/encoder mount tubes installed where the floating brass nuts are in that picture.
The workspaces in both images are noticeably horribly, horribly messy; both pictures were taken at the end of a couple hours of work, right before cleanup. I (unsurprisingly) tend to keep my workspaces compulsively clean.

Posted in DIY, Electronics, General, OldBlog | Tagged | 1 Comment

SmartPixels

ColorSample.jpg
One of those things I’ve been playing with intermittently just came to fruition: SmartPixels. Cheerful little LED+Microcontroller widgets which light up in interesting ways. All the code is written in a modular way so it is easy for me (or anyone else) to add sensors to the two remaining pins, or modify the behavior in other ways. Full source is available at the page above.

The biggest holdup in completing this little project was not actually the result of a difficult problem, but me forgetting, AGAIN, that when writing code for AVRs, any variable accessed inside an interrupt service routine MUST be marked volatile , or it will be treated as invariant by the compiler.

If I can figure out a convienent way to post video I will, even the simple color fade behavior I currently have loaded is mesmerizing.

Posted in Electronics, General, OldBlog | Tagged | Leave a comment

CNC Beginnings

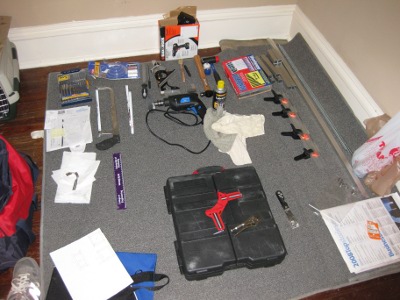
The beginnings of my CNC project, in the form of parts for the XY table, and associated tool pile:
XYParts_sm.jpg
The motion capability will be 9” in the X dimension and 6” in the Y direction, the Z axis is on hold until after the semester is over, there just isn’t time to design it in now.
Drives:
Each axis will be driven by a 130 oz-in NEMA23 Stepper (Lin Engineering 5618S-58-01)
The lead screw to run the axis is a 3/8” coarse threaded rod, cut to length
The travel nuts are 1.125” coupling nuts (long, to help with backlash without spending money)
One remaining problem is couplers for attaching the lead screw to the drive shaft, there are lots of options, but they all seem to cost at least $10/axis. I suspect unless something better appears I’ll end up with lovejoy couplings.

From aluminum square tubing (1” OD, .062” walls):
8”x8” (outside) square frame for Y axis
6”x12” (outside) rectangle for X axis
The framing will be assembled with bolts, tabs cut from 90deg angle stock, and a bit of epoxy to make it easier.

The next big fuss is figuring out the driver circuits. The motors are rated for 2A at any practical voltage, and only show about 2.6Ohms/coil of resistance, so its going to require proper current-controlled drivers, which may be expensive.

The thing I’m liking most about this project is that I’m learning a huge amount of practical, hands-on knowledge about metalworking and mechanical devices in a hurry, in a low-investment environment so I can experiment and really get a feel for things. I’m not sure if I’ll ever do much more metalwork, but its a good skill to have.

Posted in Announcements, DIY, Electronics, General, Objects, OldBlog | Tagged | 1 Comment

AVRs are Amazing

To add to all the other reasons I love AVRs (cheap, featureful, good development tools, beautiful assembly language), they are now also to be considered almost impossibly resilient: I just made a mistake and reverse biased an ATTiny13 micro (swapped Power and Ground wires), causing it to heat up until it was too hot to touch… I just popped it back in the programmer after it cooled down, and it is completely fine. Win, atmel, win.

Posted in DIY, Electronics, General, OldBlog | Tagged | Leave a comment

IEEE Robot

My extra timesink for the surrounding few weeks has been helping out with UK’s IEEE Southeastcon Competition Robot.
I spent a lot of time last semester making a never-quite-working (but very educational) vision system as a senior project; we opted not to use it (the “never-quite-working part) a few weeks ago, but the rest of the robot isn’t (wasn’t?) really in order to compete, so there have been lots of little things to take care of. This year’s robot “recycles,” it has 4 minutes to gather Coca-Cola empties (conference is in Atlanta, GA this year, of course its Coke) off of a 10×10 astroturf field, and sort them by material (glass, aluminum, plastic). Full rules are available here. The current state of the robot looks as follows, and has at least a rough software framework to drive the pictured hardware.
IEEERobot1.jpg
I don’t have an awful lot of time to dedicate to it, so I’ve been trying to take care of little things; soldering jobs, little pieces of glue code to make the software work, passing information around the group to make sure everyone stays synchronized. Hopefully it’s been useful. Indications are that there will be a reasonably competitive robot in a week, there has been a lot of a lot of people’s time and effort (not to mention a fair chunk of the UK IEEE Student Branch’s money) invested in this year’s robot, so I certainly hope so. I may even get all the OTHER things that the time spent on the robot and going to the conference proper is pulling time away from.

Posted in DIY, Electronics, General, Objects, OldBlog, School | Leave a comment

USBTinyISP

I got my Adafruit USBTinyISP AVR programmer/SPI Interface/USB Bitbang Device kit today, and was compelled to immediately assemble and test it. The USBTinyISP is an excellent product; it is considerably cheaper than the official Atmel AVR programmer, just as functional, and supports a fellow qualified hobbyist. I’ve been meaning to pick up my own AVR programmer for a while, as having a programmer and a stock of cheap microcontrollers (I also recently picked up half a dozen adorable ATTiny13 chips to use with it to give my SmartLEDs idea a shot) enables all kinds of cool projects, that do not involve “find one of the programmers on campus” or “Use the department’s Arduino Dieciemilia that I haven’t returned.”
The USBTinyISP comes as a very nice kit, which includes all the component parts including a nice case and well-made PCB.
usbtinyispparts_small.jpg
In the picture, in addition to the included parts, you can see my trusty Xytronic 379 Soldering Station, for which I have nothing but praise (if you think you need one of those classic blue Weller WES51 stations, you really need one of these, its a better station and costs half as much). In the left of the frame you can see my Leatherman Wave, which I cooed about a few days ago. It just happened to be in the picture, I use an ancient pair of thin-profile pliers (now sold as the Xcelite 378, highly, highly recommended) I inherited from my mother when I am working on electronics at home.
usbtinyispalmostdone_small.JPG
I consider myself reasonably competent with a soldering iron, and it took me a little under an hour to go from holding a mailer pouch to programming a chip, with no fuckups in between, which speaks well for the quality of the instructions, the kit, and the thinking that went into them. There are a few interesting quirks in the design; several resistors mount vertically to the PCB, the large electrolytic capacitor is intentionally mounted so it rests on top of the TTL buffer. These are both space-saving measures, and anyone who has ever seen most of the things I throw together on perfboard knows I have a high esteem for nifty tight designs.
Using the completed programmer is just the same as all the other models of AVR programmer. For software I use AVRDude, since it is well-supported on all common platforms. Below is a shot of my first successful program (or actually, readout) of a chip.
attiny13prog_small.JPG
(closeup)
attiny13bread_small.jpg
That tiny black thing on the breadboard surrounded by the brightly colored wires is one of the aforementioned ATTiny13 chips; I paid $1.95ea for those, and it really is an entirely capable little microcontroller. The incessant march of technological progress never ceases to amaze me. Sometime soon I’ll need to make a little target board that can socket the ATTiny13s and has a plug for the 6-pin connector so I don’t have to muck about with loose wires every time.

Posted in Computers, DIY, Electronics, General, Objects, OldBlog | 1 Comment

Design

I’ve been reading a lot of things about design of late: Donald Norman’s classic The Design of Everyday Things, Jef Raskin’s (disappointing) treatise on User Interface design The Humane Interface, copies of Dwell my mother passes to me when she finishes with them. In my Cognitive Sciences course, I think of many of the topics we discuss through the lens of a designer.
I came across Dieter Rams’ Ten Commandments on Design again today. All the babbling blowhards have managed to produce with their cognitive models and quantitative approaches (which I am usually all for) is summed up neatly in these ten statements.

Good design is innovative.
It does not copy existing product forms, nor does it produce any kind of novelty just for the sake of it. The essence of innovation must be clearly seen in all of a product’s functions. Current technological development keeps offering new chances for innovative solutions.

Good design makes a product useful.
The product is bought or used in order to be used. It must serve a defined purpose — in both primary and additional functions. The most important task of design is to optimize the utility of a product’s usability.

Good design is aesthetic.
The aesthetic quality of a product is integral to its usefulness because products we use every day affect our well-being. But only well-executed objects can be beautiful.

Good design helps us to understand a product.
It clarifies the product’s structure. Better still, it can make the product talk. At best, it is self-explanatory.

Good design is unobtrusive.
Products fulfilling a purpose are like tools. They are neither decorative objects nor works of art. Their design should therefore be both neutral and restrained, to leave room for the user’s self-expression.

Good design is honest.
It does not make a product more innovative, powerful or valuable than it normally is. It does not attempt to manipulate the consumer with promises that cannot be kept.

Good design has longevity.
It does not follow trends that become outdated after a short time. Well designed products differ significantly from short-lived trivial products in today’s throwaway society.

Good design is consequent to the last detail.
Nothing must be arbitrary. Thoroughness and accuracy in the design process shows respect toward the user.

Good design is concerned with the environment.
Design must make contributions toward a stable environment and sensible raw material situation. This does not only include actual pollution, but also visual pollution and destruction of our environment.

Good design is as little design as possible.
Less is better — because it concentrates on the essential aspects and the products are not burdened with non-essentials. Back to purity, back to simplicity!

(I find I like it better with the selectively bolded words, that was my doing). I would really like to know when and where these were originally published.

Posted in Computers, DIY, Electronics, General, Literature, OldBlog | Tagged , | Leave a comment