
Source: Hack a Day
Raspberry Pi was synonymous with single-board Linux computers. No longer. The $4 Raspberry Pi Pico board is their attempt to break into the crowded microcontroller module market.
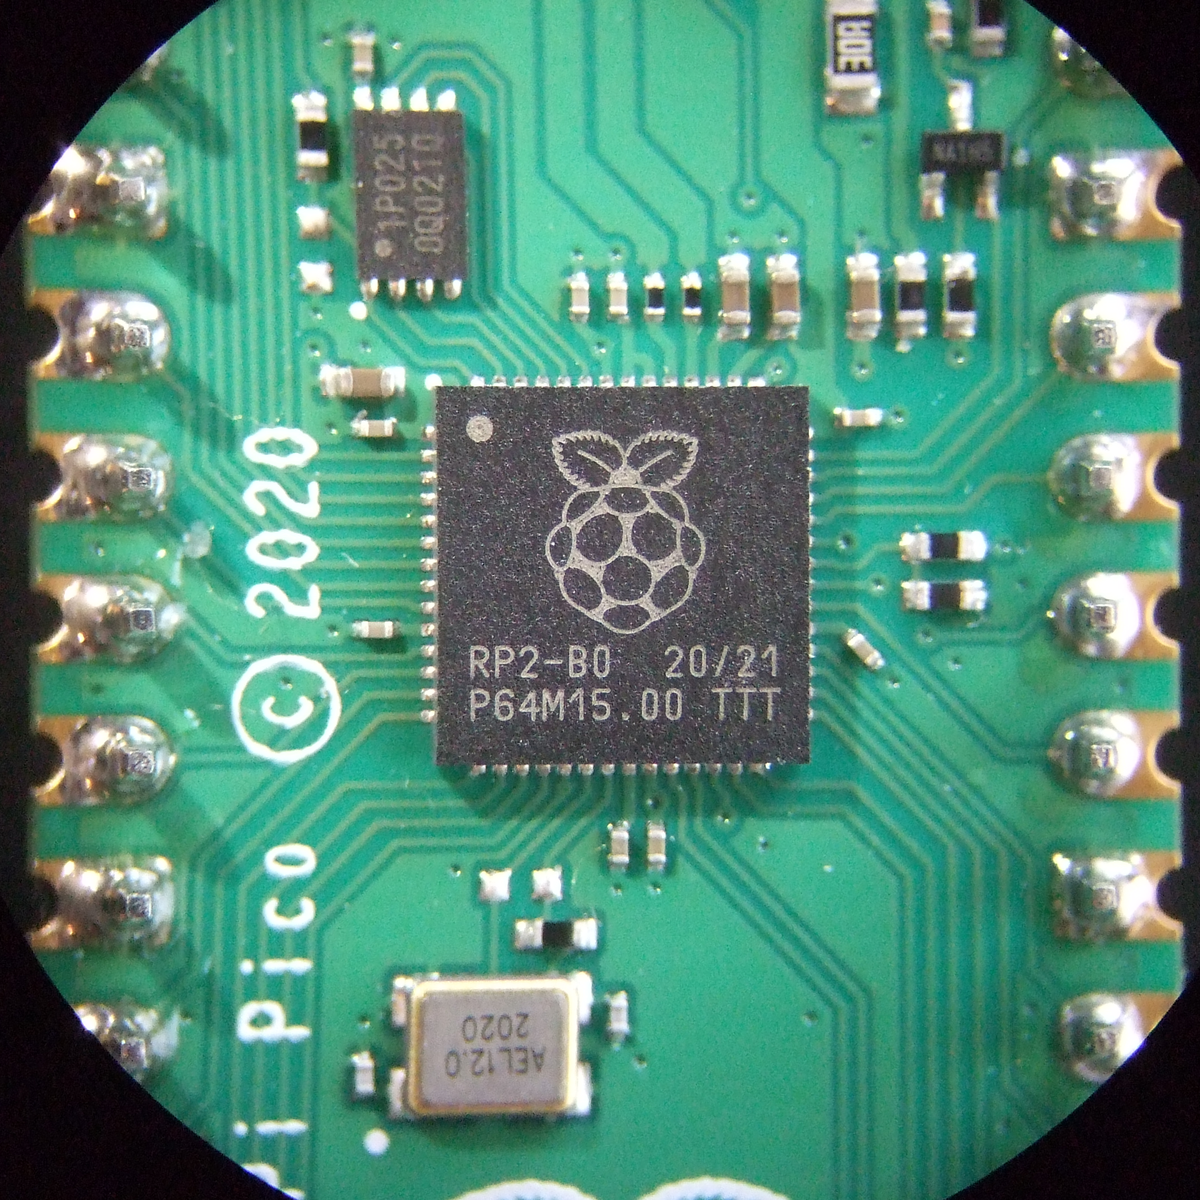
The microcontroller in question, the RP2040, is also Raspberry Pi’s first foray into custom silicon, and it’s got a dual-core Cortex M0+ with luxurious amounts of SRAM and some very interesting custom I/O peripheral hardware that will likely mean that you never have to bit-bang again. But a bare microcontroller is no fun without a dev board, and the Raspberry Pi Pico adds 2 MB of flash, USB connectivity, and nice power management.
As with the Raspberry Pi Linux machines, the emphasis is on getting you up and running quickly, and there is copious documentation: from “Getting Started” type guides for both the C/C++ and MicroPython SDKs with code examples, to serious datasheets for the Pico and the RP2040 itself, to hardware design notes and KiCAD breakout boards, and even the contents of the on-board Boot ROM. The Pico seems designed to make a friendly introduction to microcontrollers using MicroPython, but there’s enough guidance available for you to go as deep down the rabbit hole as you’d like.
Our quick take: the RP2040 is a very well thought-out microcontroller, with myriad nice design touches throughout, enough power to get most jobs done, and an innovative and very hacker-friendly software-defined hardware I/O peripheral. It’s backed by good documentation and many working examples, and at the end of the day it runs a pair of familiar ARM MO+ CPU cores. If this hits the shelves at the proposed $4 price, we can see it becoming the go-to board for many projects that don’t require wireless connectivity.
But you want more detail, right? Read on.
The Specs and the Luxuries
In many ways, the Pico is a well-appointed “normal” microcontroller board. It has 26 3.3 V GPIOs, a standard ARM Serial Wire Debug (SWD) port, USB host or device capabilities, two UARTs, two I2Cs, two SPIs, and 16 PWM channels in eight groups. (The PWM unit can also measure incoming PWM signals, both their frequency and duty cycle.) The Pico has a 12-bit ADC, although it’s connected to only four three pins, so you’ve got to be a little careful there. (Ed note: the RP2040 has four ADCs, but the fourth isn’t available on the Pico.)
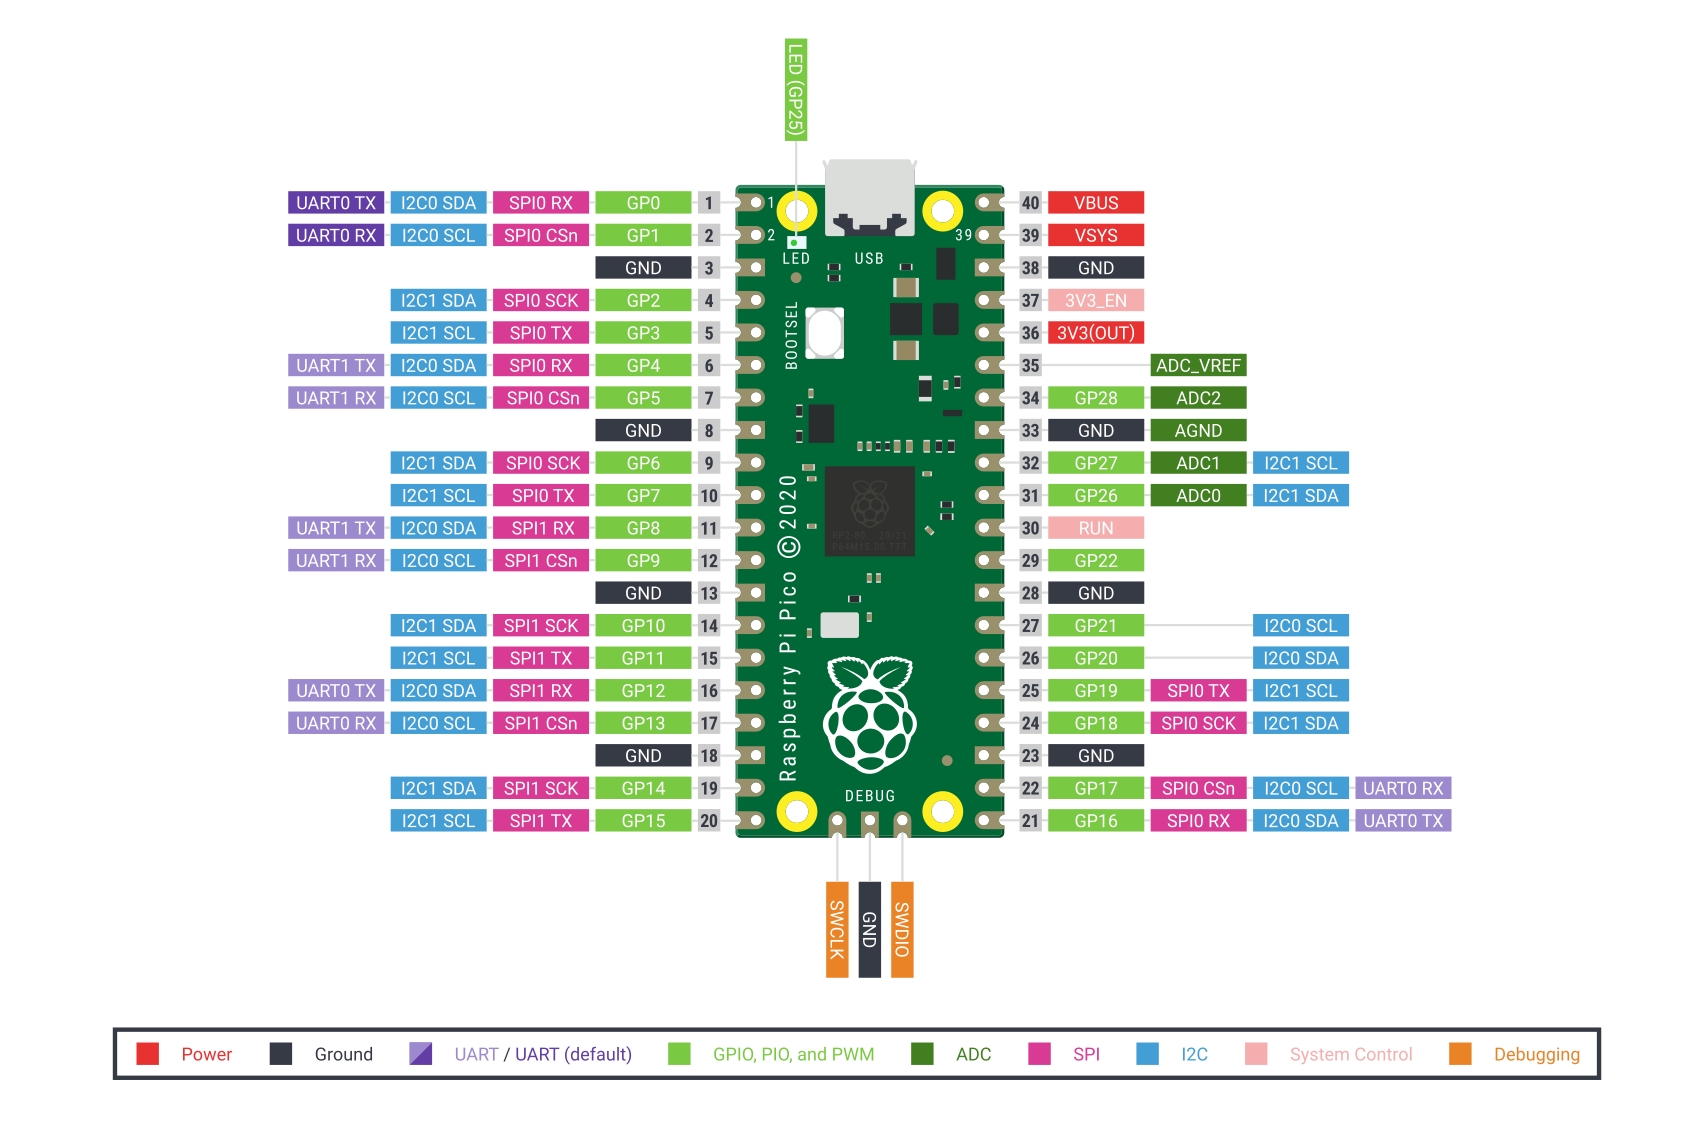
The twin ARM M0+ cores run off of PLLs, and are specced up to 133 MHz, which is pretty fast. There are separate clock dividers for nearly every peripheral, and they can be turned on and off individually for power savings, as with most other ARM microcontrollers. It runs full-out at around 100 mA @ 5 V, and has full-memory-retention sleep modes under 1 mA.
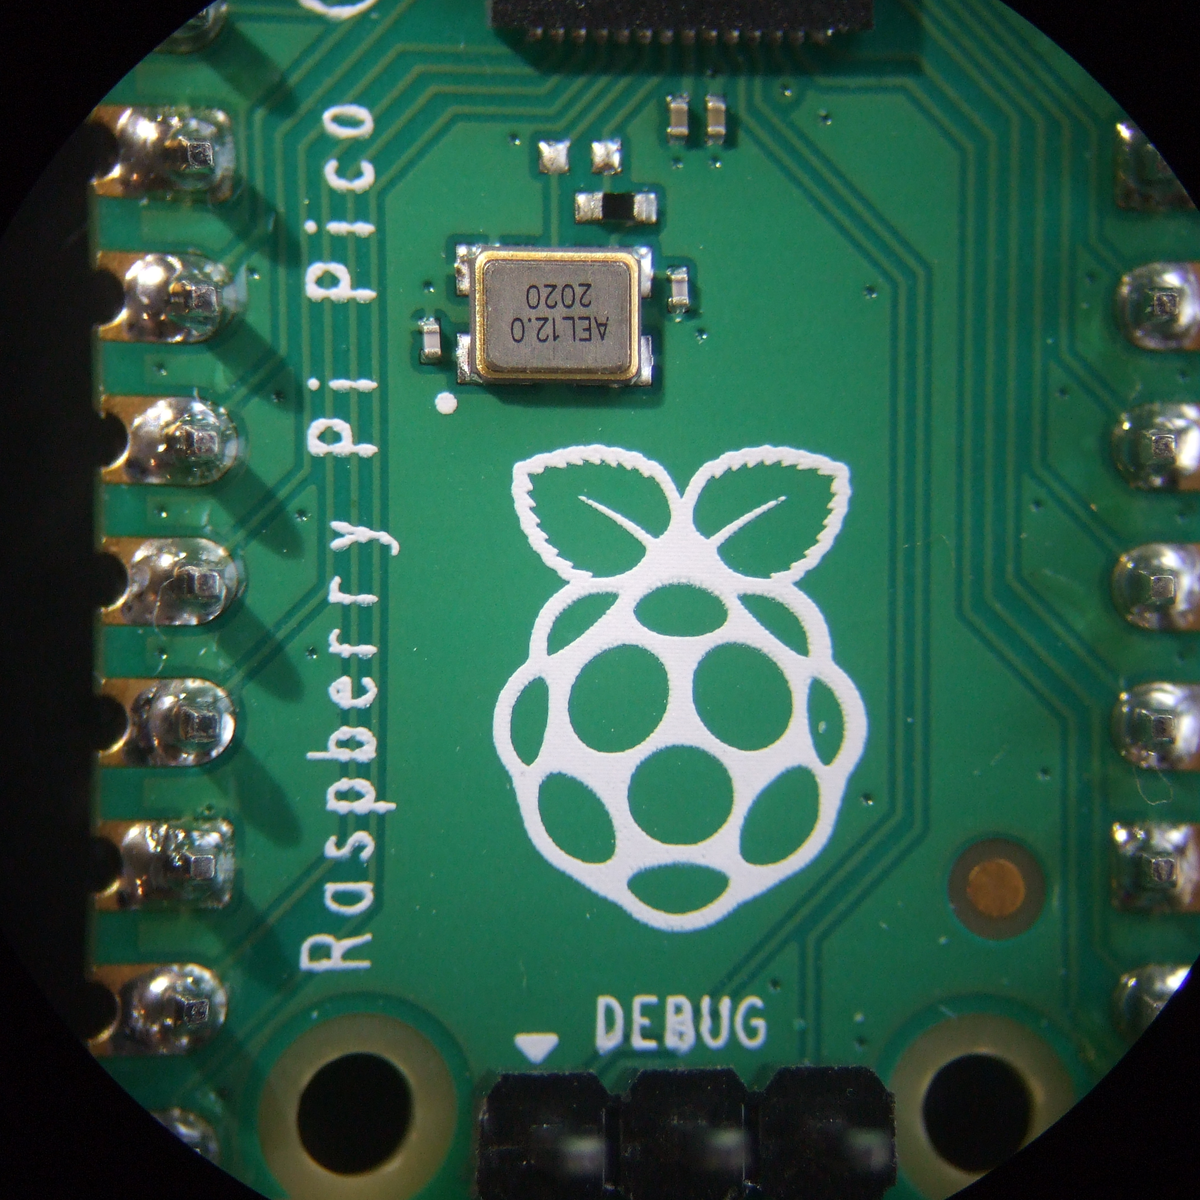
As the ESP8266 and ESP32 modules do, it uses external flash ROM to store programs, and can run code directly from the flash as if it were internal memory. The Pico board comes with a decent 2 MB QSPI flash chip, but if you’re handy with a soldering iron, you can fit up to 16 MB. It has 264 kB of SRAM, which is certainly comfy. The RAM is divided up internally into four striped 64 kB banks for fast parallel access, but they’re also accessible singly if you’d like. Two additional 4 kB banks are non-striped and suggest using themselves as per-core stack memory, but nothing forces you to use them that way either.
There are numerous minor hardware-level conveniences. All of the configuration registers are 32 bits wide, and so you might not want to have to specify all of them, or maybe you want to avoid the read-modify-write dance. Like many of the STM32 chips, there is a special memory map that lets you set, clear, or XOR any bit in any of the config registers in a single atomic command. There are also 30 GPIOs, so they all fit inside a single 32-bit register — none of this Port B, Pin 7 stuff. This also means that you can read or write them all at once, while setting individual pins is easy through the above atomic access.
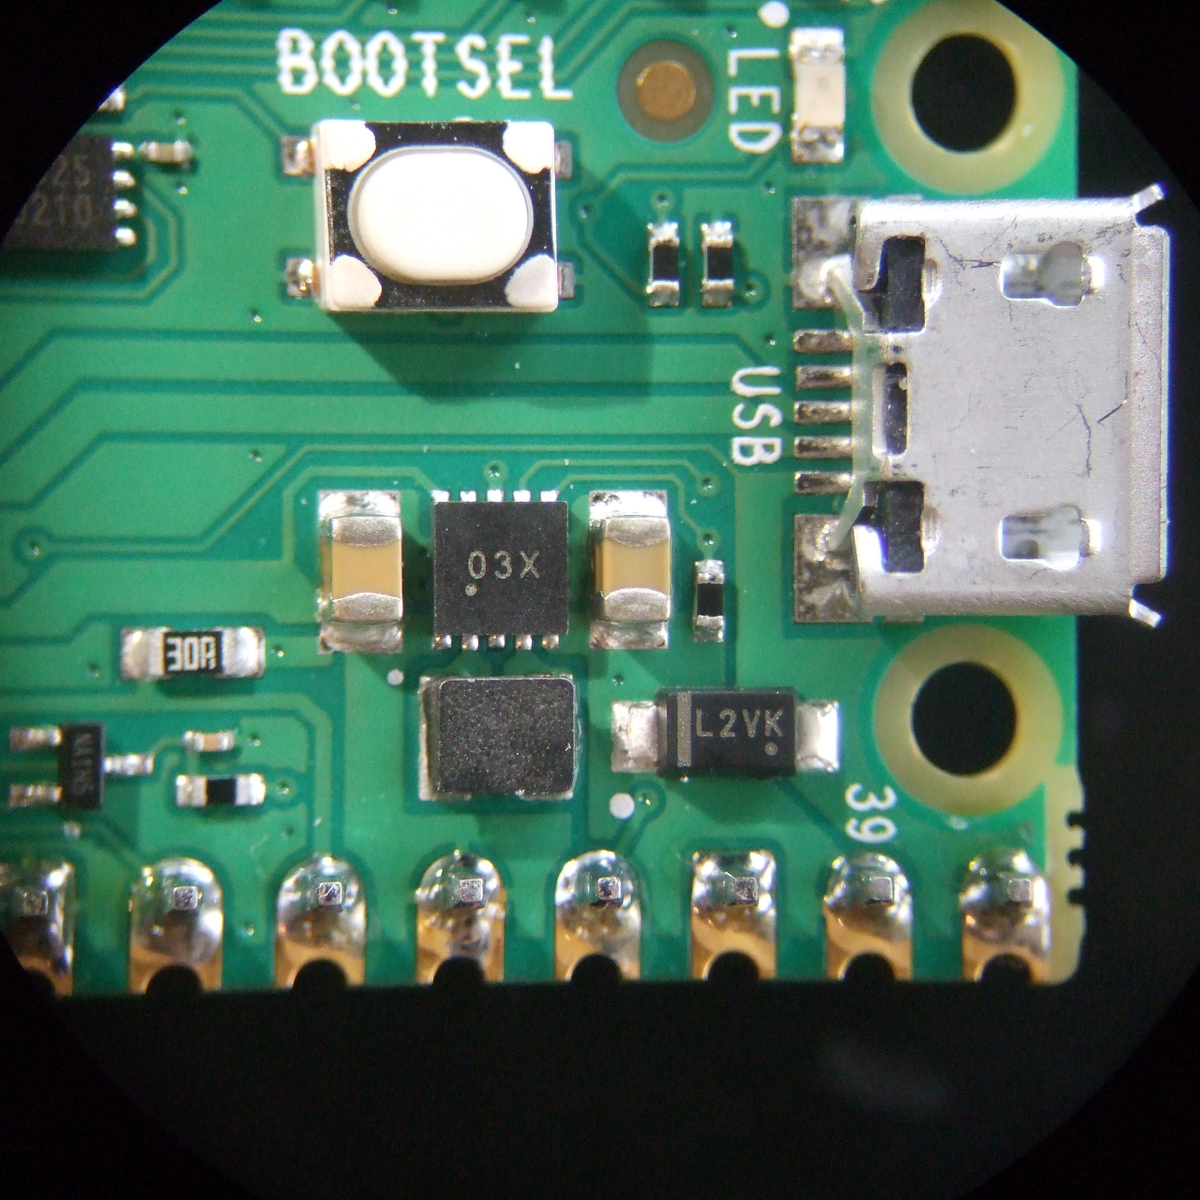 An internal mask ROM contains the UF2 bootloader, which means that you can always get the chip back under control. When you plug the Pico in holding down the BOOTSEL button, it shows up as a USB mass storage device, and you can just copy your code across, with no programmer, and Raspberry even provides an all-zeros file that you can copy across to completely clean-slate the machine. If you copy the Pico’s MicroPython binary across, however, you’ll never need the bootloader again. The mask ROM also contains some fast routines that support integer and floating point math, and all of the contents are open source as mentioned above.
The power regulation onboard is a boost-buck configuration that takes an input from 1.8 V to 5 V. This is a good range for lithium batteries, for instance, which can be a hassle because they run both above and below the IC’s 3.3 V, so it’s nice to have a boost-buck regulator to squeeze out the last few milliamp-hours. Or you could run your project on two AAs. That’s nice.
So the Pico/RP2040 is a competent modern dev board with some thoughtful touches. But it gets better.
The PIO: Never Bitbang Again
The real standout peripheral on the RP2040 and the Pico is the Programmable I/O (PIO) hardware, which allows you to define your own digital communication peripheral. There are two of these PIO units, and each one has four programmable state machines that run sequential programs written in a special PIO assembly language. Each of the state machines has its own clock divider, register memory, IRQ flags, DMA interface, and GPIO mapping. These allow essentially arbitrary cycle-accurate I/O, doing the heavy lifting so that the CPU doesn’t have to.
 If you want to program another UART, for instance, it’s trivial. But so is Manchester-encoded UART, or a grey code encoder/decoder, or even fancier tricks. One of the example applications is a DPI video example, with one state machine handling the scanline timing and pixel clock, while another pushes out the pixel data and run-length encodes it. These are the sort of simple-but-fast duties that can bog down a CPU, leading to timing glitches, so dedicated hardware is the right solution.
The PIOs are meant to have a lot of the flexibility of a CPLD or FPGA, but be easier to program. Each state machine can only take a “program” that is 32 instructions long, but the “pioasm” language is very dense. For instance, the command to set pin states also has an argument that says how long to wait after the pins are set, and additional “side-set” pins can be twiddled in the same instruction. So with one instruction you can raise a clock line, set up your data, and hold this state for a defined time. A basic SPI master TX implementation is two lines.
Or take the example of the WS2812 LED protocol. To send a logical 1, you hold the self-clocked data line high for a long period and low for a short period. To send a logical 0, the data line is held high for a short period and low for a long one. Creating the routines to do this with reasonable speed in the CPU, without glitches, required a non-trivial shedding of hacker tears. With the PIO peripheral, writing a routine to shift out these bits with absolute cycle accuracy is simple, and once that’s done your code can simply write RGB values to the PIO and the rest is taken care of.
To run PIO code from C, the assembler is called at compile time, the program is turned into machine language and stored as a matrix in a header file, and then this can be written to the PIO device from within main() to initialize it. In Python, it’s even easier — the @asm_pio decorator turns a function into PIO code. You just have to write the “Python” function using the nine PIO assembly instructions and then hook it up to GPIO pins. After that, you can call it from your code as if it were a normal peripheral.
Having played around with it only a little bit, the PIO is the coolest feature of the Pico/RP2040. It’s just a little bit of cycle-correct programmable logic, but most of the time, that’s all you need. And if you don’t feel like learning a new assembly language — although it’s only nine instructions — there are a heaping handful of examples already, and surely folks will develop more once the boards hit the streets.
IDEs and SDKs: C and MicroPython
The Raspberry Pi single-board computers (SBCs), when combined with their documentation and examples, usually manage a nice blend of being simple enough for the newbie while at the same time not hiding too much. The result is that, rather than having the underlying system’s Linuxiness abstracted away, you get introduced to it in a friendly way. That seems to be what the Raspberries are aiming at with the Pico — an introduction to microcontrollers that’s made friendly through documentation and MicroPython’s ease of use, but that’s also not pulling any punches when you turn to look at the C/C++ code.
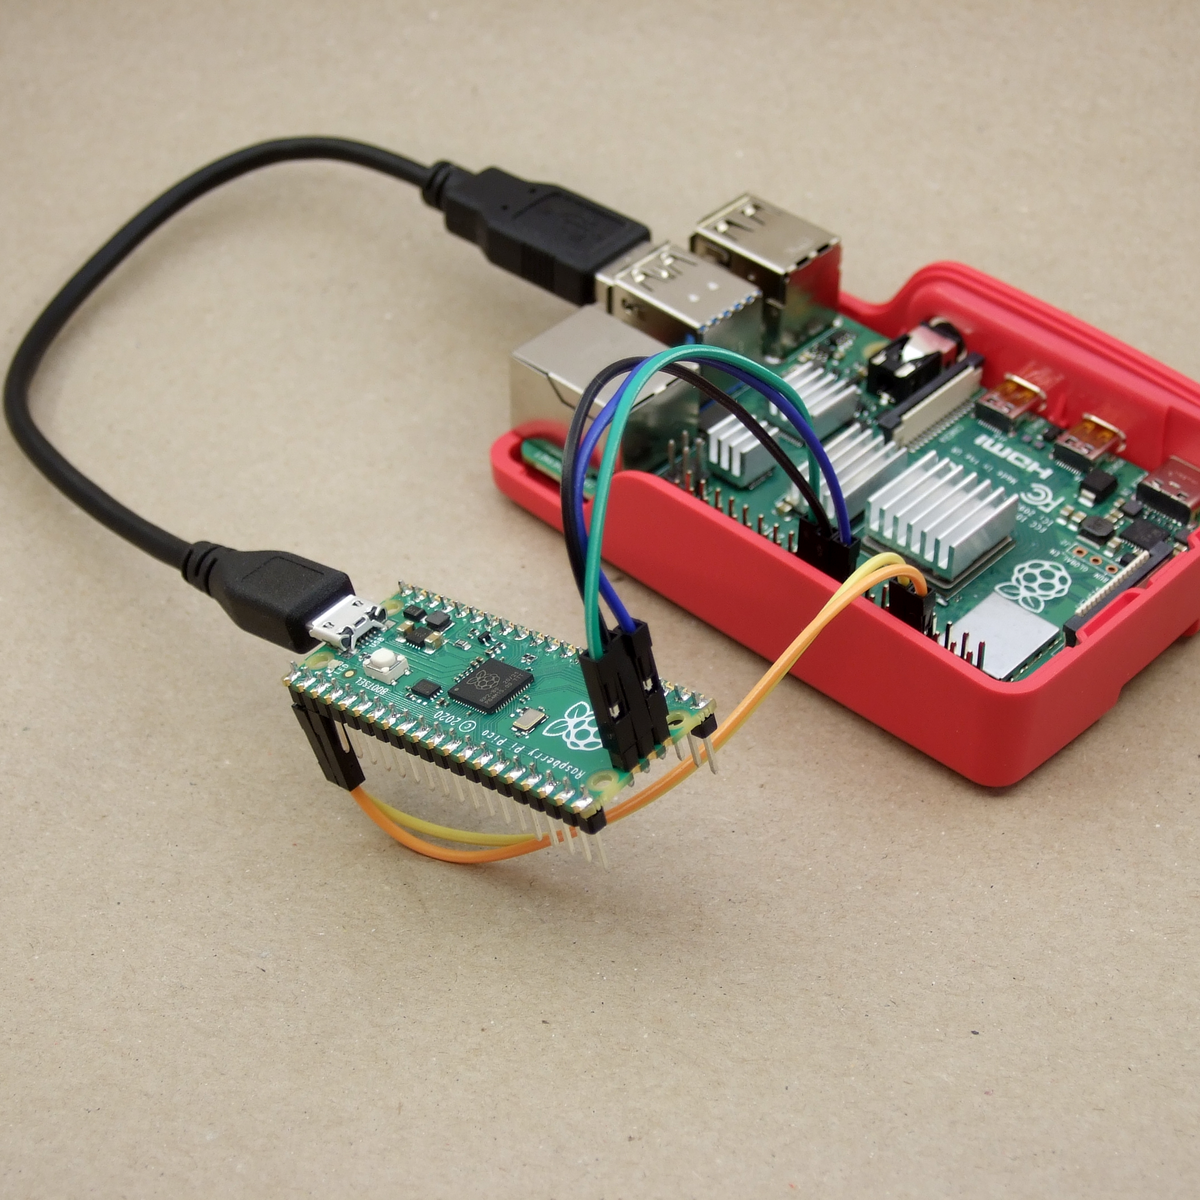
And having a Raspberry Pi SBC on hand makes a lot of the most hardcore microcontrollering simpler. For instance, if you want to do debugging on-chip, you’ll need to connect over the SWD interface, and for that you usually need a programmer. But of course, you can also bit-bang a SWD controller with the GPIOs of a Raspberry Pi SBC, but you’ll have to configure OpenOCD just right to do so.
If that all sounded like gibberish, don’t worry — all of this is taken care of by a simple pico_setup.sh script. It not only installs all of the compilation and debugging environment, it also (optionally) pulls down VScode for you. Nice.
And you will want to program it over the SWD eventually. The cycle of unplugging USB, holding down a button, and re-plugging USB gets old real fast.
If you’re a command-line junkie, the C SDK’s build system is based on CMake and runs just fine from the command line if you’ve already got the ARM toolchain installed. And as with all SDKs, there’s a certain amount of boilerplate necessary to start up a new coding session. This is taken care of by the pico project generator, so you don’t have to.
In the “Getting started” guides, you’ll find instructions for setting up your environment on a Raspberry Pi SBC, Windows, Mac, or desktop Linux machine. If you prefer Eclipse as an IDE, there are integration instructions as well.
Two Cores: Here be Dragons
If there’s one area that strikes me as not yet fully developed, it’s the dual-core aspect of the system. Right now, if you write either C or Python code, it’s running on Core 0, while Core 1 is simply sitting idle. Both the C and Python SDK documentation tell you how to start up a thread on the other core, and there’s example code available as well, but the instructions are sparse. In C, there’s a pico/multicore.h and even mutex, semaphore, and queue libs for you to include, but the documentation warns that most of the stdlib functions aren’t thread-safe. In Python you import _thread and call the start_new_thread() method, but I don’t know how much fine-grained control you have.
If all of the above sounds scary, well, it is a little. The truth about coding for multiprocessor systems is that it opens up new ways for things to go wrong, as one CPU changes values out from under the other, or they both try to write out to the UART at the same time. We wrote the Raspberries and asked if they were planning to port over an RTOS, which provides a little more structure to the problem, and they replied that that was actually first on their plate after they get through the release. So unless you know what you’re doing, you might not get the full benefit of the dual-core chip just yet. But we’re honestly looking forward to an RTOS getting the Raspberry Pi documentation-and-tutorial treatment when it happens.
Deep Thoughts
It’s not every day that you see a new player enter the microcontroller market, let alone one with the hacker-friendly qualifications of Raspberry Pi. For that alone, this board is notable. But the feature set is also solid, there are many creature comforts in both the silicon and the support, and it brings one truly new capability to the table in the form of the PIO units. Add to all this a price tag of $4, and you can imagine it becoming folks’ go-to board — for those times when you don’t need wireless connectivity.
 Indeed, the only real competitor for this board in terms of price/performance ratio are the various ESP32 boards. But they’re also very different animals — one offers fewer GPIOs but has extensive wireless features, and the other has more (and more flexible) GPIO, device and host USB, but no radio. Power consumption while running full-out, with wireless turned off, is a slight advantage for the ESP32, but the sleep modes of the Pico are slightly thriftier. Both SDKs get the job done in C, and both run MicroPython. ESP32’s dual cores run FreeRTOS, but we imagine it won’t be very long before that playing field is levelled. So basically it’s down to WiFi vs USB.
Of course, for slightly less money, one can pick up one of the STM32-based “Black Pill” boards, with yet another set of pros and cons. Choices, choices!
With the Pico, Raspberry Pi is entering a crowded field. They’ve got the name recognition, a cool hardware trick, a great value proposition, and a track record of solid documentation. If I were coding up a GPIO-heavy application without the need for wireless, the Pico would be a solid choice, especially if I could make use of the extra core.
I’ll leave you with a teaser: On page 9 of the RP2040 datasheet, they lay out what “2040” stands for: two cores, type M0+, more than 256 kB RAM, and zero kB flash. Does that mean we’ll eventually see models with more RAM, onboard flash, or different ARM cores? RP2050? RP2048? Speculate wildly in the comments.
